前端vite+vue3——利用环境变量和路由区分h5、pc模块打包(从0到1)
yma16 2024-07-14 09:03:03 阅读 85

⭐前言
大家好,我是yma16,本文分享 前端vite+vue3——利用环境变量和路由对前端区分h5和pc模块打包(从0到1)。
背景:
前端本地开发pc和h5的项目,发布时需要区分开h5和pc的页面
vite
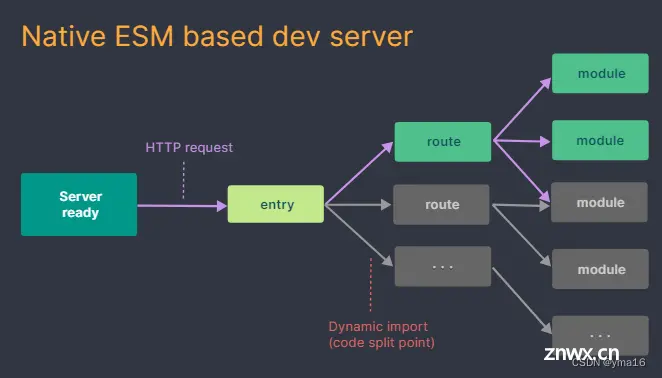
Vite 通过在一开始将应用中的模块区分为 依赖 和 源码 两类,改进了开发服务器启动时间。
依赖 大多为在开发时不会变动的纯 JavaScript。一些较大的依赖(例如有上百个模块的组件库)处理的代价也很高。依赖也通常会存在多种模块化格式(例如 ESM 或者
CommonJS)。
Vite 将会使用 esbuild 预构建依赖。esbuild 使用 Go 编写,并且比以 JavaScript 编写的打包器预构建依赖快
10-100 倍。
源码 通常包含一些并非直接是 JavaScript 的文件,需要转换(例如 JSX,CSS 或者 Vue/Svelte 组件),时常会被编辑。同时,并不是所有的源码都需要同时被加载(例如基于路由拆分的代码模块)。
Vite 以 原生 ESM 方式提供源码。这实际上是让浏览器接管了打包程序的部分工作:Vite
只需要在浏览器请求源码时进行转换并按需提供源码。根据情景动态导入代码,即只在当前屏幕上实际使用时才会被处理。
node系列往期文章
node_windows环境变量配置
node_npm发布包
linux_配置node
node_nvm安装配置
node笔记_http服务搭建(渲染html、json)
node笔记_读文件
node笔记_写文件
node笔记_连接mysql实现crud
node笔记_formidable实现前后端联调的文件上传
node笔记_koa框架介绍
node_koa路由
node_生成目录
node_读写excel
node笔记_读取目录的文件
node笔记——调用免费qq的smtp发送html格式邮箱
node实战——搭建带swagger接口文档的后端koa项目(node后端就业储备知识)
node实战——后端koa结合jwt连接mysql实现权限登录(node后端就业储备知识)
node实战——koa给邮件发送验证码并缓存到redis服务(node后端储备知识)
koa系列项目文章
前端vite+vue3结合后端node+koa——实现代码模板展示平台(支持模糊搜索+分页查询)
node+vue3+mysql前后分离开发范式——实现对数据库表的增删改查
node+vue3+mysql前后分离开发范式——实现视频文件上传并渲染
koa-vue性能监控到封装sdk系列文章
性能监控系统搭建——node_koa实现性能监控数据上报(第一章)
性能监控系统搭建——vue3实现性能监控数据展示(第二章)
性能监控计算——封装带性能计算并上报的npm包(第三章)
⭐初始化前端项目到打包
思路:利用打包时候的变量去区分是否打包需要的路由,即需要区分pc端和h5的路由。
example:这里我使用element-plus模拟pc端页面,vant模拟移动端页面。
对比组件:时间选择
基本的package.json
<code>{
"name": "vue-with-vite",
"version": "0.0.0",
"scripts": {
"dev": "vite",
"build": "vite build",
"build-h5": "vite build --mode h5",
"build-pc": "vite build --mode pc",
"preview": "vite preview --port 4173"
},
"dependencies": {
"element-plus": "^2.7.3",
"vant": "^4.9.1",
"vue": "^3.2.37",
"vue-router": "^4.4.0"
},
"devDependencies": {
"@types/node": "^18.19.6",
"@vitejs/plugin-vue": "^4.0.0",
"prettier": "^3.2.2",
"typescript": "^4.9.3",
"vite": "^4.0.0",
"vue-tsc": "^1.0.11"
}
}
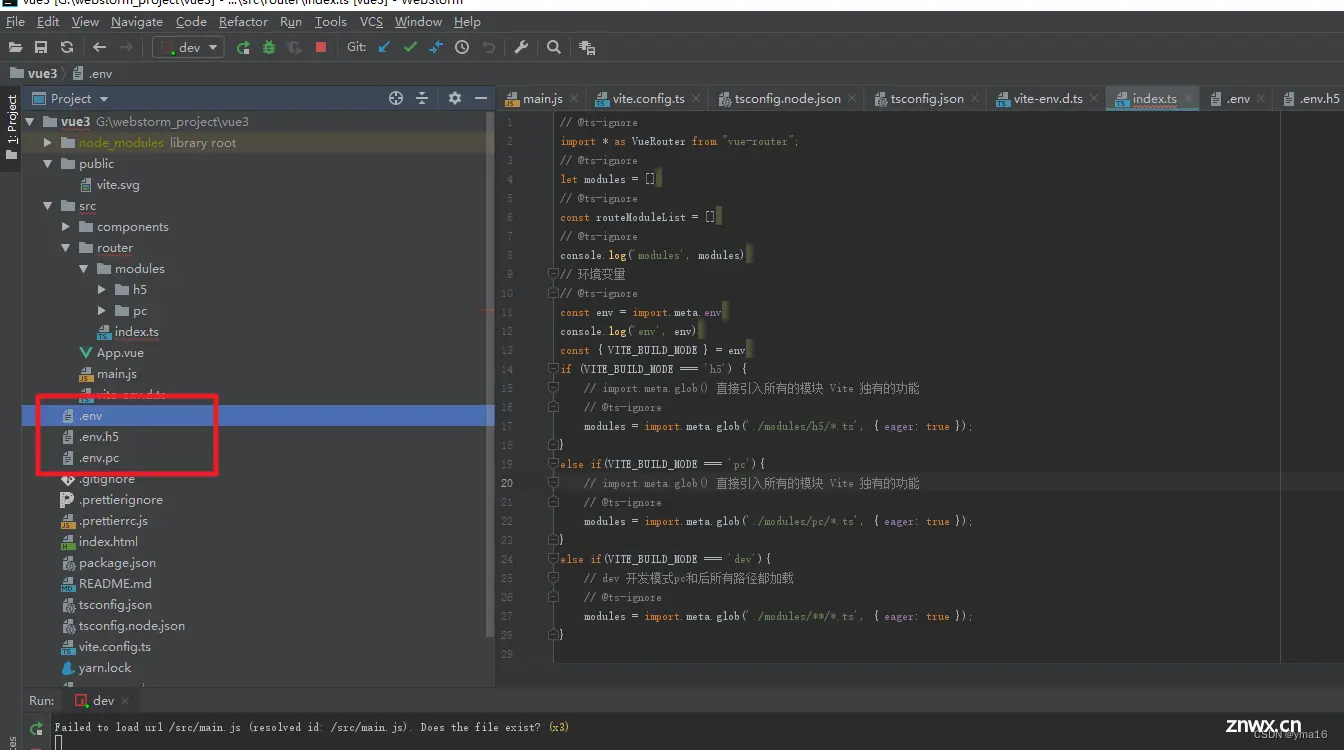
💖配置vite变量文件
配置env文件
env
# .env
VITE_APP_TITLE=My App (staging)
VITE_BUILD_MODE=dev
# .env.h5
NODE_ENV=production
VITE_APP_TITLE=My App (staging)
VITE_BUILD_MODE=h5
# .env.pc
NODE_ENV=production
VITE_APP_TITLE=My App (staging)
VITE_BUILD_MODE=PC
对应文件位置如下
💖配置vite打包时的区分路径
vite.config.tsn内容配置如下
import { defineConfig,loadEnv } from 'vite'
import { resolve } from "path";
// @ts-ignore
import vue from '@vitejs/plugin-vue'
// https://vitejs.dev/config/
// @ts-ignore
export default defineConfig(({mode})=>{
// 运行模式
console.log('mode',mode)
// 当前路径
console.log('process.cwd()',process.cwd())
// @ts-ignore
const env=loadEnv(mode,process.cwd())
console.log('env',env)
return {
// 打包相对路径
base: '/',
build:{
// 输出的目录 h5 pc
outDir:'dist/'+env.VITE_BUILD_MODE
},
server: {
host:true,
},
resolve: {
alias: {
"@": resolve(__dirname, "src"),
},
},
plugins: [
vue()
],
}
});
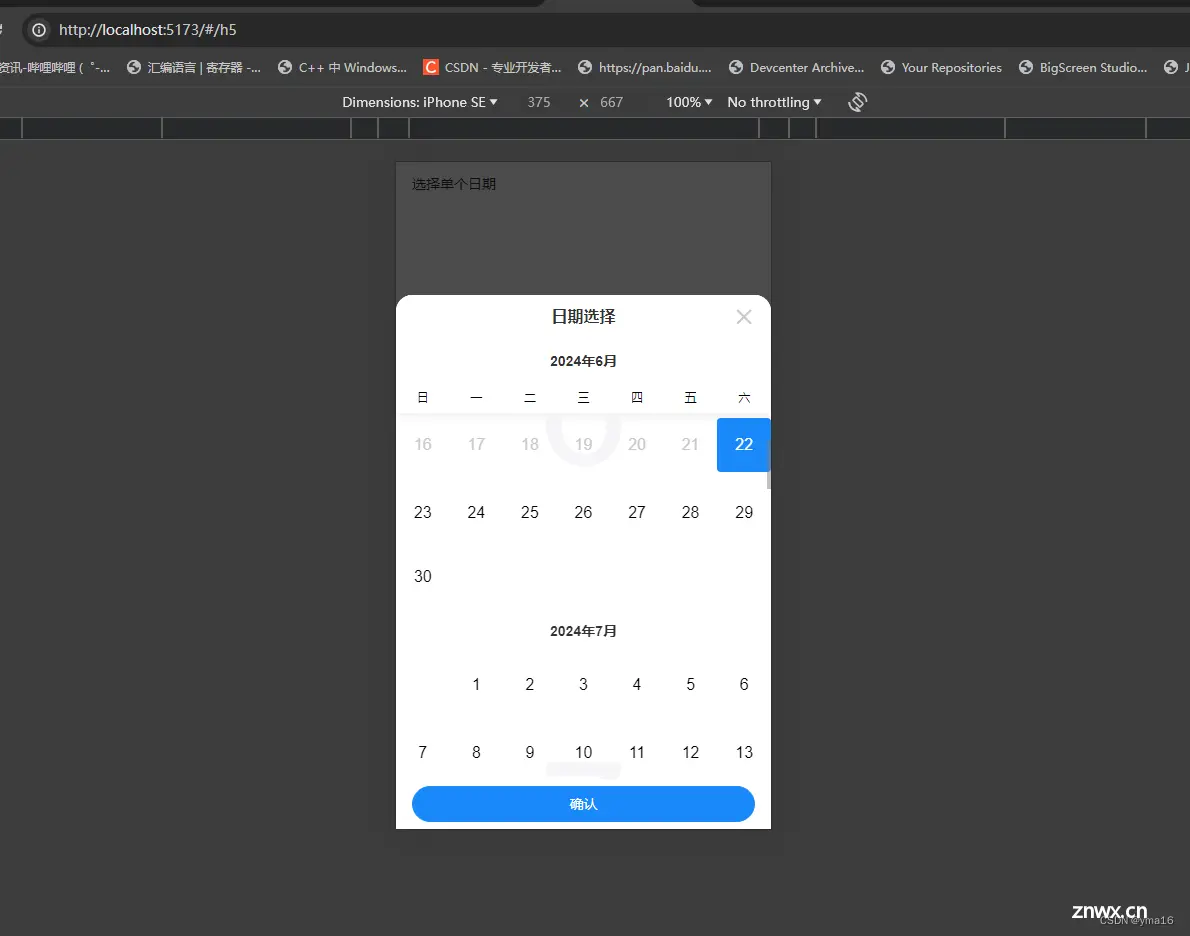
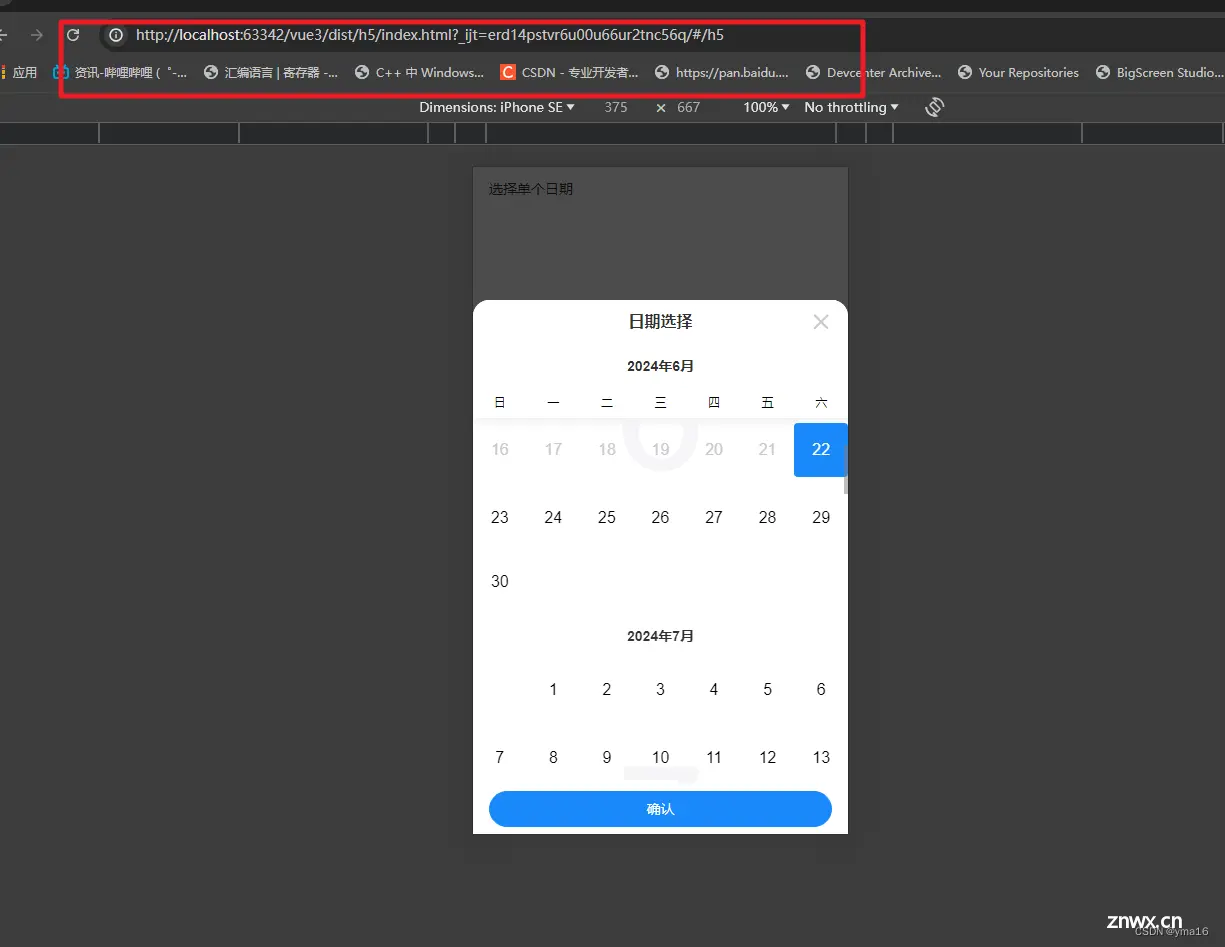
💖h5页面
MobilePage.vue主要显示移动端时间选择
<template>
<van-cell title="选择单个日期" :value="date" @click="show = true" />code>
<van-calendar v-model:show="show" @confirm="onConfirm" />code>
</template>
<script setup>
import { ref } from 'vue';
const date = ref('');
const show = ref(false);
const formatDate = (date) => `${ date.getMonth() + 1}/${ date.getDate()}`;
const onConfirm = (value) => {
show.value = false;
date.value = formatDate(value);
};
</script>
页面效果:
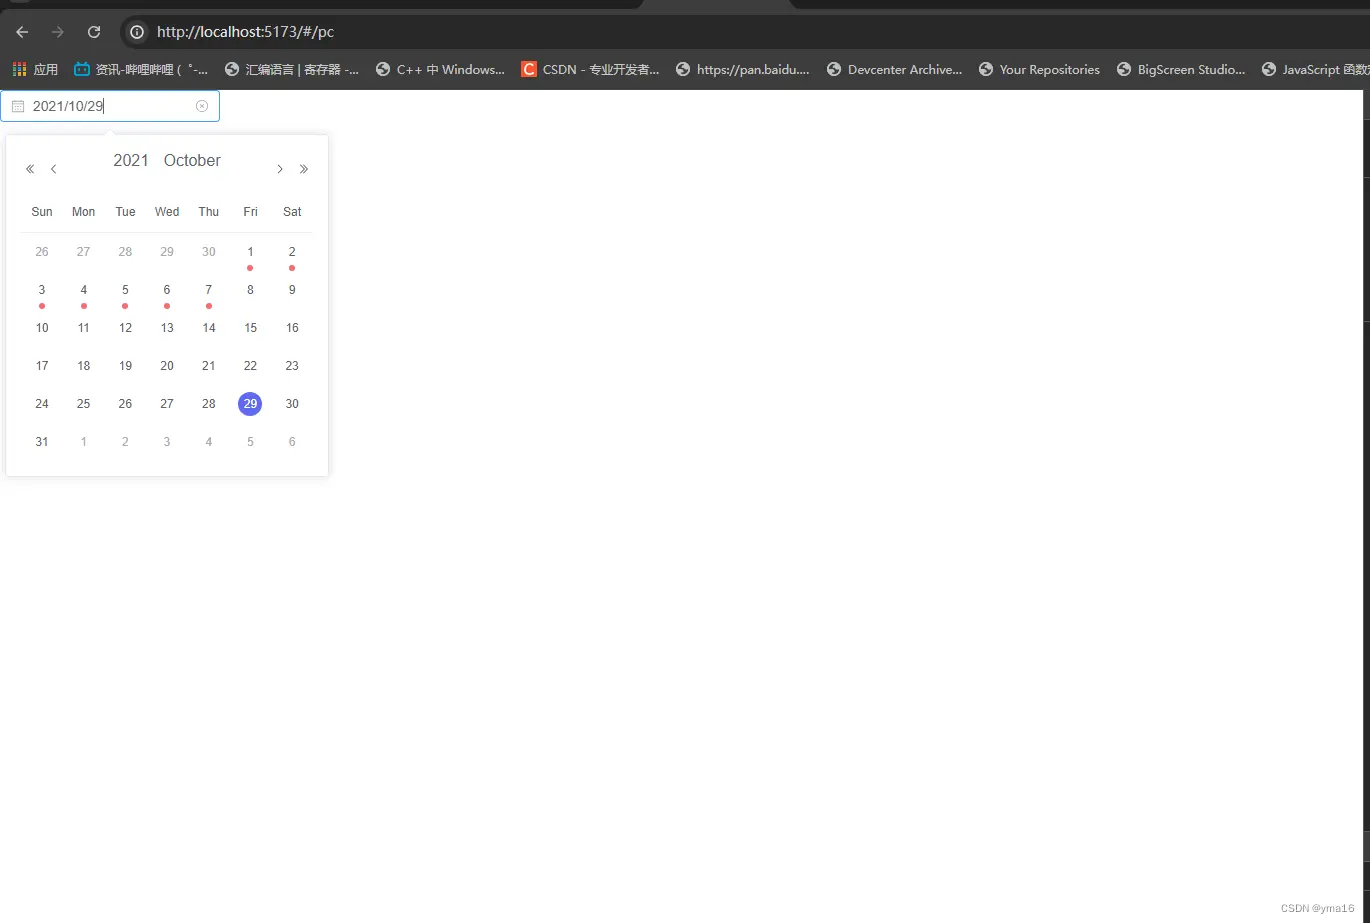
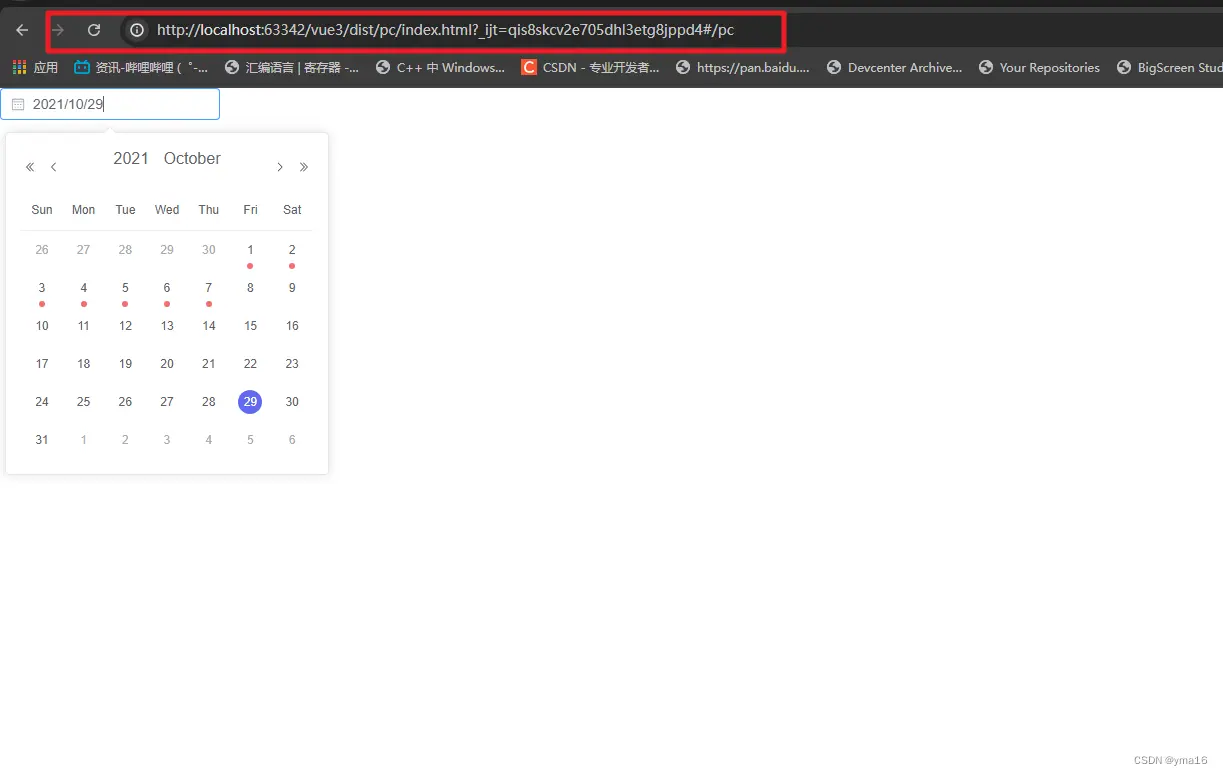
💖pc页面
WebPage.vue主要显示网页选择时间
<code><template>
<div class="demo-date-picker">code>
<el-date-picker
v-model="value"code>
type="date"code>
placeholder="Pick a day"code>
format="YYYY/MM/DD"code>
value-format="YYYY-MM-DD"code>
>
<template #default="cell">code>
<div class="cell" :class="{ current: cell.isCurrent }">code>
<span class="text">{ { cell.text }}</span>code>
<span v-if="isHoliday(cell)" class="holiday" />code>
</div>
</template>
</el-date-picker>
</div>
</template>
<script setup>
import { ref } from 'vue'
const value = ref('2021-10-29')
const holidays = [
'2021-10-01',
'2021-10-02',
'2021-10-03',
'2021-10-04',
'2021-10-05',
'2021-10-06',
'2021-10-07',
]
const isHoliday = ({ dayjs }) => {
return holidays.includes(dayjs.format('YYYY-MM-DD'))
}
</script>
<style scoped>
.cell {
height: 30px;
padding: 3px 0;
box-sizing: border-box;
}
.cell .text {
width: 24px;
height: 24px;
display: block;
margin: 0 auto;
line-height: 24px;
position: absolute;
left: 50%;
transform: translateX(-50%);
border-radius: 50%;
}
.cell.current .text {
background: #626aef;
color: #fff;
}
.cell .holiday {
position: absolute;
width: 6px;
height: 6px;
background: var(--el-color-danger);
border-radius: 50%;
bottom: 0px;
left: 50%;
transform: translateX(-50%);
}
</style>
页面效果
💖关键router配置:区分打包路由
main.js的入口文件区分打包
import { createApp } from 'vue'
// @ts-ignore
import App from './App.vue'
// 路由
// @ts-ignore
import router from "./router/index.ts";
// pc 端 element-plus
// @ts-ignore
import ElementPlus from 'element-plus'
import 'element-plus/dist/index.css'
// 移动端 vant
// 1. 引入你需要的组件
// @ts-ignore
import { Calendar,Cell } from 'vant';
// 2. 引入组件样式
import 'vant/lib/index.css';
const app=createApp(App)
app.use(router)
// 环境变量
// @ts-ignore
const env = import.meta.env
console.log('env', env)
const { VITE_BUILD_MODE } = env
if (VITE_BUILD_MODE === 'h5') {
// h5 组件
app.use(Calendar)
app.use(Cell)
}
else if(VITE_BUILD_MODE === 'pc'){
//pc 组件
app.use(ElementPlus)
}
else if(VITE_BUILD_MODE === 'dev'){
// dev开发模式 h5 组件 pc组件都引入
app.use(Calendar)
app.use(Cell)
app.use(ElementPlus)
}
app.mount('#app')
router/index.ts 路由配置,读取目录modules下的h5和pc路由
// @ts-ignore
import * as VueRouter from "vue-router";
// @ts-ignore
let modules = []
// @ts-ignore
const routeModuleList = []
// @ts-ignore
console.log('modules', modules)
// 环境变量
// @ts-ignore
const env = import.meta.env
console.log('env', env)
const { VITE_BUILD_MODE } = env
if (VITE_BUILD_MODE === 'h5') {
// import.meta.glob() 直接引入所有的模块 Vite 独有的功能
// @ts-ignore
modules = import.meta.glob('./modules/h5/*.ts', { eager: true });
}
else if(VITE_BUILD_MODE === 'pc'){
// import.meta.glob() 直接引入所有的模块 Vite 独有的功能
// @ts-ignore
modules = import.meta.glob('./modules/pc/*.ts', { eager: true });
}
else if(VITE_BUILD_MODE === 'dev'){
// dev 开发模式pc和后所有路径都加载
// @ts-ignore
modules = import.meta.glob('./modules/**/*.ts', { eager: true });
}
// 加入到路由集合中
// @ts-ignore
Object.keys(modules).forEach((key) => {
// @ts-ignore
const mod = modules[key].default || { };
const modList = Array.isArray(mod) ? [...mod] : [mod];
console.log('modList', modList)
// @ts-ignore
routeModuleList.push(...modList);
});
// @ts-ignore
console.log('routeModuleList', routeModuleList)
const router = VueRouter.createRouter({
// 4. 内部提供了 history 模式的实现。为了简单起见,我们在这里使用 hash 模式。
history: VueRouter.createWebHashHistory(),
// @ts-ignore
routes: routeModuleList,
});
// 路由权限 beforeResolve
// @ts-ignore
router.beforeResolve(async (to, from, next) => {
next()
});
export default router;
h5/h5.ts 移动端路由
export default {
path: '/h5',
name: 'MobilePage',
component: () => {
// @ts-ignore
return import('@/components/h5/MobilePage.vue')
},
meta: {
title: 'MobilePage',
},
children: [],
};
pc/pc.ts 网页路由
export default {
path: '/pc',
name: 'WebPage',
component: () => {
// @ts-ignore
return import('@/components/pc/WebPage.vue')
},
meta: {
title: 'WebPage',
},
children: [],
};
💖vite build:h5页面
运行 build-h5 会拉起 .env.h5变量
# npm run build-h5
打包文件在dist/h5目录
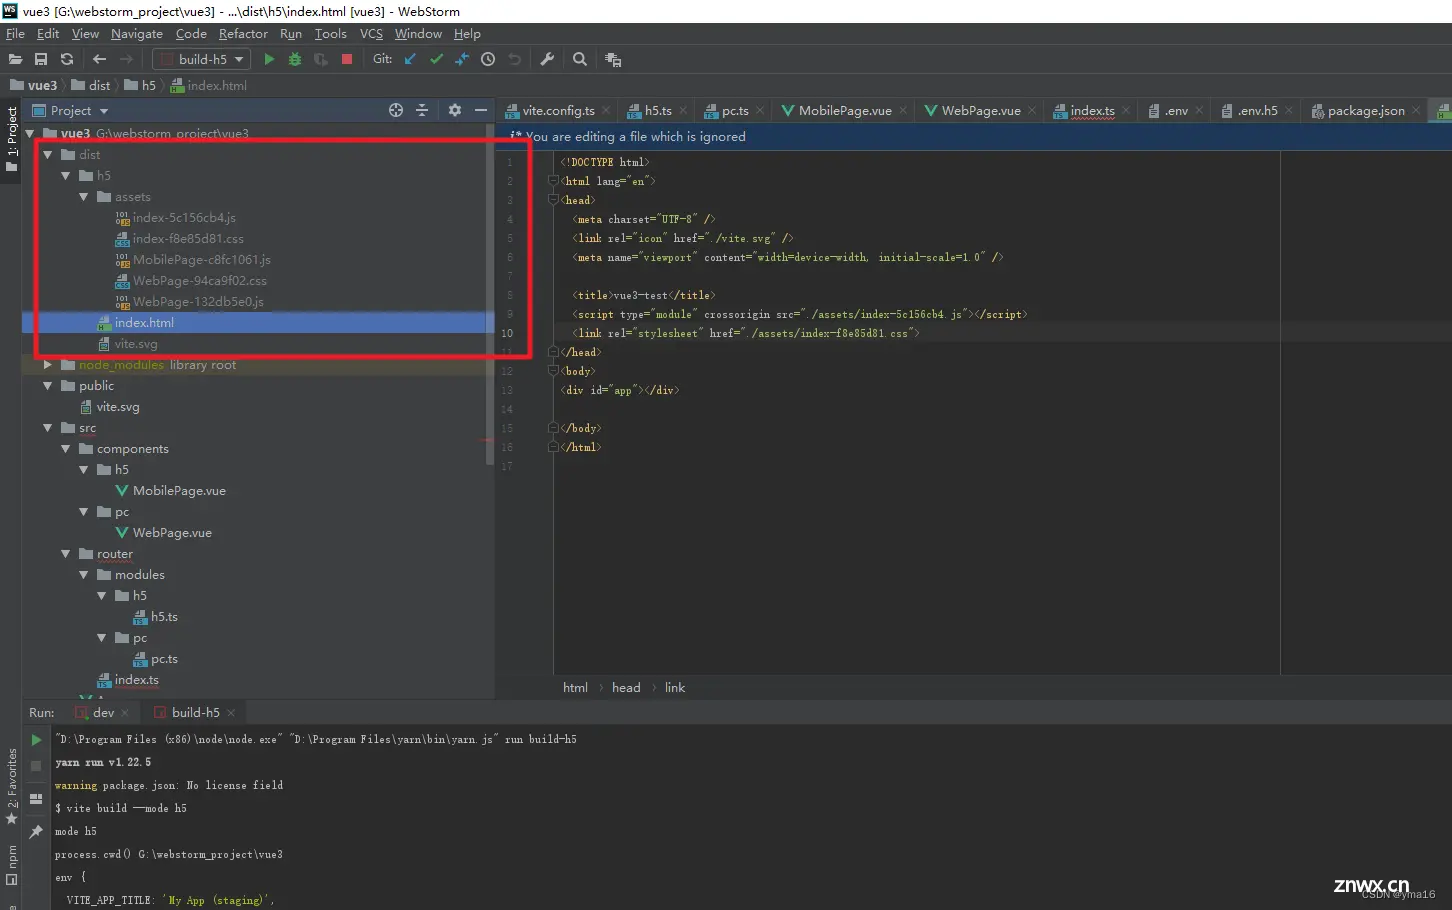
打开build文件 打包成功!
💖vite build:pc页面
运行 build-pc 会拉起 .env.pc变量
<code># npm run build-pc
打包文件在dist/pc目录
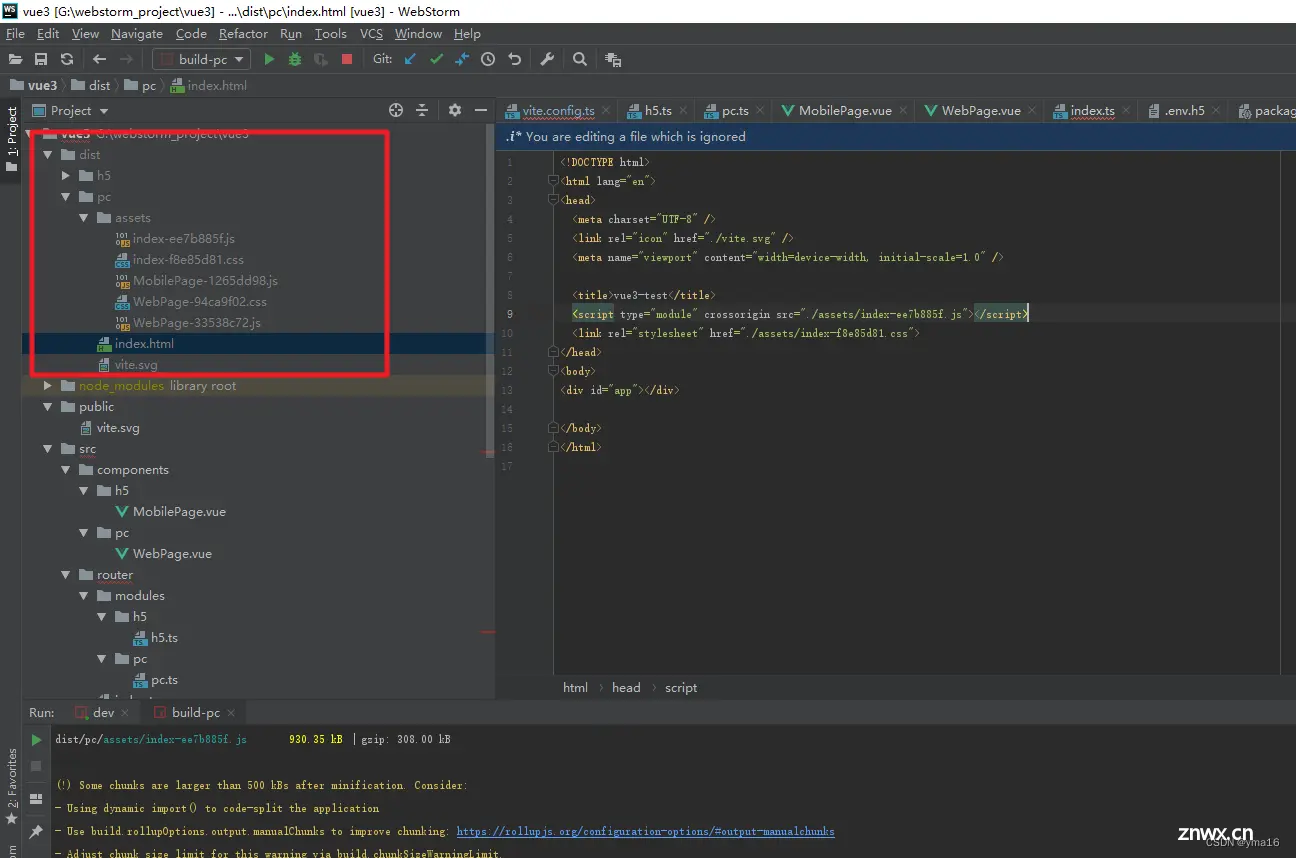
打开打包build index页面
⭐结束
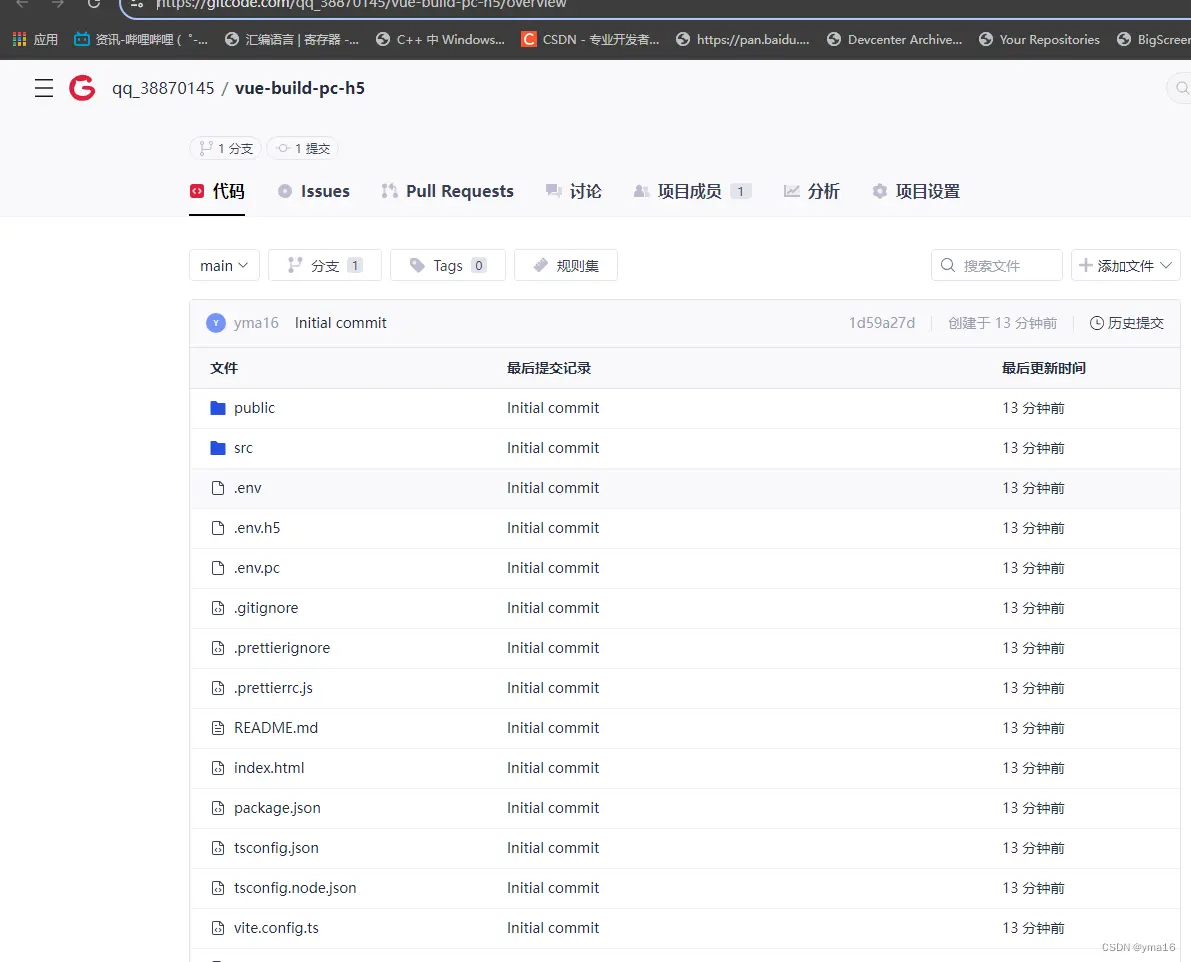
项目地址:https://gitcode.com/qq_38870145/vue-build-pc-h5
本文分享到这结束,如有错误或者不足之处欢迎指出!

👍 点赞,是我创作的动力!
⭐️ 收藏,是我努力的方向!
✏️ 评论,是我进步的财富!
💖 最后,感谢你的阅读!
声明
本文内容仅代表作者观点,或转载于其他网站,本站不以此文作为商业用途
如有涉及侵权,请联系本站进行删除
转载本站原创文章,请注明来源及作者。