Ruoyi Cloud K8s 部署
叶 落 2024-10-12 16:37:07 阅读 57
本文视频版本:https://www.bilibili.com/video/BV1xF4Se3Esv
参考
https://blog.csdn.net/Equent/article/details/137779505
https://blog.csdn.net/weixin_48711696/article/details/138117392
https://zhuanlan.zhihu.com/p/470647732
https://gitee.com/y_project/RuoYi-Cloud
https://blog.csdn.net/morecccc/article/details/130497740
k8s 安装
可以参考之前的视频和博客:
https://blog.csdn.net/qq_46028493/article/details/139900081
安装私有仓库 registry
安装私有镜像仓库 registry 和安装 registry 的可视化工具可以参考之前的视频和博客:
https://blog.csdn.net/qq_46028493/article/details/139900081
注意里面的一些重要步骤:
将私有镜像仓库添加到 containerd 的仓库列表中,修改 docker 配置将私有镜像仓库设置为安全的(私有镜像仓库所在的机器)修改 containerd 配置,让私有仓库是安全的
部署
部署规划
整个项目的部署规划:
| 服务 | 镜像 | 描述 | 类型 | 部署节点 | 服务名 | configMap 名 | 外部访问地址 | 对应的资源清单名[yaml 文件名] | 注意点 |
|---|---|---|---|---|---|---|---|---|---|
| MySQL | mysql:8.0 | 关系型数据库 | 有状态服务 | node60 | ry-cloud-mysql-service | ruoyi-cloud-init-sql-config-map | 不暴露 | 1_ry-cloud-mysql.yml | |
| Redis | redis:7.2.0 | 缓存 | 有状态服务 | node60 | ry-cloud-redis-service | ruoyi-cloud-redis-config-map | 不暴露 | 4_ry-cloud-redis.yml | |
| Nacos | nacos/nacos-server:v2.3.0 | 配置中心、注册中心 | 无状态服务 | 随机部署到 node61 和 node62 | ry-cloud-nacos-service | 使用环境变量配置容器,未使用挂载配置 | http://192.168.10.241:8848/nacos[Nacos 界面] | 2_ry-cloud-nacos.yml | 启动后,需要人工打开界面修改 redis 和 mysql 的地址为对应的服务名 |
| Sentinel | bladex/sentinel-dashboard:1.8.0 | 流量卫兵 | 无状态服务 | 随机部署到 node61 和 node62 | ry-cloud-sentinel-service | 在项目中配置 Sentinel 将规则持久化到 Nacos 中 | http://192.168.10.240:8858/#/dashboard[Sentinel 界面] | 3_ry-cloud-sentinel.yml | |
| Minio | minio/minio:RELEASE.2024-08-29T01-40-52Z | 对象存储 | 有状态服务 | node60 | ry-cloud-minio-service | 未使用挂载配置 | http://node60:9090/、http://node61:9090/、http://node62:9090/[Minio 界面以及文件访问地址] | 5_ry-cloud-minio.yml | 启动后,需要人工打开界面创建 bucket 并将 secret key 和 secret pwd 配置到 Nacos,再设置 bucket 为公共读 |
| ruoyi-gateway | node63:5000/ruoyi-gateway:1.0 | ruoyi 网关 | 无状态服务 | 随机部署到 node60、node61 、node62 | ry-cloud-gateway-service | 激活 boostrap 中的 k8s 配置、Nacos | 不暴露 | ry-cloud-backend.yml | |
| ruoyi-auth | node63:5000/ruoyi-auth:1.0 | ruoyi 认证鉴权服务 | 无状态服务 | 随机部署到 node60、node61 、node62 | ry-cloud-auth-service | 激活 boostrap 中的 k8s 配置、Nacos | 不暴露 | ry-cloud-backend.yml | |
| ruoyi-sys | node63:5000/ruoyi-sys:1.0 | ruoyi 系统服务 | 无状态服务 | 随机部署到 node60、node61 、node62 | ry-cloud-sys-service | 激活 boostrap 中的 k8s 配置、Nacos | 不暴露 | ry-cloud-backend.yml | |
| ruoyi-monitor | node63:5000/ruoyi-monitor:1.0 | ruoyi 监控服务 | 无状态服务 | 随机部署到 node60、node61 、node62 | ry-cloud-monitor-service | 激活 boostrap 中的 k8s 配置、Nacos | http://192.168.10.242:9100[Admin 控制台侧边栏] | ry-cloud-backend.yml | |
| ruoyi-gen | node63:5000/ruoyi-gen:1.0 | ruoyi 代码生成服务 | 无状态服务 | 随机部署到 node60、node61 、node62 | ry-cloud-gen-service | 激活 boostrap 中的 k8s 配置、Nacos | 不暴露 | ry-cloud-backend.yml | |
| ruoyi-job | node63:5000/ruoyi-job:1.0 | ruoyi 定时任务服务 | 无状态服务 | 随机部署到 node60、node61 、node62 | ry-cloud-job-service | 激活 boostrap 中的 k8s 配置、Nacos | 不暴露 | ry-cloud-backend.yml | |
| ruoyi-file | node63:5000/ruoyi-file:1.0 | ruoyi 文件服务 | 无状态服务 | 随机部署到 node60、node61 、node62 | ry-cloud-file-service | 激活 boostrap 中的 k8s 配置、Nacos | 不暴露 | ry-cloud-backend.yml | |
| ruoyi-ui | node63:5000/ruoyi-ui:1.0 | ruoyi 前端服务 | 无状态服务 | 随机部署到 node60、node61 、node62 | ry-cloud-ui-service | ruoyi-cloud-ui-config-map | http://192.168.10.243:80[ruoyi 前端访问界面] | ry-cloud-fronted.yml |
此外,还需要有一个存储了 registry 的用户名和密码的 secret(registry-user-pwd-secret)。
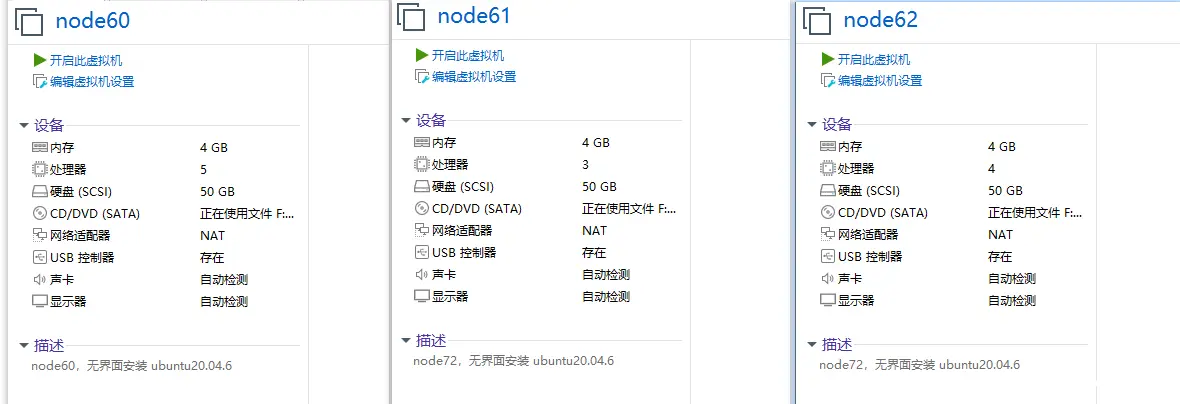
因为部署的 pod 比较多,尽量将虚拟机的内存和 cpu 设置多一点,不然容易因为资源不够导致 pod 启动不了。
下面是我成功部署的虚拟机资源配置,可以供大家参考下:
修改 k8s nodePort 可以暴露的端口范围
因为本次前端需要访问 minio 中的图片,我们使用 nodePort 将 minio 的端口暴露出去,前端页面才能展示图片。 访问图片的端口是 9000。
NodePort 的端口范围是在 Kubernetes API 服务器的启动参数中定义的。默认情况下,Kubernetes 允许的 NodePort 端口范围是 30000 到 32767。如果你需要暴露更多的端口(即,端口范围之外的端口),你需要修改 Kubernetes 的配置以调整允许的端口范围。
我们使用的是 kubeadm 安装的集群,API 服务器的配置通常在 /etc/kubernetes/manifests/kube-apiserver.yaml 文件中。
<code>vim /etc/kubernetes/manifests/kube-apiserver.yaml
添加如下内容:
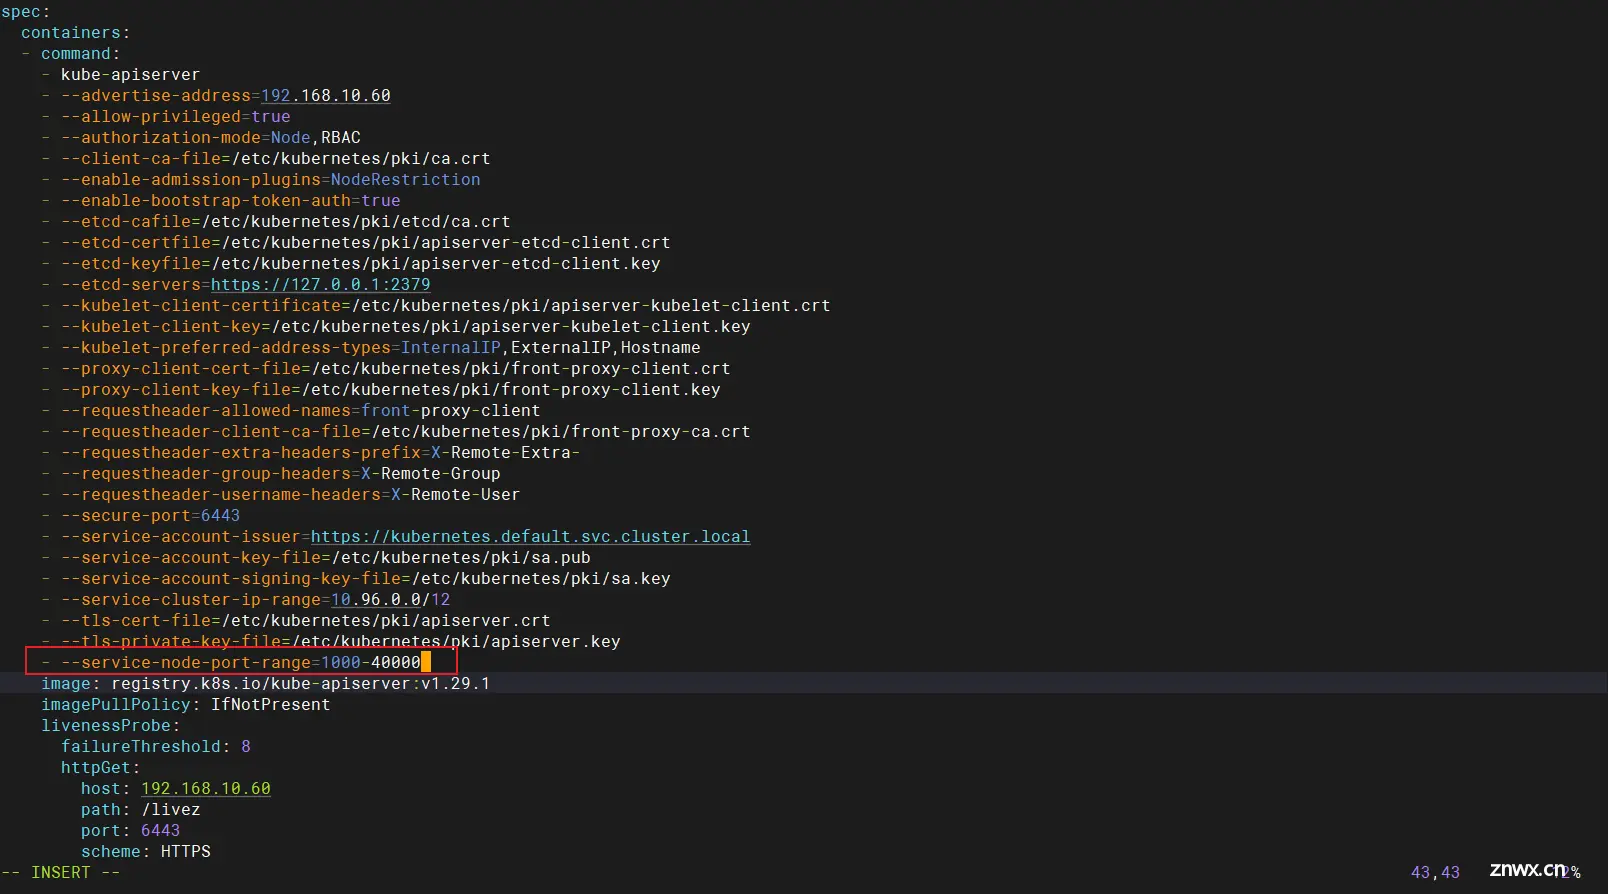
—service-node-port-range=1000-40000
由于 kubelet 会对目录进行监视以查看是否有改动,因此不需要再做其他操作。kubelet 将使用新的配置重新创建 kube-apiserver。
使用如下命令查看 kube-apiserver 的启动时间:
<code>kubectl get pods -n kube-system
发现 kube-apiserver 重新启动了:
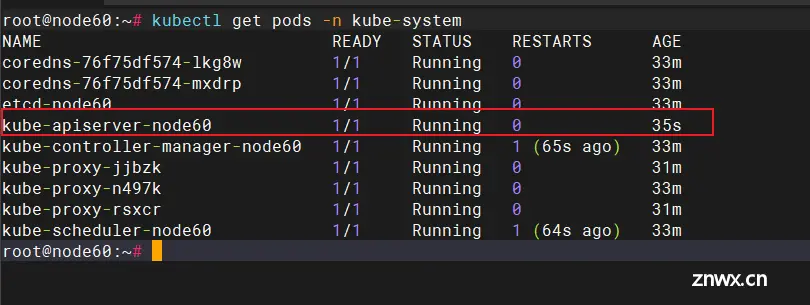
这样,我们就成功的将 k8s nodePort 可以暴露的端口范围改成了 1000 到 40000。
安装 MetalLB LoadBalancer
为了方便的将 sentinel、nacos 的访问页面端口暴露到外部,我们安装 MetalLB LoadBalancer。
负载均衡器主要作用:
负载均衡:将来自外部的请求均匀地分配到多个后端 Pod,提高服务的可用性和性能。对外暴露服务:将集群中的服务暴露给集群外部的用户或系统,允许用户通过外部 IP 和端口访问集群内部的服务
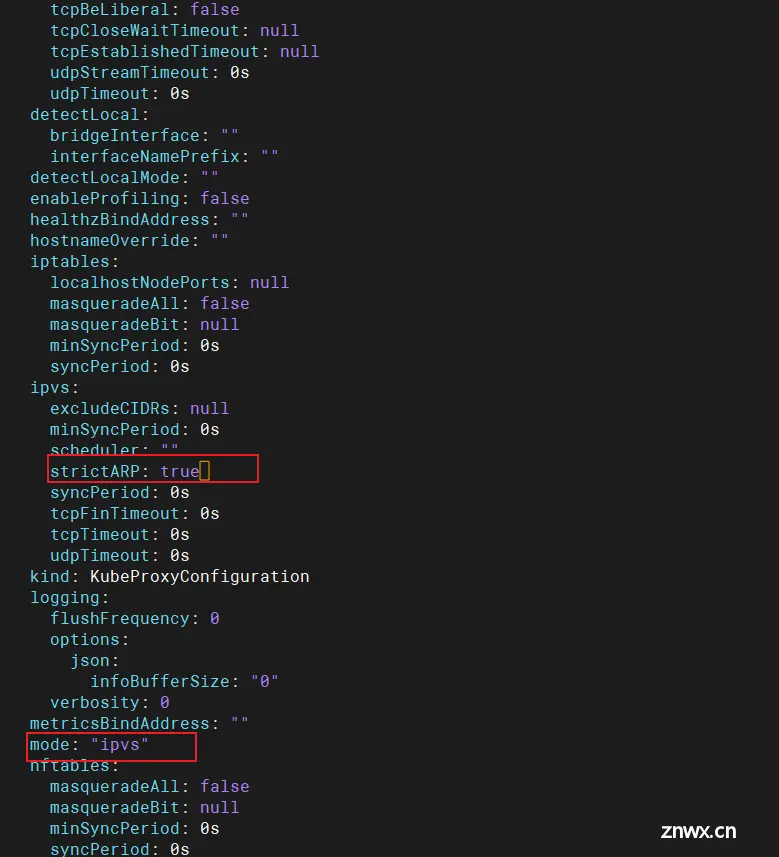
<code>kubectl edit configmap -n kube-system kube-proxy
修改下面两个地方:
创建资源:
<code>kubectl apply -f https://raw.githubusercontent.com/metallb/metallb/v0.13.5/config/manifests/metallb-native.yaml
查看资源:
kubectl get pod -n metallb-system

设置 ip 地址池,创建配置 ip 地址池的 yml 文件:
<code>mkdir -p /opt/k8s-config
touch /opt/k8s-config/metallb-ip-pool-config.yml
apiVersion: metallb.io/v1beta1
kind: IPAddressPool
metadata:
name: first-pool
namespace: metallb-system
spec:
addresses:
# 局域网,ip 要在同一网段,和虚拟机所在的网段一致
- 192.168.10.240-192.168.10.250
---
apiVersion: metallb.io/v1beta1
kind: L2Advertisement
metadata:
name: example
namespace: metallb-system
spec:
ipAddressPools:
- first-pool
生效这个 yaml 配置文件:
kubectl apply -f metallb-ip-pool-config.yml
可以编写一个资源清单,将 Nginx 的端口暴露到 192.168.10.240 的 80 端口:
apiVersion: apps/v1
kind: Deployment
metadata:
name: nginx-deploy
namespace: default
spec:
replicas: 2
selector:
matchLabels:
app: nginx
template:
metadata:
labels:
app: nginx
spec:
containers:
- name: nginx
image: nginx:latest
resources:
limits:
memory: "512Mi"
cpu: "500m"
ports:
- containerPort: 80
name: http
---
apiVersion: v1
kind: Service
metadata:
name: nginx
spec:
type: LoadBalancer
selector:
app: nginx
ports:
- name: http
port: 80
protocol: TCP
targetPort: 80
# 指定的负载均衡 IP
loadBalancerIP: 192.168.10.240
kubectl apply -f metallb-nginx-example.yml
访问 http://192.168.10.240/ 就可以看到 Nginx 的页面了。
准备 mysql 服务的配置
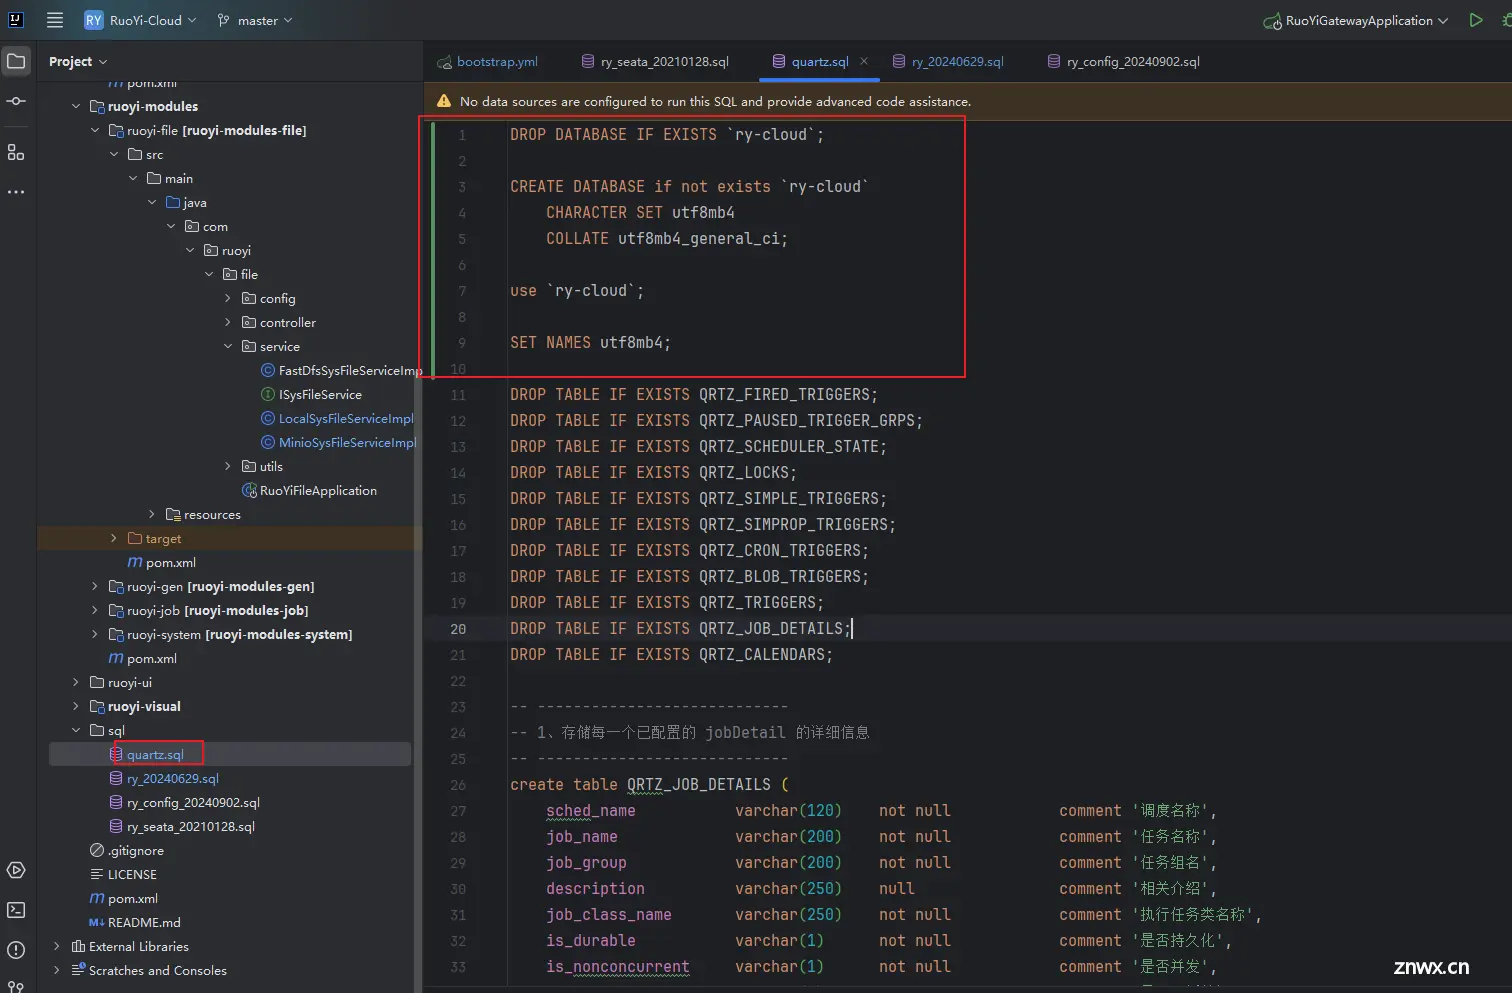
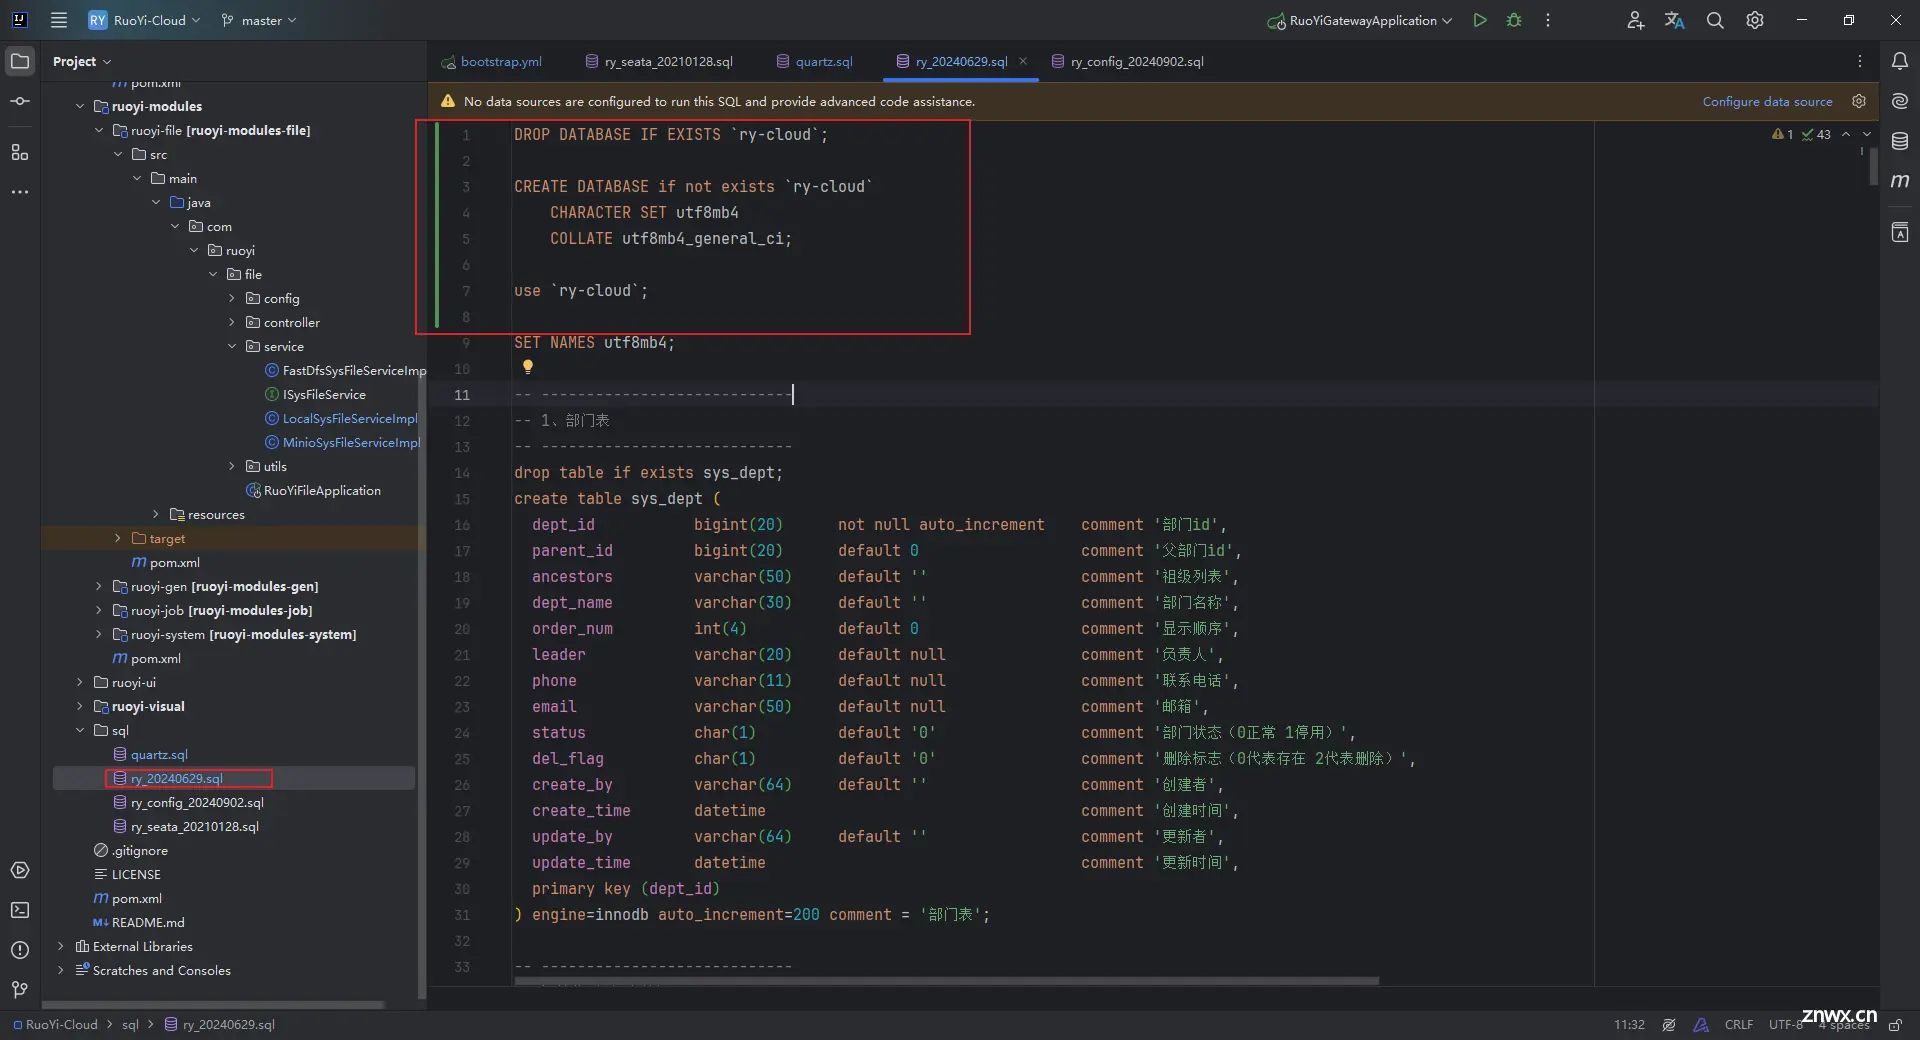
修改初始化的 sql 文件:
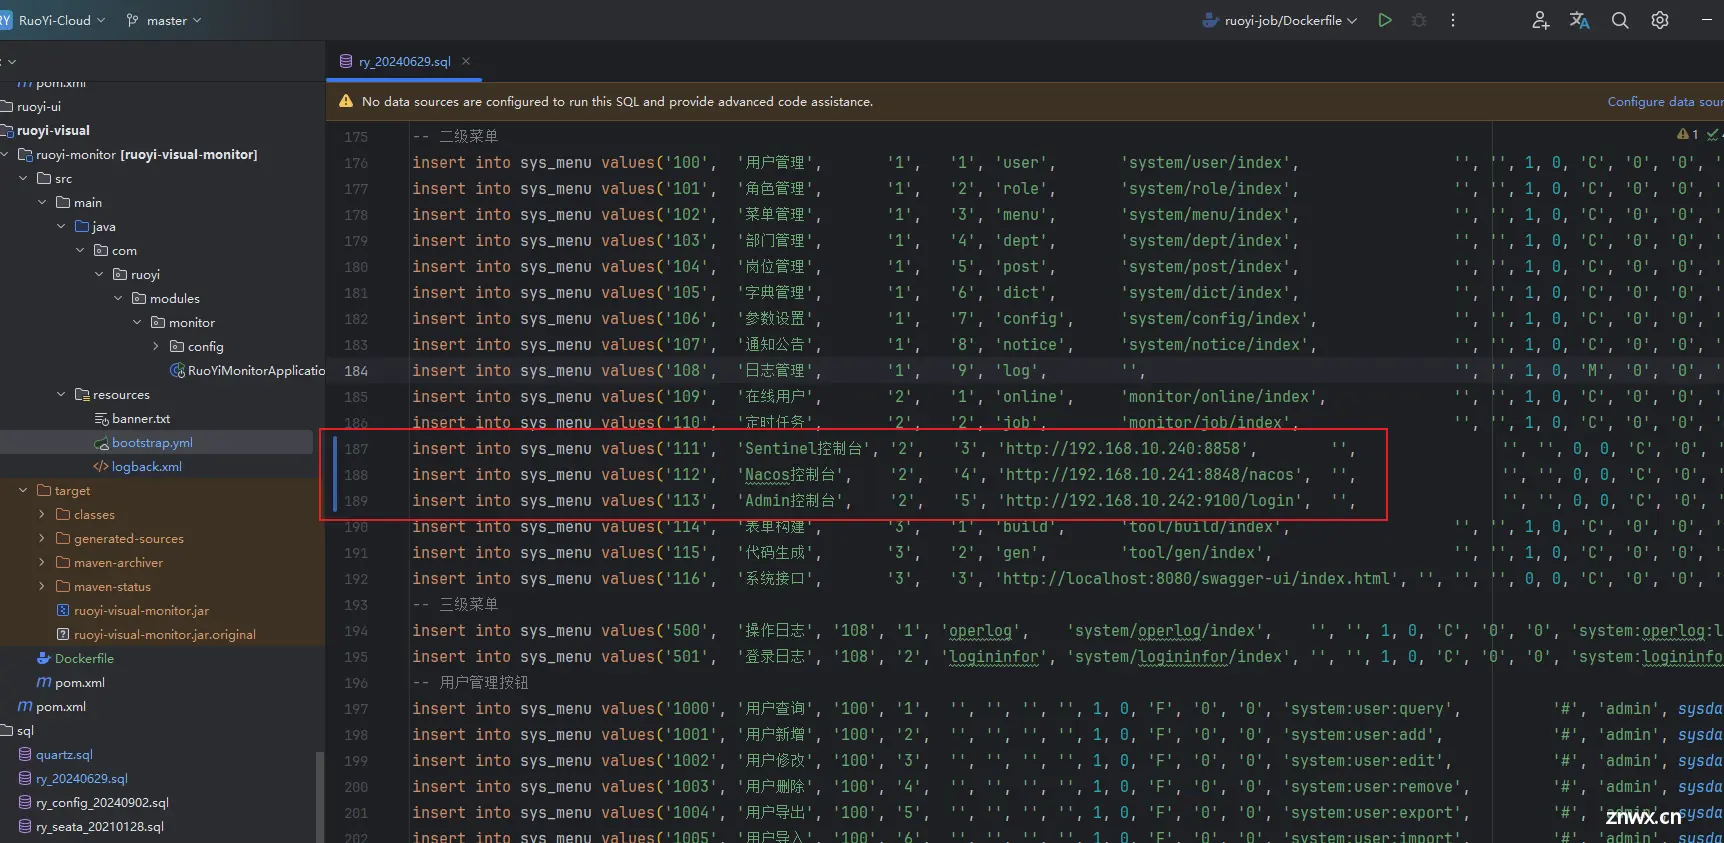
修改配置表中的 sentinel 地址、Nacos 地址、Admin 控制台(ruoyi minitor 服务)的地址,这些地址是我们等会暴露出去的地址:
上传 sql 文件到服务器,根据这 4 个 sql 文件创建 configmap:
<code>kubectl create configmap ruoyi-cloud-init-sql-config-map --from-file=/opt/ruoyi-cloud/sql
# 查看这个 configmap 的详情
kubectl describe configmap/ruoyi-cloud-init-sql-config-map
准备 redis 服务的配置
载需要的 redis 对应版本,解压后拷贝 redis.conf 文件,修改配置文件中的如下部分:
# 注释掉 bind 127.0.0.1,bind 用于限制访问 Redis 的机器 ip,直接关掉
# bind 127.0.0.1
# 修改 daemonize no 为 yes,让 Redis 可以后台启动
daemonize yes
# 启用 AOF(Append-Only File) 持久化机制
appendonly yes
# 指定 Redis 用于存储数据文件的目录
dir /data
# 设置密码
requirepass 123456
根据这个 redis.conf 配置文件生成 configMap:
kubectl create configmap ruoyi-cloud-redis-config-map --from-file=/opt/ruoyi-cloud/redis/redis.conf
kubectl describe configmap/ruoyi-cloud-redis-config-map
准备前端服务的配置
worker_processes 1;
events {
worker_connections 1024;
}
http {
include mime.types;
default_type application/octet-stream;
sendfile on;
keepalive_timeout 65;
server {
listen 80;
server_name localhost;
location / {
# 镜像中存放前端静态文件的位置
root /opt/project/ruoyi/ruoyi-front-code;
try_files $uri $uri/ /index.html;
index index.html index.htm;
}
location /prod-api/{
proxy_set_header Host $http_host;
proxy_set_header X-Real-IP $remote_addr;
proxy_set_header REMOTE-HOST $remote_addr;
proxy_set_header X-Forwarded-For $proxy_add_x_forwarded_for;
# 转发到后端网关服务
proxy_pass http://ry-cloud-gateway-service:8080/;
}
# 避免actuator暴露
if ($request_uri ~ "/actuator") {
return 403;
}
error_page 500 502 503 504 /50x.html;
location = /50x.html {
root html;
}
}
}
根据这个 nginx.conf 配置文件生成 configMap:
kubectl create configmap ruoyi-cloud-ui-config-map --from-file=/opt/ruoyi-cloud/nginx/nginx.conf
kubectl describe configmap/ruoyi-cloud-ui-config-map
将 registry 的用户名和密码创建为 secret
创建一个 secret 用于存储我们的 registry 仓库的用户名和密码,在 k8s 资源编排 yaml 文件中,在 deployment 中使用 imagePullSecrets 字段就可以引用这个 Secret 对象,这样 Kubernetes 就可以在拉取镜像时使用这个 Secret 对象中的认证信息。
kubectl create secret registry-user-pwd-secret \
--docker-server=http://node63:5000 \
--docker-username=root \
--docker-password=123456
如果提示:error: unknown flag: --docker-server,是因为kubectl create secret 的命令在较新的版本中使用了不同的参数来创建 Docker 注册表凭据 ,改为使用如下命令:
kubectl create secret docker-registry registry-user-pwd-secret \
--docker-server=http://node63:5000 \
--docker-username=root \
--docker-password=123456
通过以下命令来验证是否成功创建了 secret:
kubectl get secret registry-user-pwd-secret --output=yaml
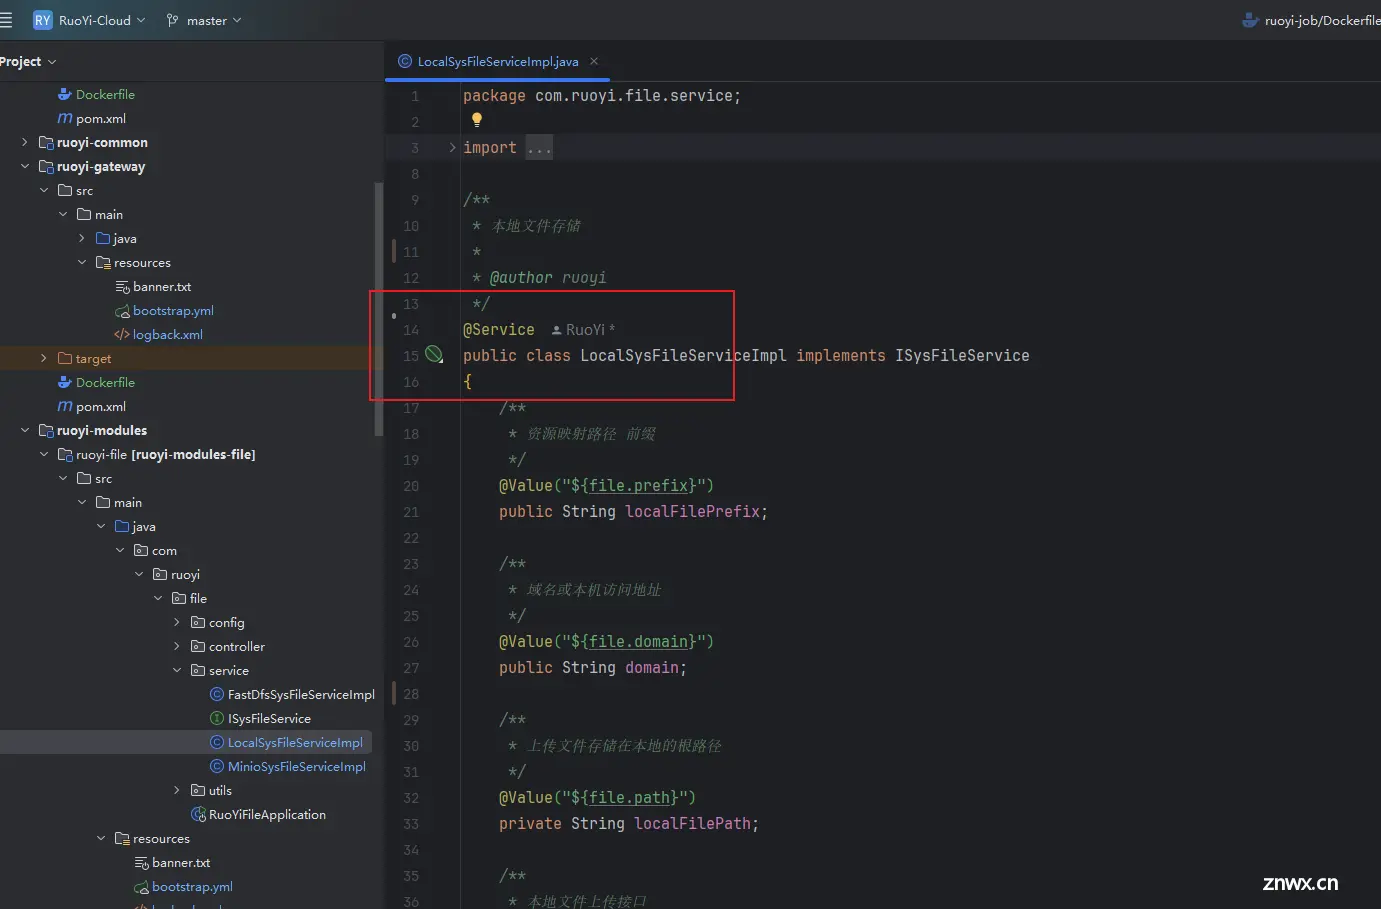
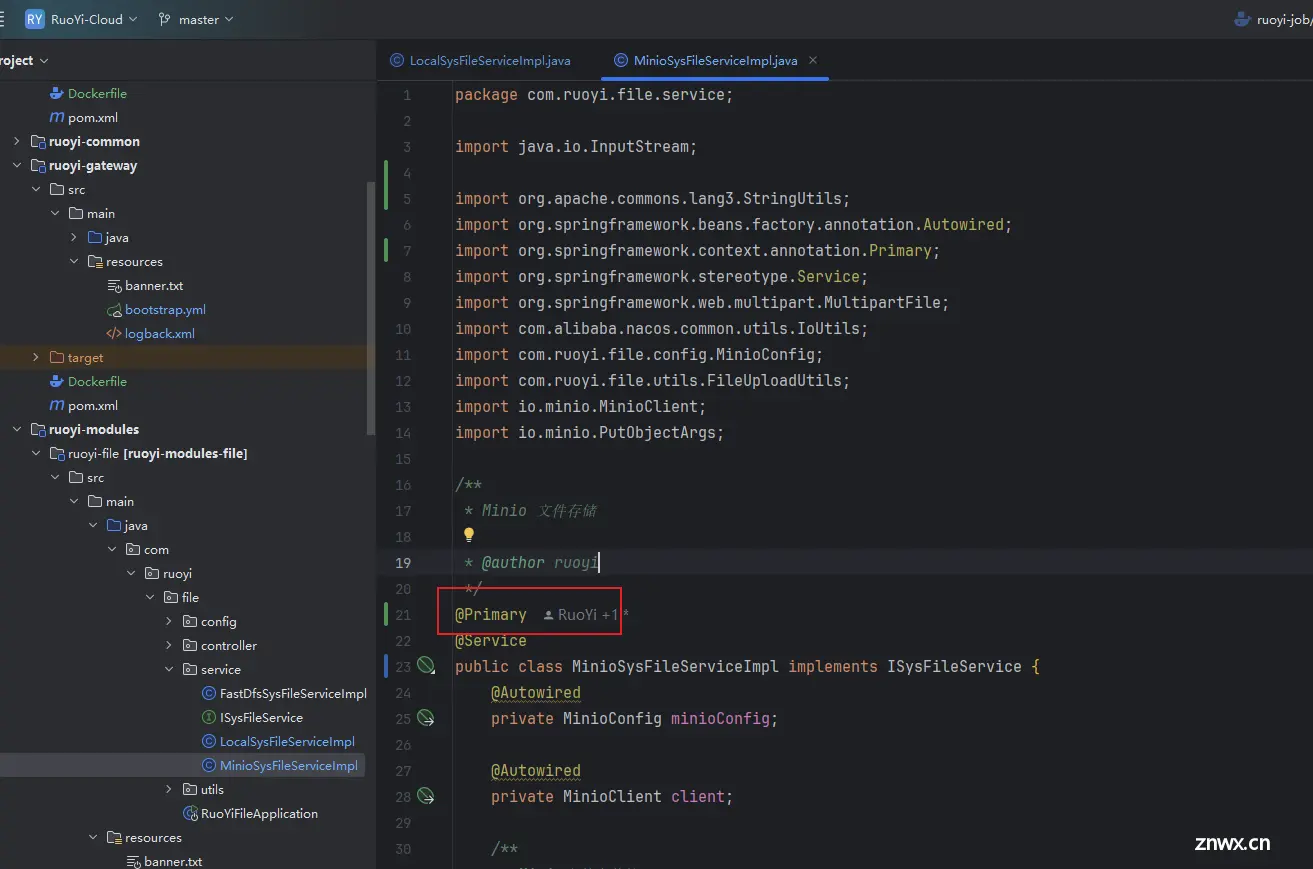
修改 ruoyi-file 模块的代码
去掉 LocalSysFileServiceImpl 上的 @primary 注解,在 MinioSysFileServiceImpl 上添加 @primay 注解,代表切换为使用 minio 作为文件存储实现:
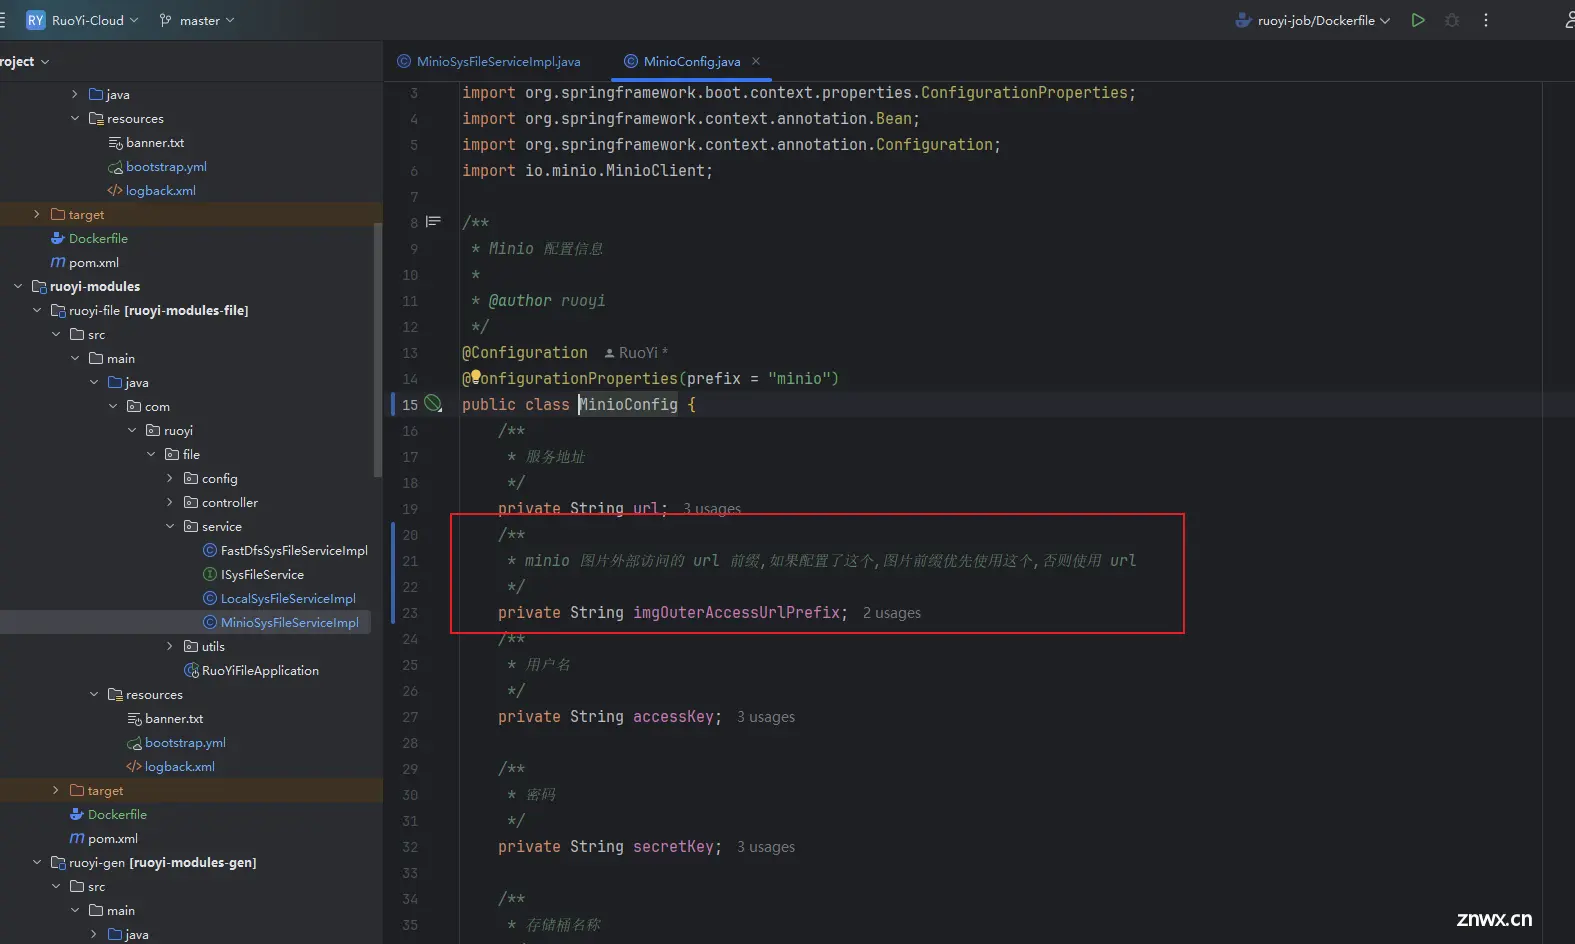
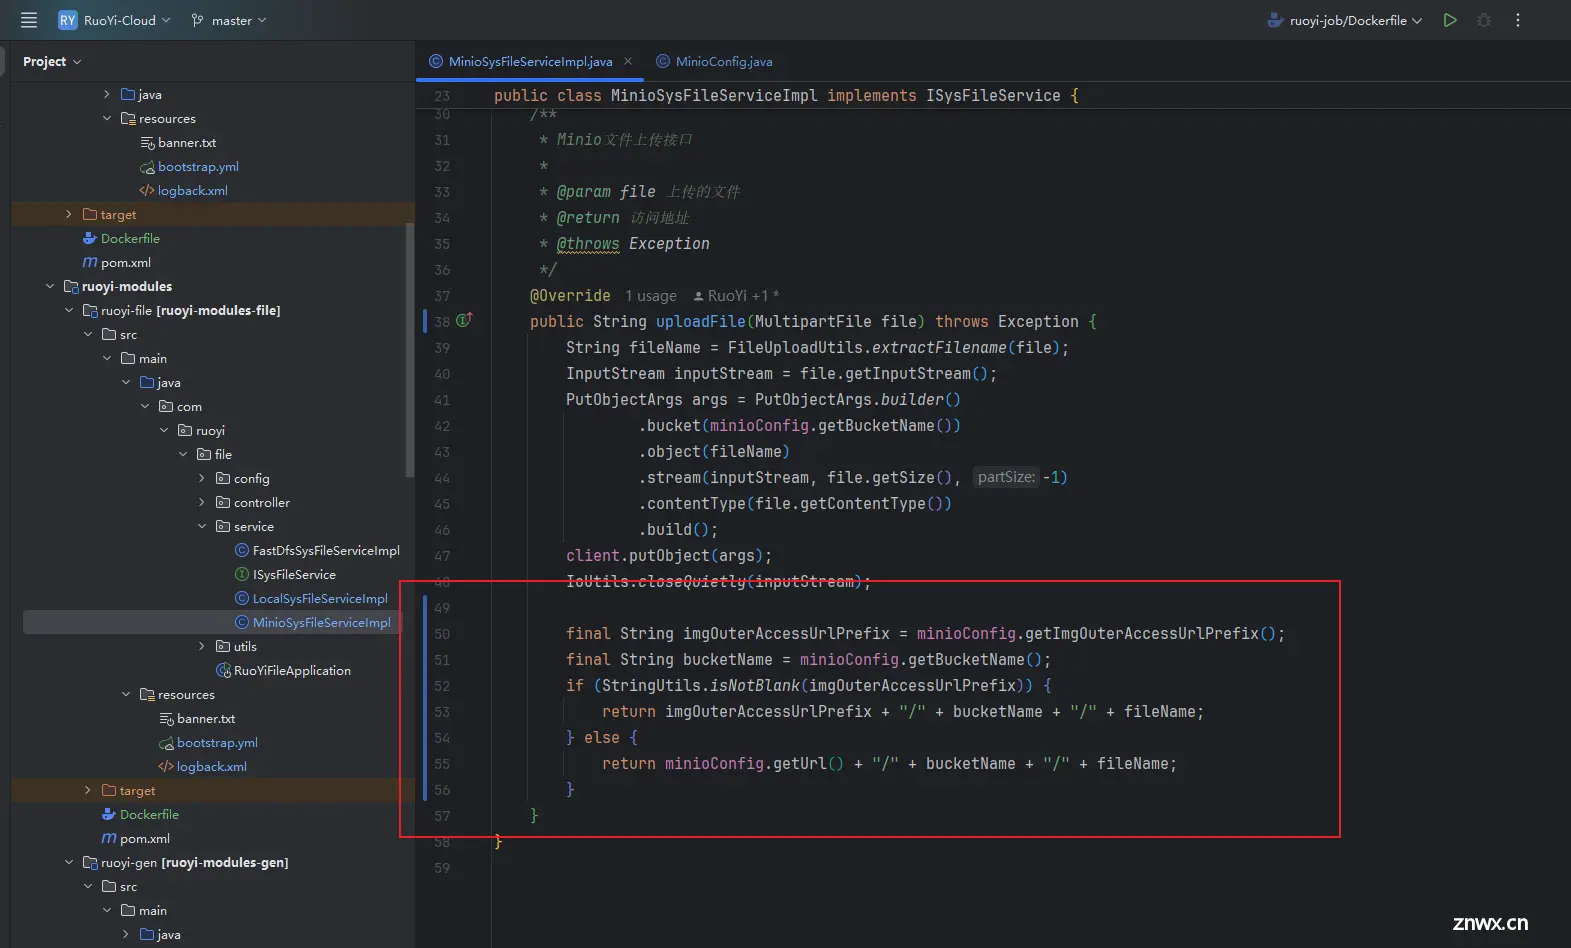
因为我们使用了 nodePort 暴露了 minio 到 k8s 集群,外部可以通过 k8s 集群的任意节点的 9000 端口访问 minio 中的图片,但是原有的上传文件的逻辑中存储的图片的前缀是配置中的 url,这个 url 我们配置的是 minio 服务的服务名,这个服务名只能在 k8s 内部访问,前端如果通过 http://node60:9000/ruoyi-cloud/2024/09/13/Java_20240913143027A001.png 这种 url 链接访问图片是访问不了的,所以,我们需要修改代码逻辑,后端上传图片时使用 minio 的服务名,上传图片后,生成的图片的 url 前缀应该使用 minio 暴露到外部的 ip 和 端口(k8s 任意一个节点的 9000 端口),这样前端才能访问到图片,才能正确的展示图片。
修改后端配置并打镜像
需要修改后端 7 个服务的 bootstarp.yml 配置文件,添加 profile 为 k8s 的相关配置,编写 Dockerfile 文件,修改 logback.xml 中日志文件的存储路径(这里以网关服务为例子):
<code># Tomcat
server:
port: 8080
---
spring:
application:
# 应用名称
name: ruoyi-gateway
profiles:
active: dev
---
spring:
config:
activate:
on-profile: dev
cloud:
nacos:
discovery:
# 服务注册地址
server-addr: node73:8848
config:
# 配置中心地址
server-addr: node73:8848
# 配置文件格式
file-extension: yml
# 共享配置
shared-configs:
- application-${ spring.profiles.active}.${ spring.cloud.nacos.config.file-extension}
sentinel:
# 取消控制台懒加载
eager: true
transport:
# 控制台地址
dashboard: node73:8858
# nacos配置持久化
datasource:
ds1:
nacos:
server-addr: node73:8848
dataId: sentinel-ruoyi-gateway
groupId: DEFAULT_GROUP
data-type: json
rule-type: gw-flow
---
spring:
config:
activate:
on-profile: k8s
cloud:
nacos:
discovery:
# 服务注册地址
server-addr: ry-cloud-nacos-service:8848
config:
# 配置中心地址
server-addr: ry-cloud-nacos-service:8848
# 配置文件格式
file-extension: yml
# 共享配置
shared-configs:
- application-${ spring.profiles.active}.${ spring.cloud.nacos.config.file-extension}
sentinel:
# 取消控制台懒加载
eager: true
transport:
# 控制台地址
dashboard: ry-cloud-sentinel-service:8858
# nacos配置持久化
datasource:
ds1:
nacos:
server-addr: ry-cloud-nacos-service:8848
dataId: sentinel-ruoyi-gateway
groupId: DEFAULT_GROUP
data-type: json
rule-type: gw-flow
# 基础镜像
FROM openjdk:8-jre
# 创建存放日志的目录
RUN mkdir -p /opt/project/ruoyi/logs/ruoyi-gateway
# 设置工作目录
WORKDIR /opt/project/ruoyi
# 复制jar文件到工作目录
COPY ./target/ruoyi-gateway.jar ruoyi-gateway.jar
# 暴露端口
EXPOSE 8080
# 启动服务
CMD ["nohup","java","-jar","/opt/project/ruoyi/ruoyi-gateway.jar", ">", "/opt/project/ruoyi/logs/ruoyi-gateway/nohup.log", "&"]
<?xml version="1.0" encoding="UTF-8"?>code>
<configuration scan="true" scanPeriod="60 seconds" debug="false">code>
<!-- 日志存放路径 -->
<!--<property name="log.path" value="logs/ruoyi-gateway" />-->code>
<property name="log.path" value="/opt/project/ruoyi/logs/ruoyi-gateway" />code>
<!-- 日志输出格式 -->
<property name="log.pattern" value="%d{HH:mm:ss.SSS} [%thread] %-5level %logger{20} - [%method,%line] - %msg%n" />code>
<!-- 控制台输出 -->
<appender name="console" class="ch.qos.logback.core.ConsoleAppender">code>
<encoder>
<pattern>${log.pattern}</pattern>
</encoder>
</appender>
<!-- 系统日志输出 -->
<appender name="file_info" class="ch.qos.logback.core.rolling.RollingFileAppender">code>
<file>${log.path}/info.log</file>
<!-- 循环政策:基于时间创建日志文件 -->
<rollingPolicy class="ch.qos.logback.core.rolling.TimeBasedRollingPolicy">code>
<!-- 日志文件名格式 -->
<fileNamePattern>${log.path}/info.%d{yyyy-MM-dd}.log</fileNamePattern>
<!-- 日志最大的历史 60天 -->
<maxHistory>60</maxHistory>
</rollingPolicy>
<encoder>
<pattern>${log.pattern}</pattern>
</encoder>
<filter class="ch.qos.logback.classic.filter.LevelFilter">code>
<!-- 过滤的级别 -->
<level>INFO</level>
<!-- 匹配时的操作:接收(记录) -->
<onMatch>ACCEPT</onMatch>
<!-- 不匹配时的操作:拒绝(不记录) -->
<onMismatch>DENY</onMismatch>
</filter>
</appender>
<appender name="file_error" class="ch.qos.logback.core.rolling.RollingFileAppender">code>
<file>${log.path}/error.log</file>
<!-- 循环政策:基于时间创建日志文件 -->
<rollingPolicy class="ch.qos.logback.core.rolling.TimeBasedRollingPolicy">code>
<!-- 日志文件名格式 -->
<fileNamePattern>${log.path}/error.%d{yyyy-MM-dd}.log</fileNamePattern>
<!-- 日志最大的历史 60天 -->
<maxHistory>60</maxHistory>
</rollingPolicy>
<encoder>
<pattern>${log.pattern}</pattern>
</encoder>
<filter class="ch.qos.logback.classic.filter.LevelFilter">code>
<!-- 过滤的级别 -->
<level>ERROR</level>
<!-- 匹配时的操作:接收(记录) -->
<onMatch>ACCEPT</onMatch>
<!-- 不匹配时的操作:拒绝(不记录) -->
<onMismatch>DENY</onMismatch>
</filter>
</appender>
<!-- 系统模块日志级别控制 -->
<logger name="com.ruoyi" level="info" />code>
<!-- Spring日志级别控制 -->
<logger name="org.springframework" level="warn" />code>
<root level="info">code>
<appender-ref ref="console" />code>
</root>
<!--系统操作日志-->
<root level="info">code>
<appender-ref ref="file_info" />code>
<appender-ref ref="file_error" />code>
</root>
</configuration>
这 7 个服务都需要按照上面的方式改一遍:

直接使用 idea 连接到虚拟机中的 Docker,打后端服务的镜像:
Docker Compose 部署若依前后端分离版
在 node63 中,将打好的镜像全部上传到私有的镜像仓库 registry 中:
<code>docker login -u root -p 123456 node63:5000
docker tag ruoyi-gateway:1.0 node63:5000/ruoyi-gateway:1.0
docker push node63:5000/ruoyi-gateway:1.0
docker tag ruoyi-auth:1.0 node63:5000/ruoyi-auth:1.0
docker push node63:5000/ruoyi-auth:1.0
docker tag ruoyi-sys:1.0 node63:5000/ruoyi-sys:1.0
docker push node63:5000/ruoyi-sys:1.0
docker tag ruoyi-monitor:1.0 node63:5000/ruoyi-monitor:1.0
docker push node63:5000/ruoyi-monitor:1.0
docker tag ruoyi-gen:1.0 node63:5000/ruoyi-gen:1.0
docker push node63:5000/ruoyi-gen:1.0
docker tag ruoyi-job:1.0 node63:5000/ruoyi-job:1.0
docker push node63:5000/ruoyi-job:1.0
docker tag ruoyi-file:1.0 node63:5000/ruoyi-file:1.0
docker push node63:5000/ruoyi-file:1.0
修改前端代码并打镜像
# 使用 Nginx 作为基础镜像
FROM nginx:1.12.2
# 创建存放前端编译后代码的目录
RUN mkdir -p /opt/project/ruoyi/ruoyi-front-code
# 将构建好的应用拷贝到 Nginx 的默认 web 目录
COPY dist /opt/project/ruoyi/ruoyi-front-code
# Expose 端口
EXPOSE 80
# 启动 Nginx 服务器
CMD ["nginx", "-g", "daemon off;"]
使用 WebStorm 连接到 node63 的 Docker,将镜像打到 node63 上。
在 node63 上使用如下命令将镜像上传到 registry 上:
docker login -u root -p 123456 node63:5000
docker tag ruoyi-ui:1.0 node63:5000/ruoyi-ui:1.0
docker push node63:5000/ruoyi-ui:1.0
在 node60 节点创建 pv 对应挂载的文件夹
mkdir -p /pv/ry-cloud/mysql
mkdir -p /pv/ry-cloud/minio
mkdir -p /pv/ry-cloud/redis
部署后端相关的所有服务
部署后端依赖的基础服务
MySQL 服务的 k8s 资源清单:
apiVersion: v1
kind: PersistentVolume
metadata:
name: ruoyi-cloud-mysql-pv
labels:
pvId: ruoyi-cloud-mysql-pv
type: local
spec:
storageClassName: manual
capacity:
storage: 2Gi
accessModes:
- ReadWriteOnce
hostPath:
# 主机的路径(或你集群的存储路径)
path: /pv/ry-cloud/mysql
---
apiVersion: v1
kind: PersistentVolumeClaim
metadata:
name: ruoyi-cloud-mysql-pvc
spec:
storageClassName: manual
accessModes:
- ReadWriteOnce
resources:
requests:
# 和对应的 PV 一致
storage: 2Gi
selector:
matchLabels:
pvId: ruoyi-cloud-mysql-pv
---
apiVersion: apps/v1
kind: Deployment
metadata:
name: ry-cloud-mysql-deployment
namespace: default
spec:
selector:
matchLabels:
app: ry-cloud-mysql-pod
template:
metadata:
labels:
app: ry-cloud-mysql-pod
spec:
containers:
- name: ry-cloud-mysql-container
image: mysql:8.0
env:
- name: MYSQL_ROOT_PASSWORD
value: "123456"
volumeMounts:
- mountPath: /docker-entrypoint-initdb.d
name: ruoyi-cloud-init-sql
- name: mysql-volume
mountPath: /var/log/mysql
# 挂载到 pvc 中的 log 子目录下
subPath: log
- name: mysql-volume
mountPath: /var/lib/mysql
# 挂载到 pvc 中的 data 子目录下
subPath: data
- name: mysql-volume
mountPath: /etc/mysql/conf.d
# 挂载到 pvc 中的 conf 子目录下
subPath: conf
resources:
limits:
memory: "512Mi"
cpu: "500m"
ports:
- containerPort: 3306
name: port-3306
volumes:
- name: ruoyi-cloud-init-sql
configMap:
name: ruoyi-cloud-init-sql-config-map
- name: mysql-volume
persistentVolumeClaim:
claimName: ruoyi-cloud-mysql-pvc
imagePullSecrets:
- name: registry-user-pwd-secret
nodeSelector:
# pod 部署到 node60 上,避免部署到其他节点导致的 pv 失效
kubernetes.io/hostname: node60
# 允许被调度到有控制节点污点的节点上
tolerations:
- key: "node-role.kubernetes.io/control-plane"
operator: "Exists"
effect: "NoSchedule"
---
apiVersion: v1
kind: Service
metadata:
name: ry-cloud-mysql-service
namespace: default
spec:
selector:
app: ry-cloud-mysql-pod
ports:
- name: port-3306
port: 3306
targetPort: 3306
Redis 服务的 k8s 资源清单:
apiVersion: v1
kind: PersistentVolume
metadata:
name: ruoyi-cloud-redis-pv
labels:
pvId: ruoyi-cloud-redis-pv
type: local
spec:
storageClassName: manual
capacity:
storage: 2Gi
accessModes:
- ReadWriteOnce
hostPath:
# 主机的路径(或你集群的存储路径)
path: /pv/ry-cloud/redis
---
apiVersion: v1
kind: PersistentVolumeClaim
metadata:
name: ruoyi-cloud-redis-pvc
spec:
storageClassName: manual
accessModes:
- ReadWriteOnce
resources:
requests:
# 和对应的 PV 一致
storage: 2Gi
selector:
matchLabels:
pvId: ruoyi-cloud-redis-pv
---
apiVersion: apps/v1
kind: Deployment
metadata:
name: ry-cloud-redis-deployment
spec:
selector:
matchLabels:
app: ry-cloud-redis-pod
template:
metadata:
labels:
app: ry-cloud-redis-pod
spec:
containers:
- name: ry-cloud-redis-container
image: redis:7.2.0
resources:
limits:
memory: "512Mi"
cpu: "500m"
ports:
- containerPort: 6379
volumeMounts:
# 挂载 configmap
- mountPath: /usr/local/etc/redis/redis.conf
name: ruoyi-redis-config
# 挂载 volume
- name: redis-volume
mountPath: /data
# 挂载到 pvc 中的 data 子目录下
subPath: data
volumes:
- name: ruoyi-redis-config
configMap:
name: ruoyi-cloud-redis-config-map
- name: redis-volume
persistentVolumeClaim:
claimName: ruoyi-cloud-redis-pvc
imagePullSecrets:
- name: registry-user-pwd-secret
nodeSelector:
# pod 部署到 node60 上,避免部署到其他节点导致的 pv 失效
kubernetes.io/hostname: node60
# 允许被调度到有控制节点污点的节点上
tolerations:
- key: "node-role.kubernetes.io/control-plane"
operator: "Exists"
effect: "NoSchedule"
---
apiVersion: v1
kind: Service
metadata:
name: ry-cloud-redis-service
namespace: default
spec:
selector:
app: ry-cloud-redis-pod
ports:
- port: 6379
targetPort: 6379
Nacos 服务的 k8s 资源清单:
apiVersion: apps/v1
kind: Deployment
metadata:
name: ry-cloud-nacos-deployment
spec:
replicas: 1
selector:
matchLabels:
app: ry-cloud-nacos-pod
template:
metadata:
labels:
app: ry-cloud-nacos-pod
spec:
containers:
- name: ry-cloud-nacos-container
image: nacos/nacos-server:v2.3.0
ports:
- containerPort: 8848
name: port-8848
- containerPort: 9848
name: port-9848
- containerPort: 9849
name: port-9849
env:
- name: MODE
value: "standalone"
- name: MYSQL_SERVICE_PORT
value: "3306"
- name: MYSQL_SERVICE_USER
value: "root"
- name: MYSQL_SERVICE_DB_NAME
value: "ry-config"
- name: MYSQL_SERVICE_PASSWORD
value: "123456"
- name: SPRING_DATASOURCE_PLATFORM
value: "mysql"
- name: MYSQL_SERVICE_HOST
# 设置为 mysql 服务的服务名
value: "ry-cloud-mysql-service"
- name: MYSQL_DATABASE_URL
value: "jdbc:mysql://ry-cloud-mysql-service:3306/ry-config?characterEncoding=utf8&connectTimeout=10000&socketTimeout=30000&autoReconnect=true&useSSL=false&allowPublicKeyRetrieval=true"
resources:
limits:
memory: "1024Mi"
cpu: "1000m"
# 不要部署到 node60 节点上,因为 node60 上已经部署了 statusfull 的 pod,避免 node61 节点资源不够
affinity:
nodeAffinity:
requiredDuringSchedulingIgnoredDuringExecution:
nodeSelectorTerms:
- matchExpressions:
- key: kubernetes.io/hostname
operator: NotIn
values:
- node60
---
apiVersion: v1
kind: Service
metadata:
name: ry-cloud-nacos-service
spec:
type: LoadBalancer
selector:
app: ry-cloud-nacos-pod
ports:
- name: port-8848
port: 8848
targetPort: 8848
- name: port-9848
port: 9848
targetPort: 9848
- name: port-9849
port: 9849
targetPort: 9849
loadBalancerIP: 192.168.10.241
Sentinel 服务的 k8s 资源清单:
apiVersion: apps/v1
kind: Deployment
metadata:
name: ry-cloud-sentinel-deployment
spec:
replicas: 1
selector:
matchLabels:
app: ry-cloud-sentinel-pod
template:
metadata:
labels:
app: ry-cloud-sentinel-pod
spec:
containers:
- name: ry-cloud-sentinel-container
image: bladex/sentinel-dashboard:1.8.0
ports:
- containerPort: 8858
name: port-8858
resources:
limits:
memory: "512Mi"
cpu: "500m"
# 不要部署到 node60 节点上,因为 node60 上已经部署了 statusfull 的 pod,避免 node60 节点资源不够
affinity:
nodeAffinity:
requiredDuringSchedulingIgnoredDuringExecution:
nodeSelectorTerms:
- matchExpressions:
- key: kubernetes.io/hostname
operator: NotIn
values:
- node60
---
apiVersion: v1
kind: Service
metadata:
name: ry-cloud-sentinel-service
spec:
type: LoadBalancer
selector:
app: ry-cloud-sentinel-pod
ports:
- name: port-8858
port: 8858
targetPort: 8858
loadBalancerIP: 192.168.10.240
Minio 服务的 k8s 资源清单:
# minio
apiVersion: v1
kind: PersistentVolume
metadata:
name: minio-pv
labels:
pvId: ry-cloud-minio-pv
type: local
spec:
storageClassName: manual
capacity:
storage: 2Gi
accessModes:
- ReadWriteOnce
hostPath:
# 主机的路径(或你集群的存储路径)
path: /pv/ry-cloud/minio
---
apiVersion: v1
kind: PersistentVolumeClaim
metadata:
name: minio-pvc
spec:
storageClassName: manual
accessModes:
- ReadWriteOnce
resources:
requests:
# 和对应的 PV 一致
storage: 2Gi
selector:
matchLabels:
pvId: ry-cloud-minio-pv
---
apiVersion: apps/v1
kind: Deployment
metadata:
name: ry-cloud-minio-deployment
labels:
app: ry-cloud-minio-deployment
spec:
replicas: 1
selector:
matchLabels:
app: ry-cloud-minio-pod
template:
metadata:
labels:
app: ry-cloud-minio-pod
spec:
containers:
- name: ry-cloud-minio-container
image: minio/minio:RELEASE.2024-08-29T01-40-52Z
args:
- server
- /data
- --console-address=:9090
- --address=:9000
env:
- name: MINIO_ACCESS_KEY
value: "minioadmin"
- name: MINIO_SECRET_KEY
value: "minioadmin"
volumeMounts:
- name: minio-volume
mountPath: /data
# 挂载到 pvc 中的 data 子目录下
subPath: data
- name: minio-volume
mountPath: /root/.minio
# 挂载到 pvc 中的 config 子目录下
subPath: config
resources:
limits:
memory: "512Mi"
cpu: "500m"
ports:
- containerPort: 9000
name: port-9000
- containerPort: 9090
name: port-9090
restartPolicy: Always
volumes:
- name: minio-volume
persistentVolumeClaim:
claimName: minio-pvc
nodeSelector:
# pod 部署到 node60 上,避免部署到其他节点导致的 pv 失效
kubernetes.io/hostname: node60
# 允许被调度到有控制节点污点的节点上
tolerations:
- key: "node-role.kubernetes.io/control-plane"
operator: "Exists"
effect: "NoSchedule"
---
apiVersion: v1
kind: Service
metadata:
name: ry-cloud-minio-service
labels:
app: ry-cloud-minio-service
spec:
selector:
app: ry-cloud-minio-pod
# minio 使用 NodePort 暴露端口,因为需要使用浏览器访问 minio 上的图片
type: NodePort
ports:
- name: port-9000
port: 9000
targetPort: 9000
# NodePort range should be between 30000-32767
nodePort: 9000
- name: port-9090
port: 9090
targetPort: 9090
# NodePort range should be between 30000-32767
nodePort: 9090
将上面的这些资源清单都使用 k8s 的命令部署:
kubectl apply -f 1_ry-cloud-mysql.yml
kubectl apply -f 2_ry-cloud-redis.yml
kubectl apply -f 3_ry-cloud-nacos.yml
kubectl apply -f 4_ry-cloud-sentinel.yml
kubectl apply -f 5_ry-cloud-minio.yml
部署后,使用如下命令查看 pod 的状态是否都正常,正常才能进行下面的步骤:
kubectl get pods
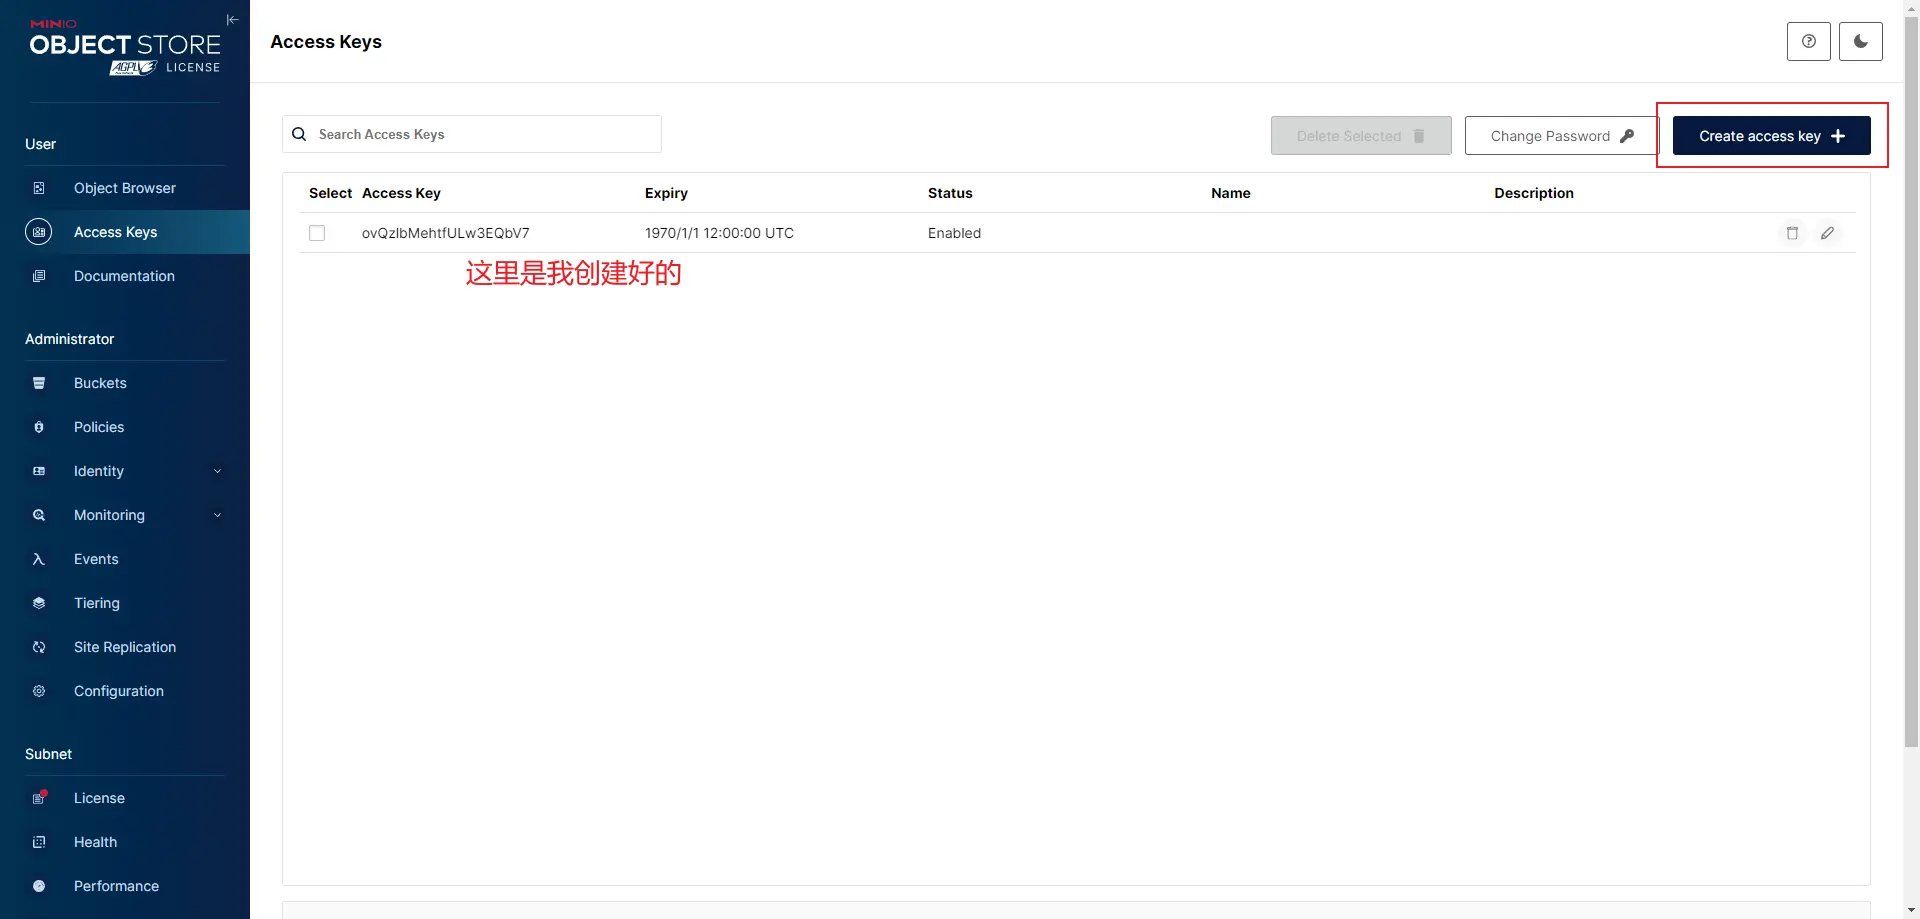
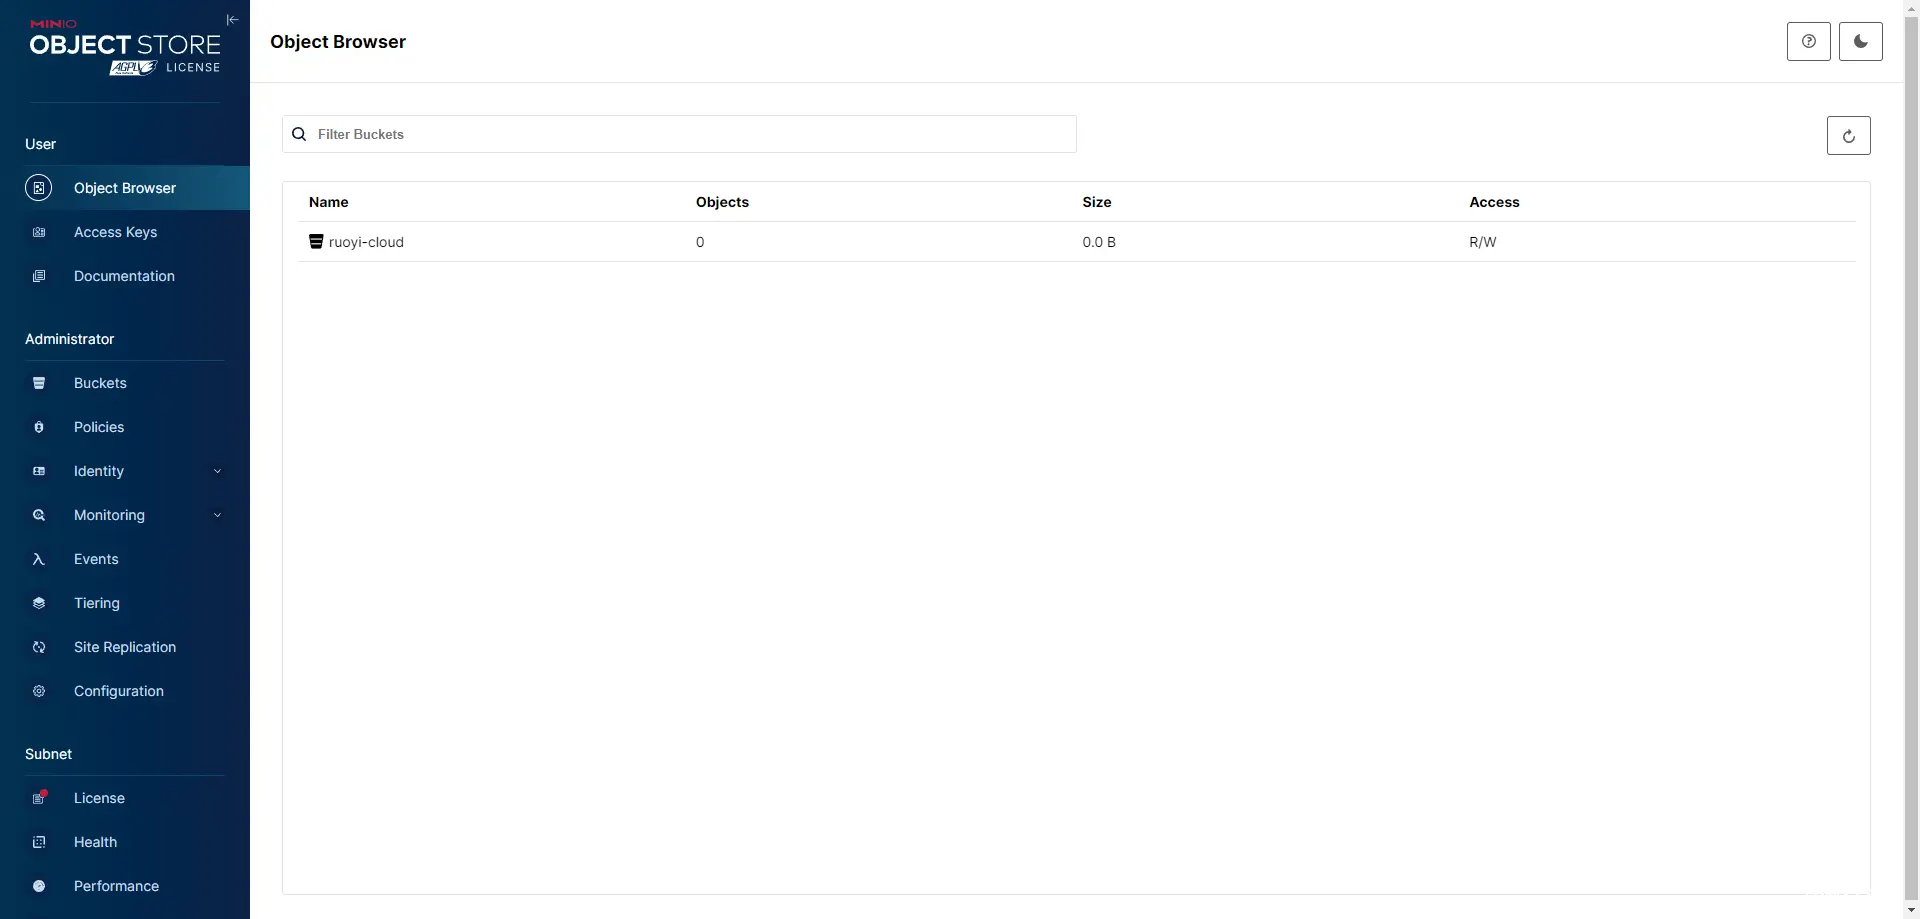
minio 配置数据桶和密钥
创建一个 secret:
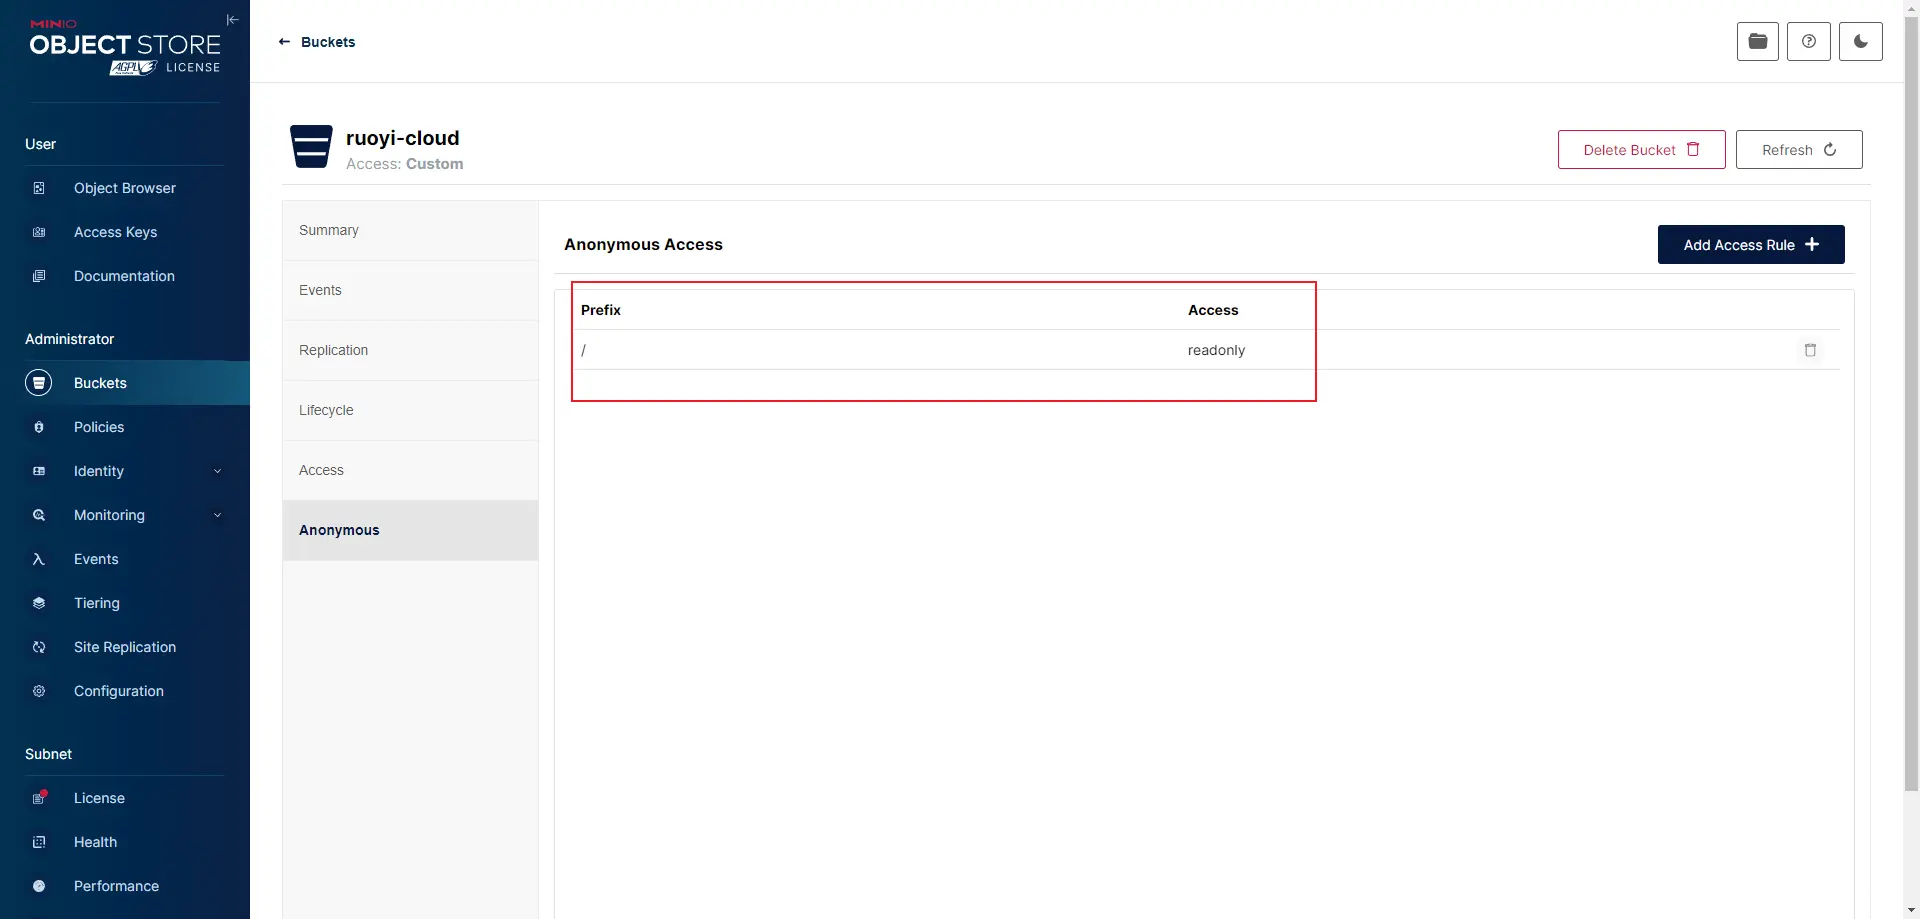
创建一个桶并设置公共读:
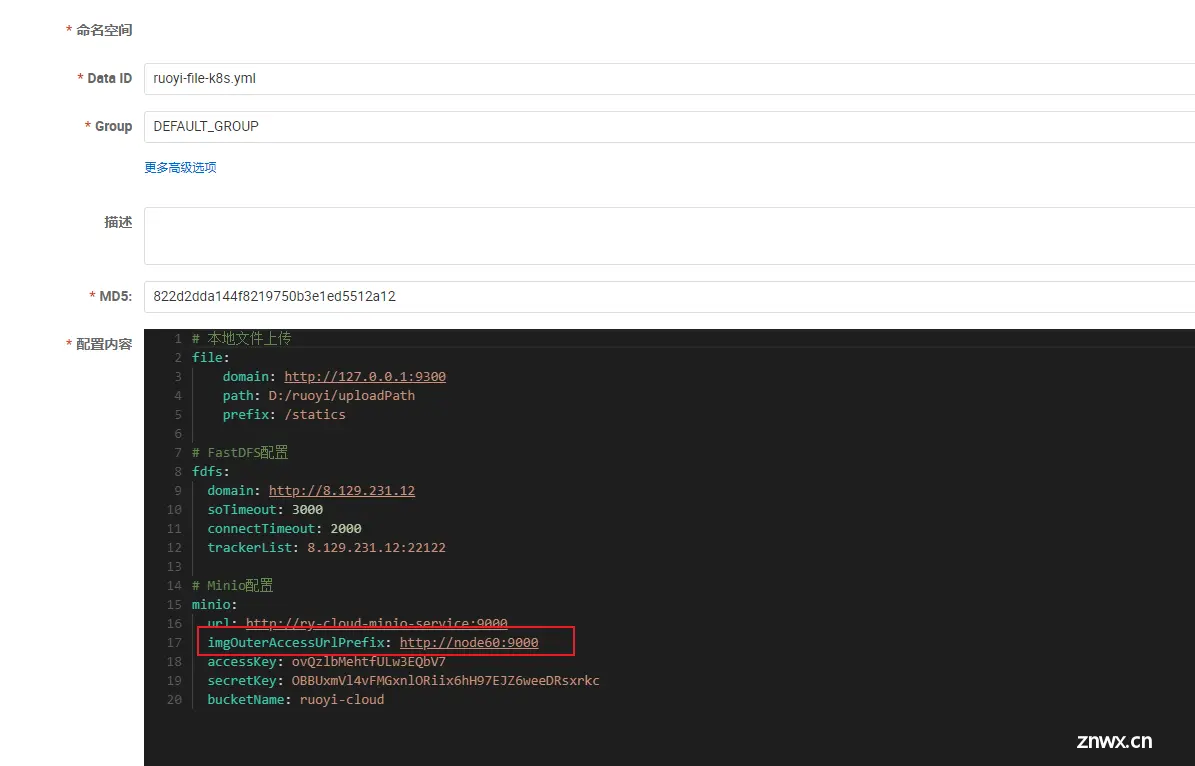
修改 Nacos 上的配置

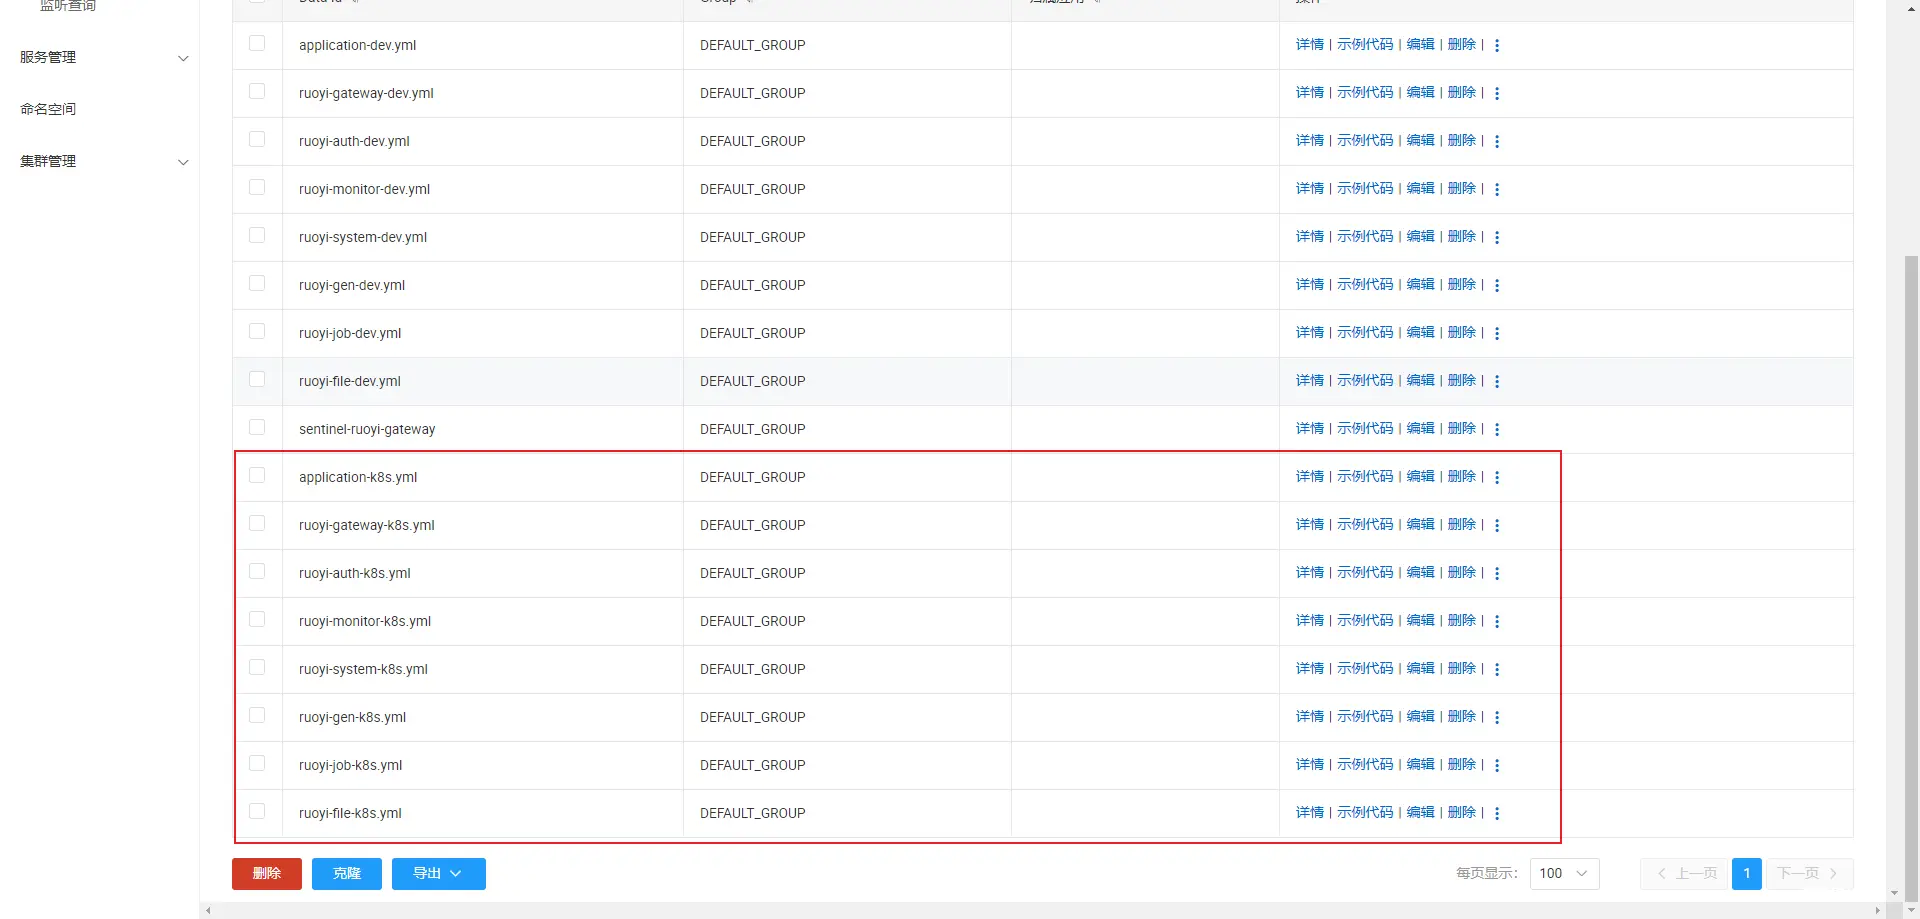
拷贝的过程中修改 redis 的 host 为 ry-cloud-redis-service,密码为 123456,修改 mysql 的 host 为 ry-cloud-mysql-service,用户为 root,密码为 123456,修改网关的地址为 ry-cloud-gateway-service
。
修改 minio 的相关配置为刚才创建的 bucket 以及 key 和密钥,url 设置为 minio 服务的服务名,imgOuterAccessUrlPrefix 设置为 k8s 的任意一个节点的 9000 端口都行(minio 通过 nodePort 向外暴露的):
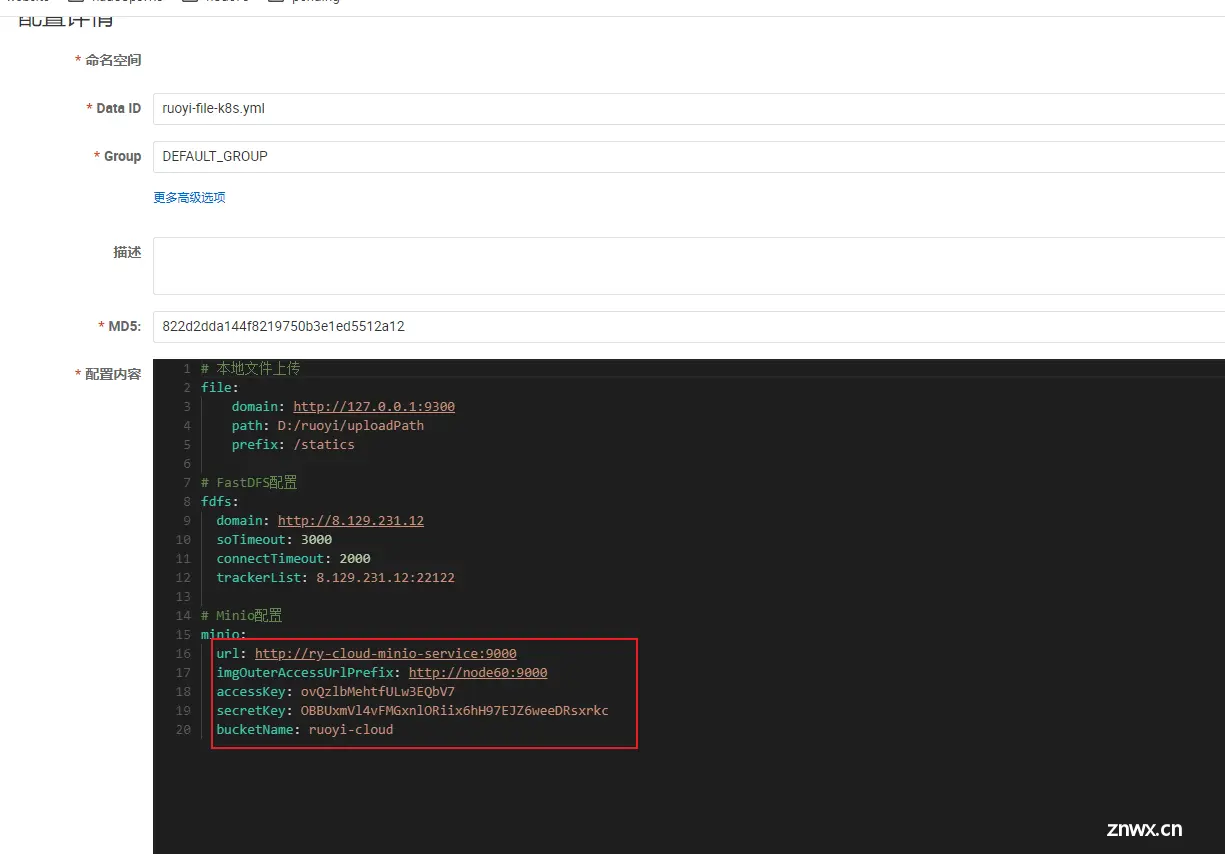
<code># 本地文件上传
file:
domain: http://127.0.0.1:9300
path: D:/ruoyi/uploadPath
prefix: /statics
# FastDFS配置
fdfs:
domain: http://8.129.231.12
soTimeout: 3000
connectTimeout: 2000
trackerList: 8.129.231.12:22122
# Minio配置
minio:
url: http://ry-cloud-minio-service:9000
imgOuterAccessUrlPrefix: http://node60:9000
accessKey: ovQzlbMehtfULw3EQbV7
secretKey: OBBUxmVl4vFMGxnlORiix6hH97EJZ6weeDRsxrkc
bucketName: ruoyi-cloud
部署 ruoyi 服务
因为 ruoyi 的服务依赖 mysql、redis、nacos、sentinel、minio 这些基础服务,部署 ruoyi 服务前,请确保 k8s 中部署的这些基础服务都运行成功了。
ruoyi 服务的 k8s 资源清单:
# geteway
apiVersion: apps/v1
kind: Deployment
metadata:
name: ruoyi-cloud-gateway-deployment
labels:
app: ruoyi-cloud-gateway-deployment
spec:
replicas: 1
selector:
matchLabels:
app: ruoyi-cloud-gateway-pod
template:
metadata:
labels:
app: ruoyi-cloud-gateway-pod
spec:
initContainers:
- name: wait-for-mysql
image: mysql:8.0
env:
- name: MYSQL_ROOT_PASSWORD
value: "123456"
command:
- sh
- -c
- |
set -e
maxTries=10
while [ "$$maxTries" -gt 0 ] \
&& ! mysqladmin ping --connect-timeout=3 -s \
-hry-cloud-mysql-service -uroot -p$$MYSQL_ROOT_PASSWORD
do
echo 'Waiting for MySQL to be available'
sleep 5
let maxTries--
done
if [ "$$maxTries" -le 0 ]; then
echo >&2 'error: unable to contact MySQL after 10 tries'
exit 1
fi
- name: wait-for-redis
image: redis:7.2.0
env:
- name: REDIS_PASSWORD
value: "123456"
command:
- sh
- -c
- |
set -e
maxTries=10
while [ "$$maxTries" -gt 0 ] \
&& ! timeout 3 redis-cli -h ry-cloud-redis-service -a $$REDIS_PASSWORD ping
do
echo 'Waiting for Redis to be available'
sleep 5
let maxTries--
done
if [ "$$maxTries" -le 0 ]; then
echo >&2 'error: unable to contact Redis after 10 tries'
exit 1
fi
containers:
- name: ruoyi-cloud-gateway-container
image: node63:5000/ruoyi-gateway:1.0
resources:
limits:
memory: "512Mi"
cpu: "512m"
imagePullPolicy: Always
ports:
# 和模块中 bootstrap.yml 中配置的一致
- containerPort: 8080
# 激活 k8s 环境配置
args:
["nohup","java","-jar","/opt/project/ruoyi/ruoyi-gateway.jar", "--spring.profiles.active=k8s", ">", "/opt/project/ruoyi/logs/ruoyi-gateway/nohup.log", "&"]
imagePullSecrets:
- name: registry-user-pwd-secret
---
apiVersion: v1
kind: Service
metadata:
name: ry-cloud-gateway-service
namespace: default
spec:
selector:
app: ruoyi-cloud-gateway-pod
ports:
- port: 8080
targetPort: 8080
---
# auth
apiVersion: apps/v1
kind: Deployment
metadata:
name: ruoyi-cloud-auth-deployment
labels:
app: ruoyi-cloud-auth-deployment
spec:
replicas: 1
selector:
matchLabels:
app: ruoyi-cloud-auth-pod
template:
metadata:
labels:
app: ruoyi-cloud-auth-pod
spec:
initContainers:
- name: wait-for-mysql
image: mysql:8.0
env:
- name: MYSQL_ROOT_PASSWORD
value: "123456"
command:
- sh
- -c
- |
set -e
maxTries=10
while [ "$$maxTries" -gt 0 ] \
&& ! mysqladmin ping --connect-timeout=3 -s \
-hry-cloud-mysql-service -uroot -p$$MYSQL_ROOT_PASSWORD
do
echo 'Waiting for MySQL to be available'
sleep 5
let maxTries--
done
if [ "$$maxTries" -le 0 ]; then
echo >&2 'error: unable to contact MySQL after 10 tries'
exit 1
fi
- name: wait-for-redis
image: redis:7.2.0
env:
- name: REDIS_PASSWORD
value: "123456"
command:
- sh
- -c
- |
set -e
maxTries=10
while [ "$$maxTries" -gt 0 ] \
&& ! timeout 3 redis-cli -h ry-cloud-redis-service -a $$REDIS_PASSWORD ping
do
echo 'Waiting for Redis to be available'
sleep 5
let maxTries--
done
if [ "$$maxTries" -le 0 ]; then
echo >&2 'error: unable to contact Redis after 10 tries'
exit 1
fi
containers:
- name: ruoyi-cloud-auth-container
image: node63:5000/ruoyi-auth:1.0
resources:
limits:
memory: "512Mi"
cpu: "512m"
imagePullPolicy: Always
ports:
# 和模块中 bootstrap.yml 中配置的一致
- containerPort: 9200
# 激活 k8s 环境配置
args:
["nohup","java","-jar","/opt/project/ruoyi/ruoyi-auth.jar", "--spring.profiles.active=k8s", ">", "/opt/project/ruoyi/logs/ruoyi-auth/nohup.log", "&"]
imagePullSecrets:
- name: registry-user-pwd-secret
---
apiVersion: v1
kind: Service
metadata:
name: ruoyi-cloud-auth-service
namespace: default
spec:
selector:
app: ruoyi-cloud-auth-pod
ports:
- port: 9200
targetPort: 9200
---
### sys
apiVersion: apps/v1
kind: Deployment
metadata:
name: ruoyi-cloud-sys-deployment
labels:
app: ruoyi-cloud-sys-deployment
spec:
replicas: 1
selector:
matchLabels:
app: ruoyi-cloud-sys-pod
template:
metadata:
labels:
app: ruoyi-cloud-sys-pod
spec:
initContainers:
- name: wait-for-mysql
image: mysql:8.0
env:
- name: MYSQL_ROOT_PASSWORD
value: "123456"
command:
- sh
- -c
- |
set -e
maxTries=10
while [ "$$maxTries" -gt 0 ] \
&& ! mysqladmin ping --connect-timeout=3 -s \
-hry-cloud-mysql-service -uroot -p$$MYSQL_ROOT_PASSWORD
do
echo 'Waiting for MySQL to be available'
sleep 5
let maxTries--
done
if [ "$$maxTries" -le 0 ]; then
echo >&2 'error: unable to contact MySQL after 10 tries'
exit 1
fi
- name: wait-for-redis
image: redis:7.2.0
env:
- name: REDIS_PASSWORD
value: "123456"
command:
- sh
- -c
- |
set -e
maxTries=10
while [ "$$maxTries" -gt 0 ] \
&& ! timeout 3 redis-cli -h ry-cloud-redis-service -a $$REDIS_PASSWORD ping
do
echo 'Waiting for Redis to be available'
sleep 5
let maxTries--
done
if [ "$$maxTries" -le 0 ]; then
echo >&2 'error: unable to contact Redis after 10 tries'
exit 1
fi
containers:
- name: ruoyi-cloud-sys-container
image: node63:5000/ruoyi-sys:1.0
resources:
limits:
memory: "512Mi"
cpu: "512m"
imagePullPolicy: Always
ports:
# 和模块中 bootstrap.yml 中配置的一致
- containerPort: 9201
# 激活 k8s 环境配置
args:
["nohup","java","-jar","/opt/project/ruoyi/ruoyi-modules-system.jar", "--spring.profiles.active=k8s", ">", "/opt/project/ruoyi/logs/ruoyi-sys/nohup.log", "&"]
imagePullSecrets:
- name: registry-user-pwd-secret
---
apiVersion: v1
kind: Service
metadata:
name: ry-cloud-sys-service
namespace: default
spec:
selector:
app: ruoyi-cloud-sys-pod
ports:
- port: 9201
targetPort: 9201
---
# monitor
apiVersion: apps/v1
kind: Deployment
metadata:
name: ruoyi-cloud-monitor-deployment
labels:
app: ruoyi-cloud-monitor-deployment
spec:
replicas: 1
selector:
matchLabels:
app: ruoyi-cloud-monitor-pod
template:
metadata:
labels:
app: ruoyi-cloud-monitor-pod
spec:
initContainers:
- name: wait-for-mysql
image: mysql:8.0
env:
- name: MYSQL_ROOT_PASSWORD
value: "123456"
command:
- sh
- -c
- |
set -e
maxTries=10
while [ "$$maxTries" -gt 0 ] \
&& ! mysqladmin ping --connect-timeout=3 -s \
-hry-cloud-mysql-service -uroot -p$$MYSQL_ROOT_PASSWORD
do
echo 'Waiting for MySQL to be available'
sleep 5
let maxTries--
done
if [ "$$maxTries" -le 0 ]; then
echo >&2 'error: unable to contact MySQL after 10 tries'
exit 1
fi
- name: wait-for-redis
image: redis:7.2.0
env:
- name: REDIS_PASSWORD
value: "123456"
command:
- sh
- -c
- |
set -e
maxTries=10
while [ "$$maxTries" -gt 0 ] \
&& ! timeout 3 redis-cli -h ry-cloud-redis-service -a $$REDIS_PASSWORD ping
do
echo 'Waiting for Redis to be available'
sleep 5
let maxTries--
done
if [ "$$maxTries" -le 0 ]; then
echo >&2 'error: unable to contact Redis after 10 tries'
exit 1
fi
containers:
- name: ruoyi-cloud-monitor-container
image: node63:5000/ruoyi-monitor:1.0
resources:
limits:
memory: "512Mi"
cpu: "512m"
imagePullPolicy: Always
ports:
# 和模块中 bootstrap.yml 中配置的一致
- containerPort: 9100
name: port-9100
# 激活 k8s 环境配置
args:
["nohup","java","-jar","/opt/project/ruoyi/ruoyi-visual-monitor.jar", "--spring.profiles.active=k8s", ">", "/opt/project/ruoyi/logs/ruoyi-monitor/nohup.log", "&"]
imagePullSecrets:
- name: registry-user-pwd-secret
---
apiVersion: v1
kind: Service
metadata:
name: ry-cloud-monitor-service
namespace: default
spec:
# minitor 服务需要暴露出去,前端通过 admin 控制台侧边栏要访问
type: LoadBalancer
selector:
app: ruoyi-cloud-monitor-pod
ports:
- name: port-9100
port: 9100
targetPort: 9100
loadBalancerIP: 192.168.10.242
---
# gen
apiVersion: apps/v1
kind: Deployment
metadata:
name: ruoyi-cloud-gen-deployment
labels:
app: ruoyi-cloud-gen-deployment
spec:
replicas: 1
selector:
matchLabels:
app: ruoyi-cloud-gen-pod
template:
metadata:
labels:
app: ruoyi-cloud-gen-pod
spec:
initContainers:
- name: wait-for-mysql
image: mysql:8.0
env:
- name: MYSQL_ROOT_PASSWORD
value: "123456"
command:
- sh
- -c
- |
set -e
maxTries=10
while [ "$$maxTries" -gt 0 ] \
&& ! mysqladmin ping --connect-timeout=3 -s \
-hry-cloud-mysql-service -uroot -p$$MYSQL_ROOT_PASSWORD
do
echo 'Waiting for MySQL to be available'
sleep 5
let maxTries--
done
if [ "$$maxTries" -le 0 ]; then
echo >&2 'error: unable to contact MySQL after 10 tries'
exit 1
fi
- name: wait-for-redis
image: redis:7.2.0
env:
- name: REDIS_PASSWORD
value: "123456"
command:
- sh
- -c
- |
set -e
maxTries=10
while [ "$$maxTries" -gt 0 ] \
&& ! timeout 3 redis-cli -h ry-cloud-redis-service -a $$REDIS_PASSWORD ping
do
echo 'Waiting for Redis to be available'
sleep 5
let maxTries--
done
if [ "$$maxTries" -le 0 ]; then
echo >&2 'error: unable to contact Redis after 10 tries'
exit 1
fi
containers:
- name: ruoyi-cloud-gen-container
image: node63:5000/ruoyi-gen:1.0
resources:
limits:
memory: "512Mi"
cpu: "512m"
imagePullPolicy: Always
ports:
# 和模块中 bootstrap.yml 中配置的一致
- containerPort: 9202
# 激活 k8s 环境配置
args:
["nohup","java","-jar","/opt/project/ruoyi/ruoyi-modules-gen.jar", "--spring.profiles.active=k8s", ">", "/opt/project/ruoyi/logs/ruoyi-gen/nohup.log", "&"]
imagePullSecrets:
- name: registry-user-pwd-secret
---
apiVersion: v1
kind: Service
metadata:
name: ry-cloud-gen-service
namespace: default
spec:
selector:
app: ruoyi-cloud-gen-pod
ports:
- port: 9202
targetPort: 9202
---
# job
apiVersion: apps/v1
kind: Deployment
metadata:
name: ruoyi-cloud-job-deployment
labels:
app: ruoyi-cloud-job-deployment
spec:
replicas: 1
selector:
matchLabels:
app: ruoyi-cloud-job-pod
template:
metadata:
labels:
app: ruoyi-cloud-job-pod
spec:
initContainers:
- name: wait-for-mysql
image: mysql:8.0
env:
- name: MYSQL_ROOT_PASSWORD
value: "123456"
command:
- sh
- -c
- |
set -e
maxTries=10
while [ "$$maxTries" -gt 0 ] \
&& ! mysqladmin ping --connect-timeout=3 -s \
-hry-cloud-mysql-service -uroot -p$$MYSQL_ROOT_PASSWORD
do
echo 'Waiting for MySQL to be available'
sleep 5
let maxTries--
done
if [ "$$maxTries" -le 0 ]; then
echo >&2 'error: unable to contact MySQL after 10 tries'
exit 1
fi
- name: wait-for-redis
image: redis:7.2.0
env:
- name: REDIS_PASSWORD
value: "123456"
command:
- sh
- -c
- |
set -e
maxTries=10
while [ "$$maxTries" -gt 0 ] \
&& ! timeout 3 redis-cli -h ry-cloud-redis-service -a $$REDIS_PASSWORD ping
do
echo 'Waiting for Redis to be available'
sleep 5
let maxTries--
done
if [ "$$maxTries" -le 0 ]; then
echo >&2 'error: unable to contact Redis after 10 tries'
exit 1
fi
containers:
- name: ruoyi-cloud-job-container
image: node63:5000/ruoyi-job:1.0
resources:
limits:
memory: "512Mi"
cpu: "512m"
imagePullPolicy: Always
ports:
# 和模块中 bootstrap.yml 中配置的一致
- containerPort: 9203
# 激活 k8s 环境配置
args:
["nohup","java","-jar","/opt/project/ruoyi/ruoyi-modules-job.jar", "--spring.profiles.active=k8s", ">", "/opt/project/ruoyi/logs/ruoyi-job/nohup.log", "&"]
imagePullSecrets:
- name: registry-user-pwd-secret
---
apiVersion: v1
kind: Service
metadata:
name: ry-cloud-job-service
namespace: default
spec:
selector:
app: ruoyi-cloud-job-pod
ports:
- port: 9203
targetPort: 9203
---
# file
apiVersion: apps/v1
kind: Deployment
metadata:
name: ruoyi-cloud-file-deployment
labels:
app: ruoyi-cloud-file-deployment
spec:
replicas: 1
selector:
matchLabels:
app: ruoyi-cloud-file-pod
template:
metadata:
labels:
app: ruoyi-cloud-file-pod
spec:
initContainers:
- name: wait-for-mysql
image: mysql:8.0
env:
- name: MYSQL_ROOT_PASSWORD
value: "123456"
command:
- sh
- -c
- |
set -e
maxTries=10
while [ "$$maxTries" -gt 0 ] \
&& ! mysqladmin ping --connect-timeout=3 -s \
-hry-cloud-mysql-service -uroot -p$$MYSQL_ROOT_PASSWORD
do
echo 'Waiting for MySQL to be available'
sleep 5
let maxTries--
done
if [ "$$maxTries" -le 0 ]; then
echo >&2 'error: unable to contact MySQL after 10 tries'
exit 1
fi
- name: wait-for-redis
image: redis:7.2.0
env:
- name: REDIS_PASSWORD
value: "123456"
command:
- sh
- -c
- |
set -e
maxTries=10
while [ "$$maxTries" -gt 0 ] \
&& ! timeout 3 redis-cli -h ry-cloud-redis-service -a $$REDIS_PASSWORD ping
do
echo 'Waiting for Redis to be available'
sleep 5
let maxTries--
done
if [ "$$maxTries" -le 0 ]; then
echo >&2 'error: unable to contact Redis after 10 tries'
exit 1
fi
containers:
- name: ruoyi-cloud-file-container
image: node63:5000/ruoyi-file:1.0
resources:
limits:
memory: "512Mi"
cpu: "512m"
imagePullPolicy: Always
ports:
# 和模块中 bootstrap.yml 中配置的一致
- containerPort: 9300
# 激活 k8s 环境配置
args:
["nohup","java","-jar","/opt/project/ruoyi/ruoyi-modules-file.jar", "--spring.profiles.active=k8s", ">", "/opt/project/ruoyi/logs/ruoyi-file/nohup.log", "&"]
imagePullSecrets:
- name: registry-user-pwd-secret
---
apiVersion: v1
kind: Service
metadata:
name: ry-cloud-file-service
namespace: default
spec:
selector:
app: ruoyi-cloud-file-pod
ports:
- port: 9300
targetPort: 9300
将 ruoyi 服务的资源清单使用 k8s 的命令部署:
kubectl apply -f ry-cloud-backend.yml
部署后,使用如下命令查看 pod 的状态是否都正常,正常才能进行下面部署 ruoyi 前端服务的步骤:
kubectl get pods
部署 ruoyi 前端服务
ruoyi 前端服务的 k8s 部署资源清单:
apiVersion: apps/v1
kind: Deployment
metadata:
name: ry-cloud-ui-deployment
labels:
app: ry-cloud-ui-deployment
spec:
replicas: 1
selector:
matchLabels:
app: ry-cloud-ui-pod
template:
metadata:
labels:
app: ry-cloud-ui-pod
spec:
initContainers:
- name: wait-for-ry-cloud-gateway-service
image: alpine
command:
- sh
- -c
- |
apk add --no-cache curl
echo "Starting to wait for ry-cloud-gateway-service..."
until curl -s -f -m 3 http://ry-cloud-gateway-service:8080
do
echo "Waiting for ry-cloud-gateway-service...";
sleep 5;
done
echo "ry-cloud-gateway-service is available now."
containers:
- name: ruoyi-cloud-ui-container
image: node63:5000/ruoyi-ui:1.0
resources:
limits:
memory: "512Mi"
cpu: "512m"
imagePullPolicy: Always
ports:
- containerPort: 80
volumeMounts:
- mountPath: /etc/nginx/conf.d
name: nginx-config
volumes:
- name: nginx-config
configMap:
name: ruoyi-cloud-ui-config-map
items:
- key: nginx.conf
path: default.conf
imagePullSecrets:
- name: registry-user-pwd-secret
---
apiVersion: v1
kind: Service
metadata:
name: ry-cloud-ui-service
namespace: default
spec:
type: LoadBalancer
selector:
app: ry-cloud-ui-pod
ports:
- port: 80
targetPort: 80
loadBalancerIP: 192.168.10.243
将 ruoyi 服务的资源清单使用 k8s 的命令部署:
kubectl apply -f ry-cloud-fronted.yml
部署后,使用如下命令查看前端 pod 状态是否正常:
kubectl get pods
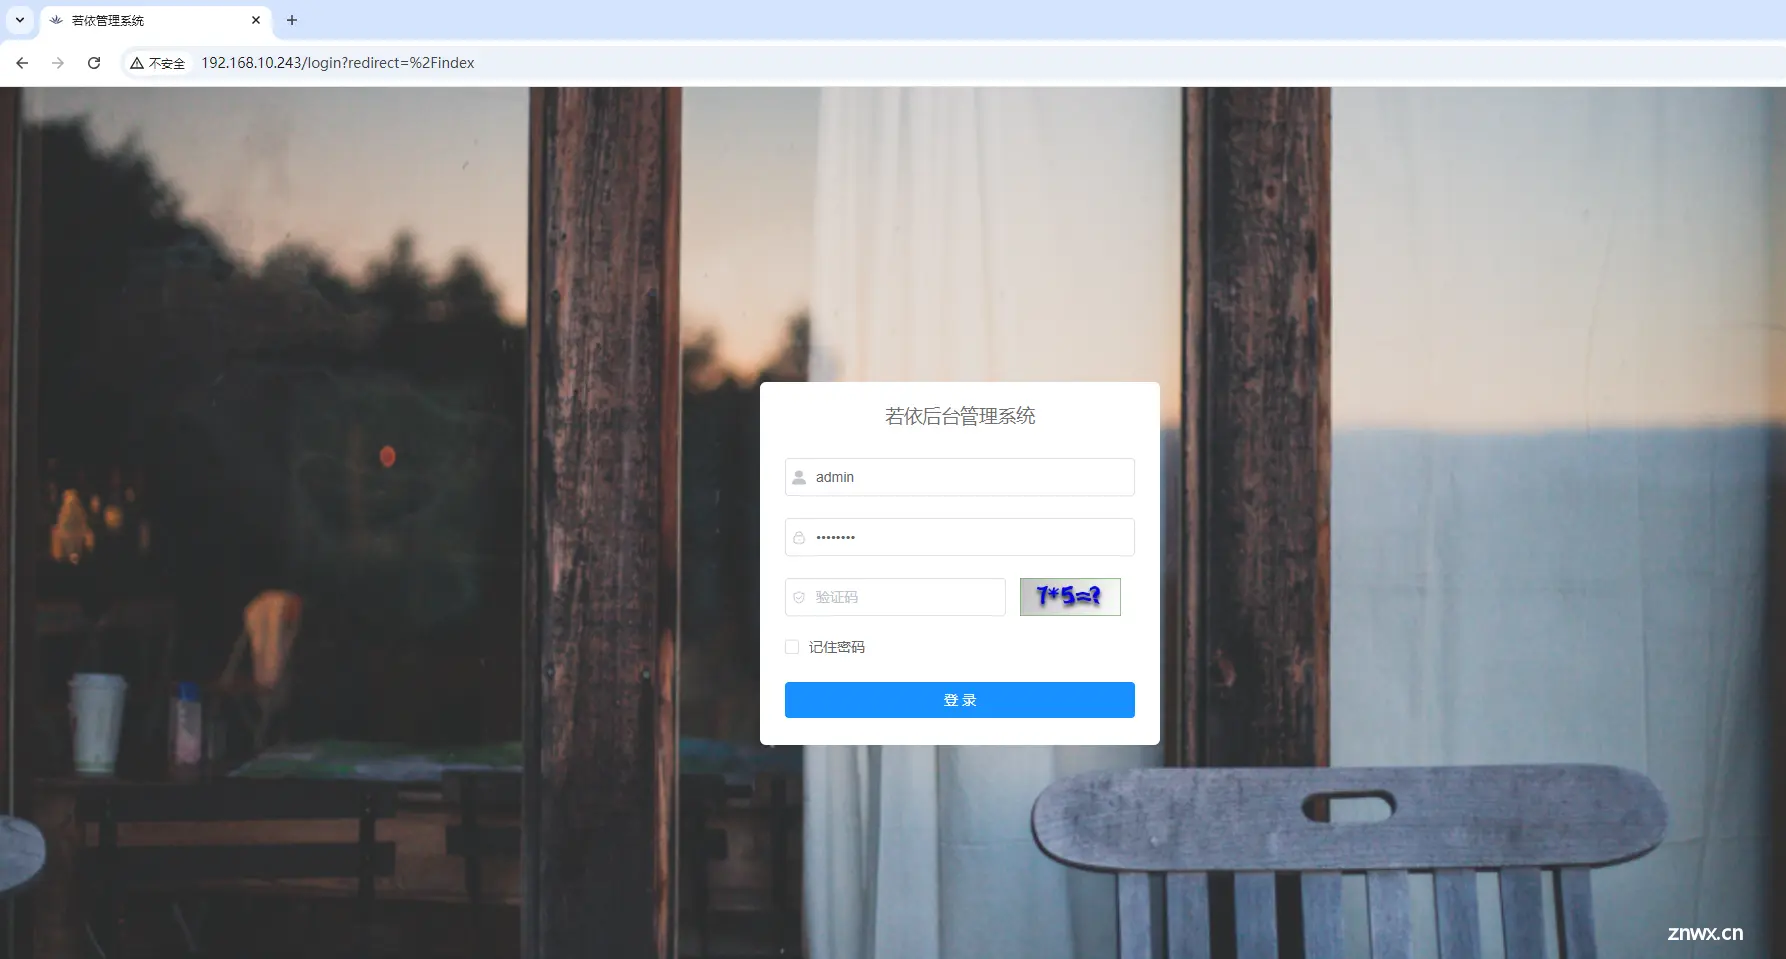
如果一切都正常运行,通过 http://192.168.10.243 就可以访问 ruoyi 前端界面了。
优化点
当前服务间存在依赖关系,手动挨个启动能否自动化PV 现在使用的是本地存储,存在单点故障,可以改进为使用 NFS(Network File System,网络文件系统)各个服务的高可用怎么做
声明
本文内容仅代表作者观点,或转载于其他网站,本站不以此文作为商业用途
如有涉及侵权,请联系本站进行删除
转载本站原创文章,请注明来源及作者。