无需 GPU 服务器,借助 OpenRouter 零成本搭建自己的大模型助手
小毕超 2024-06-11 09:07:07 阅读 60
一、搭建自己的大模型助手
大型模型的出现为许多领域带来了革命性的变化,从自然语言处理到计算机视觉,甚至是医学和金融领域。然而,对于许多开发者来说,使用一些开源的模型进行实验和应用却是一个挑战,因为它们通常需要昂贵的硬件资源来运行。大多数情况下,使用这些模型需要拥有一台配备高性能GPU的服务器,而这往往是一项昂贵的投资。而 OpenRouter 为使用者提供了部分开源模型的实现,可以通过API免费使用,主要聚焦在7B规模大小的模型,比如谷歌的 gemma-7b ,Mistral AI 的 mistral-7b-instruct,一定程度避免了自己去部署大模型的成本。
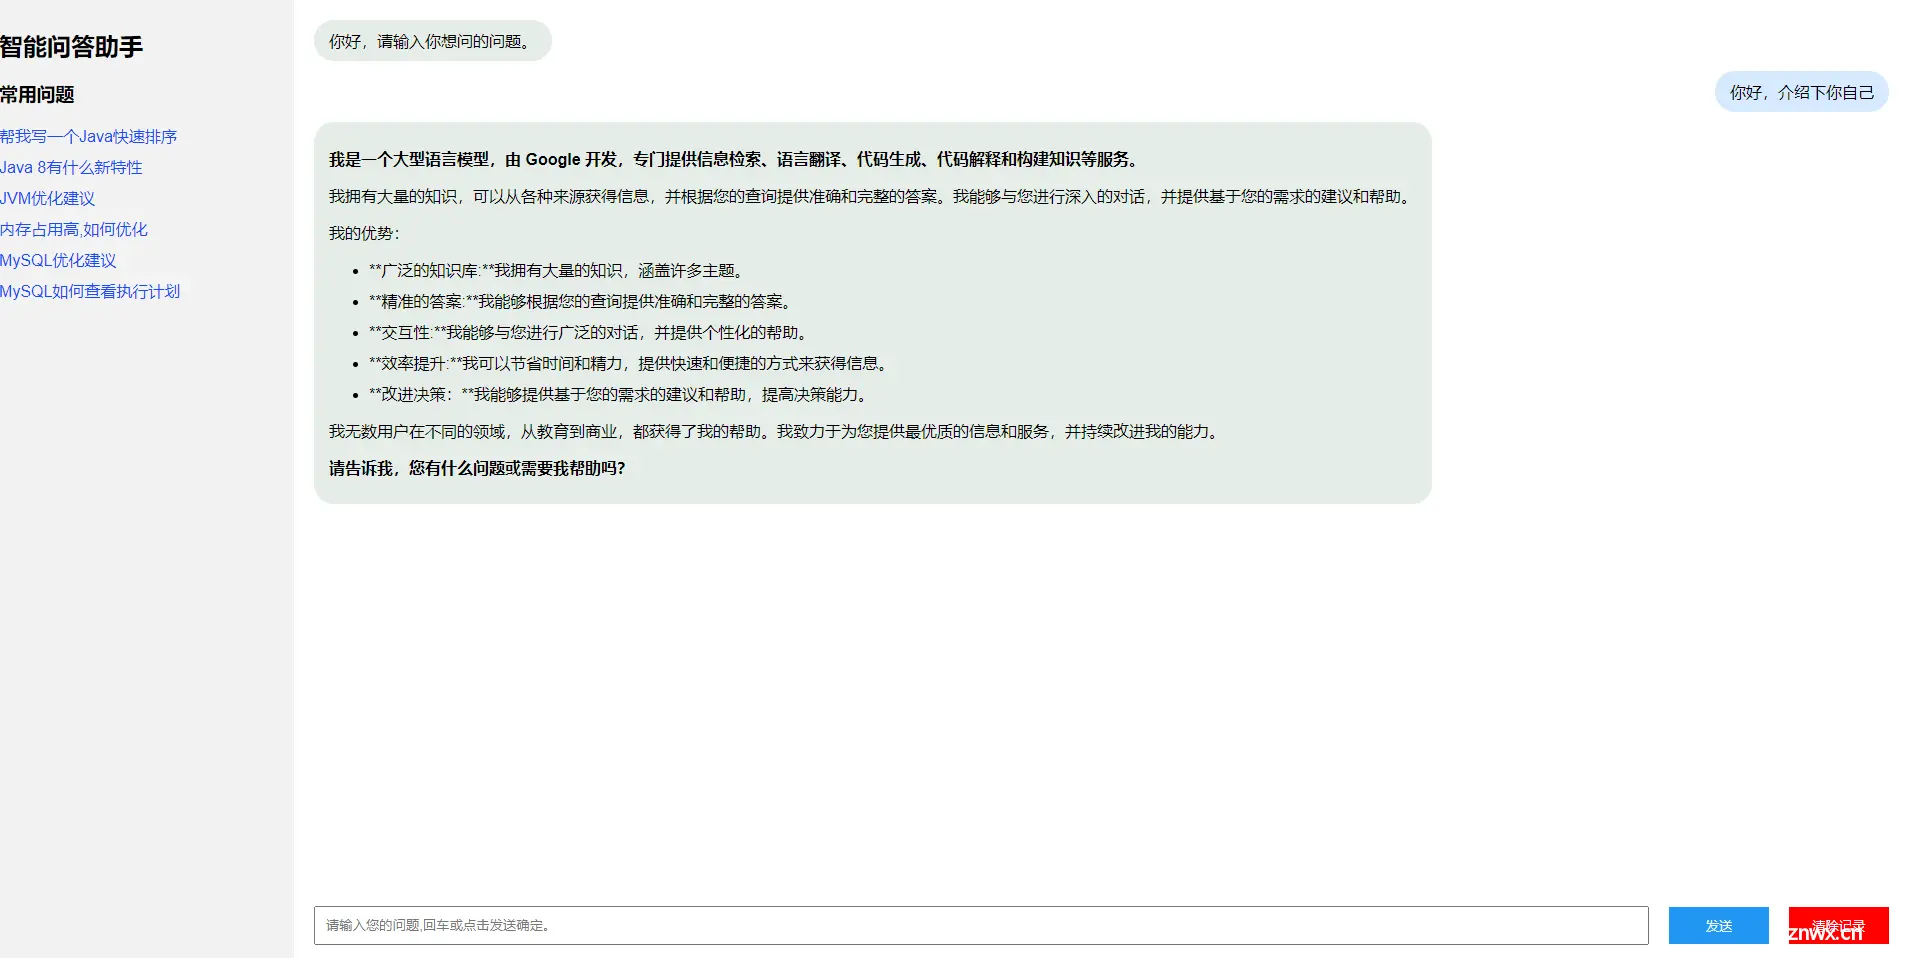
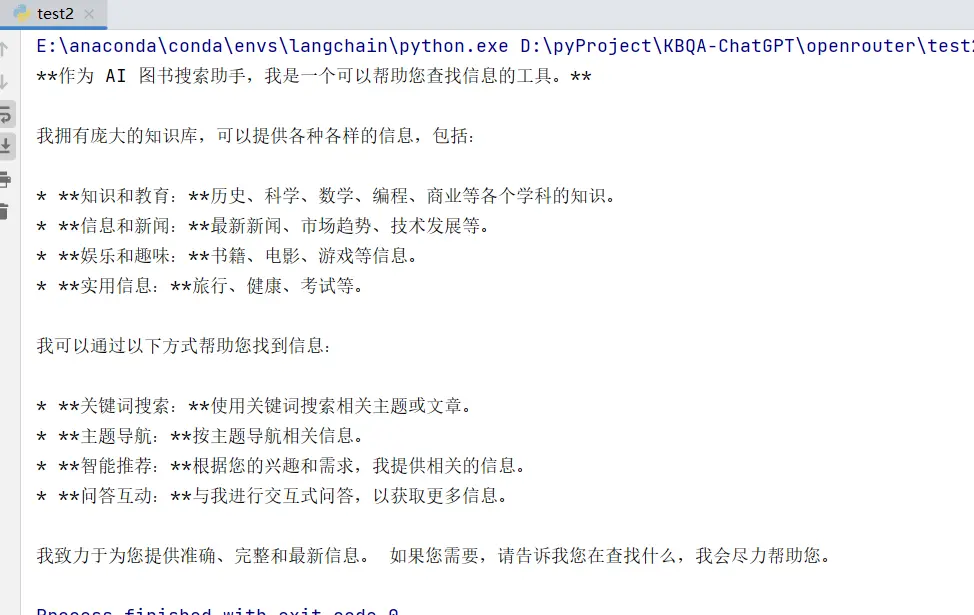
本文就基于 OpenRouter 中免费模型接口的能力,使用谷歌的 gemma-7b 模型,搭建自己的大模型助手,实现效果如下:
二、OpenRouter 使用
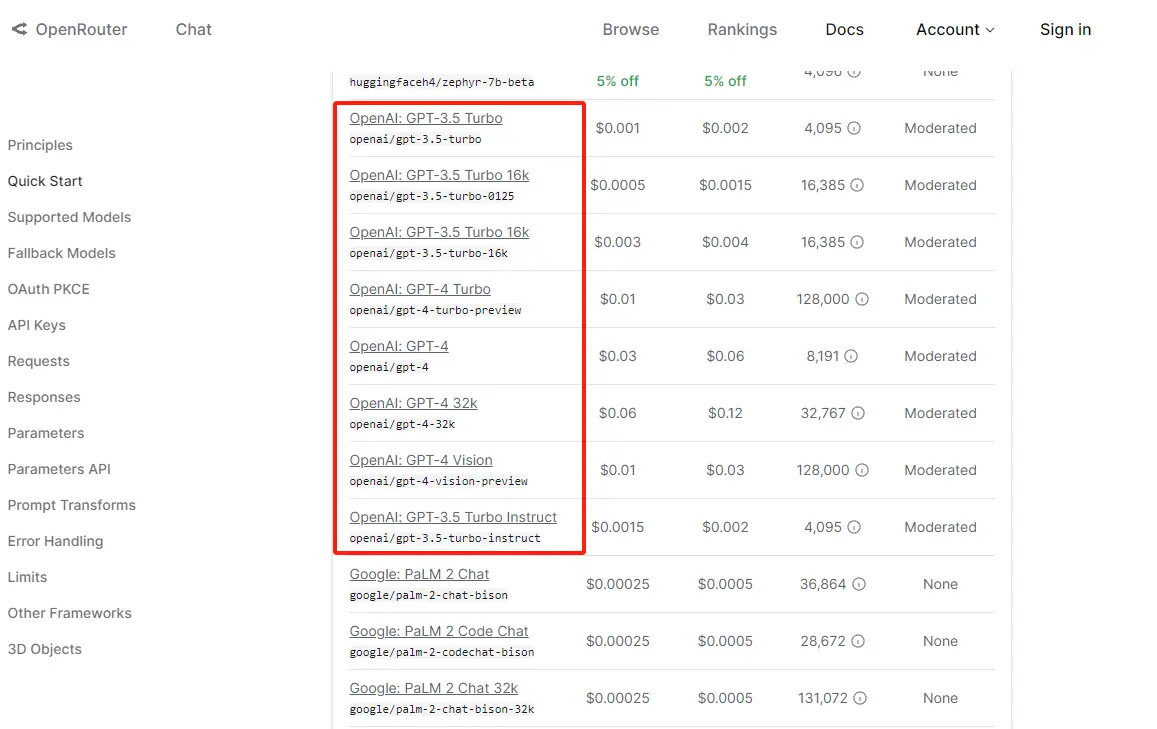
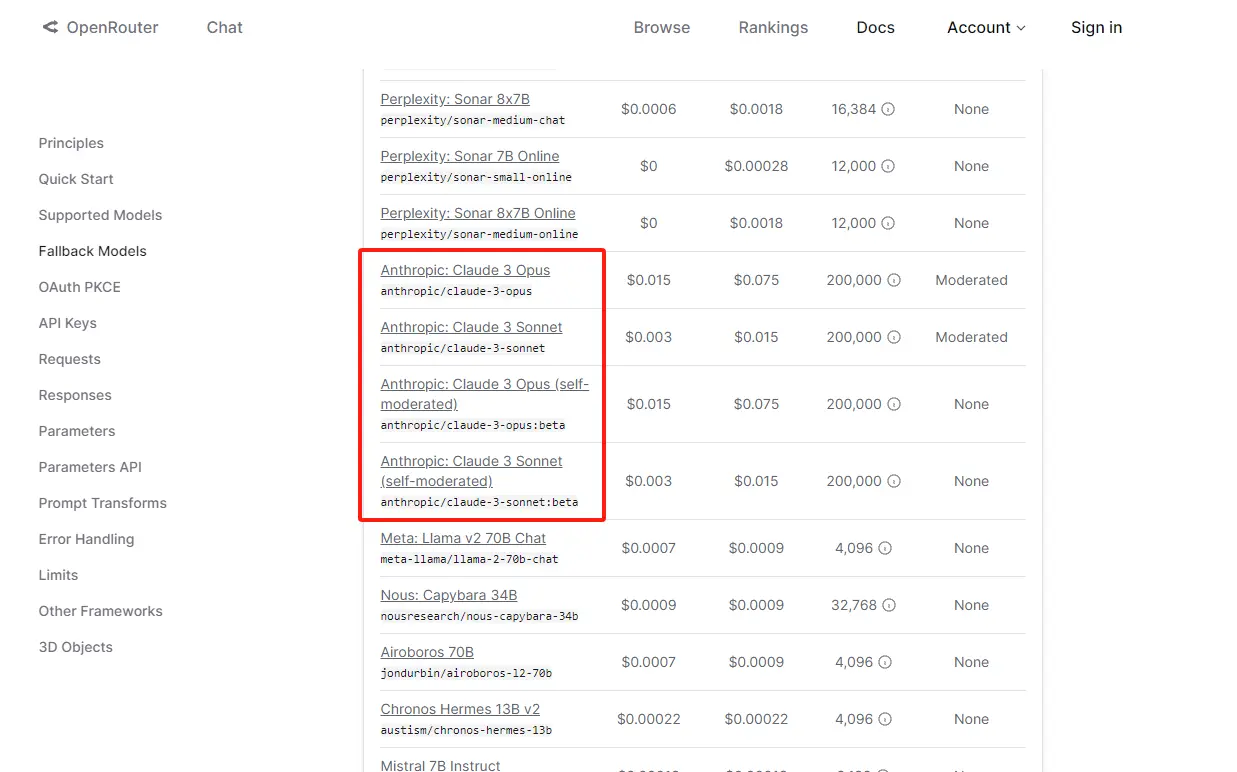
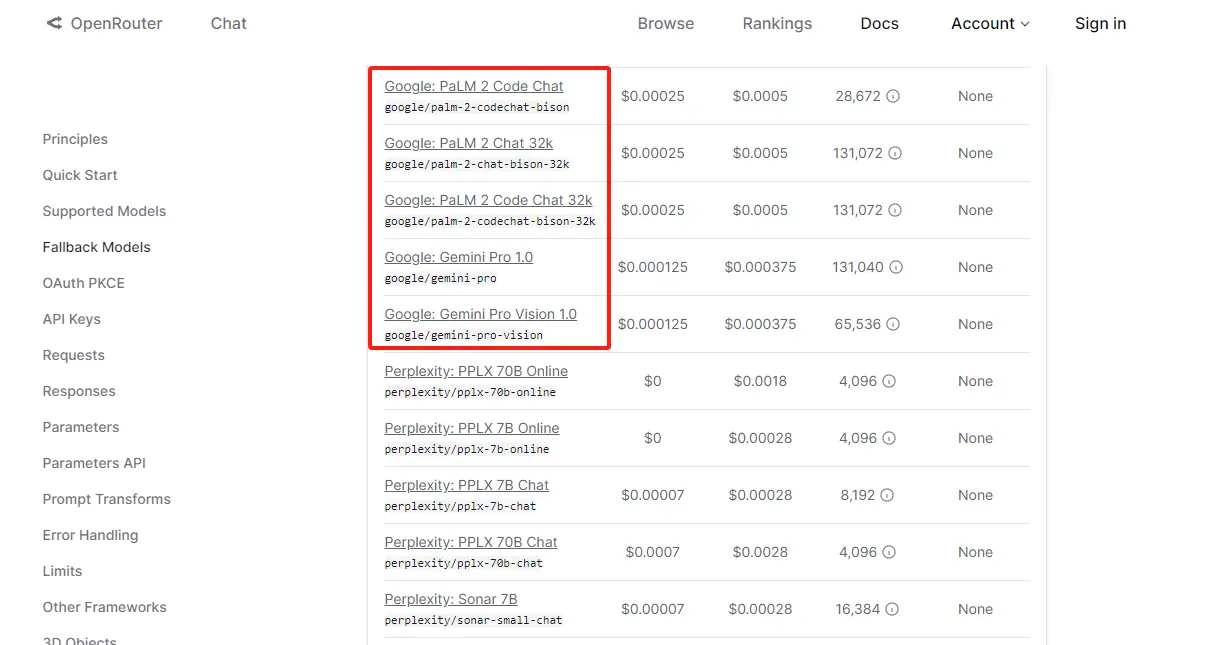
在实验前首先了解下 OpenRouter 是什么。OpenRouter 是一款整合了各类大模型的中间代理商,而且在国内无需梯子即可访问,通过 OpenRouter 可以调用超 100 种优秀的大模型,其中包括比较流行的 OpenAI 的 ChatGPT 系列(包括GPT4V),Anthropic 的 Claude 系列,谷歌的 PaLM 和 Gemini 系列等,而且更换模型仅需修改模型的名字即可,无需修改调用代码得逻辑:
官方地址如下:
https://openrouter.ai/
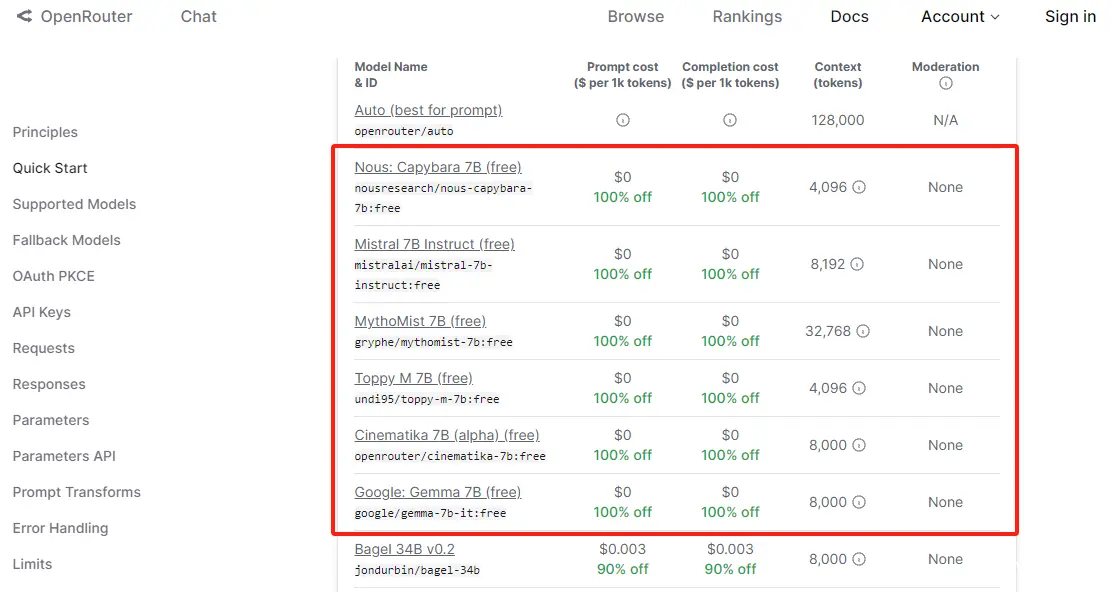
OpenRouter 没有对QQ邮箱做限制,支持 QQ 邮箱登录注册,一定程度上给国内的一些用户提供了便利,并且还免费提供了一批7B的模型,包括 nous-capybara-7b、mistral-7b-instruct、mythomist-7b、toppy-m-7b、cinematika-7b、gemma-7b-it:
因此,当我们没有 GPU 服务器的时候,又想借助开源模型搭建一套自己的大模型助手时,就可以考虑使用 OpenRouter 了,注意使用前需要先注册账号,并生成 Api key:

OpenRouter 主要以 http 的交互方式,因此几乎可以使用任何支持 http 的语言和框架去调用 ,同时也支持通过 OpenAI 的 client.chat.completions.create 方式调用:
例如:使用 Python 语言 http 的方式,调用 gemma-7b 模型:
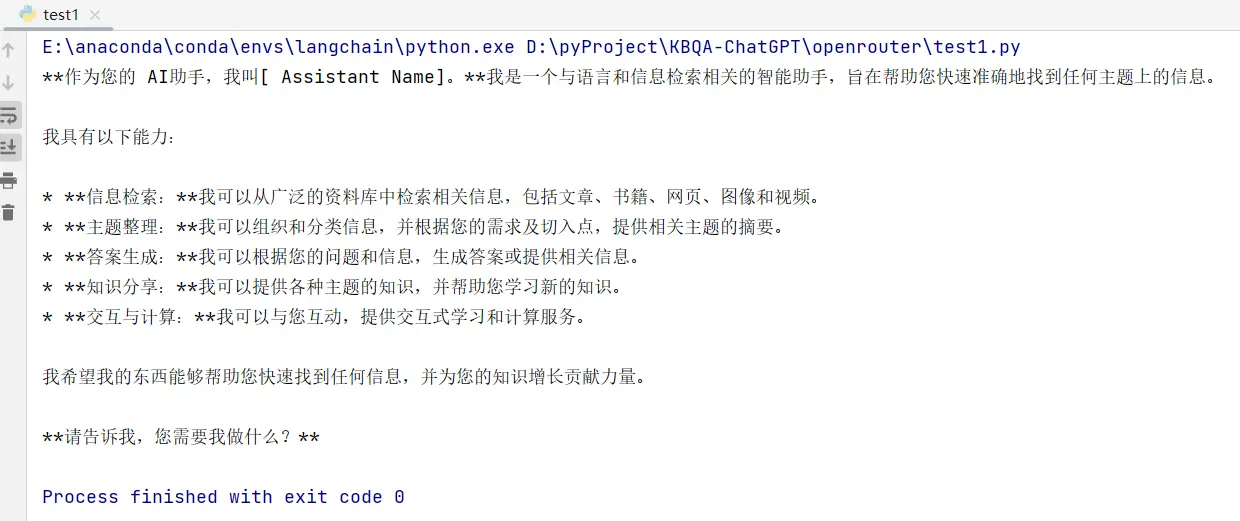
import requestsimport jsonurl = "https://openrouter.ai/api/v1/chat/completions"model = "google/gemma-7b-it:free"request_headers = { "Authorization": "Bearer 你的api_key", "HTTP-Referer": "http://localhost:8088", "X-Title": "test"}default_prompt = "You are an AI assistant that helps people find information."def llm(user_prompt,system_prompt=default_prompt): messages = [ { "role": "system", "content": system_prompt}, { "role": "user", "content": user_prompt}, ] request_json = { "model": model, "messages": messages, "max_tokens": 2048 } respose = requests.request( url=url, method="POST", json=request_json, headers=request_headers ) return json.loads(respose.content.decode('utf-8'))['choices'][0]['message']['content']if __name__ == '__main__': print(llm("你好,介绍一下你自己"))
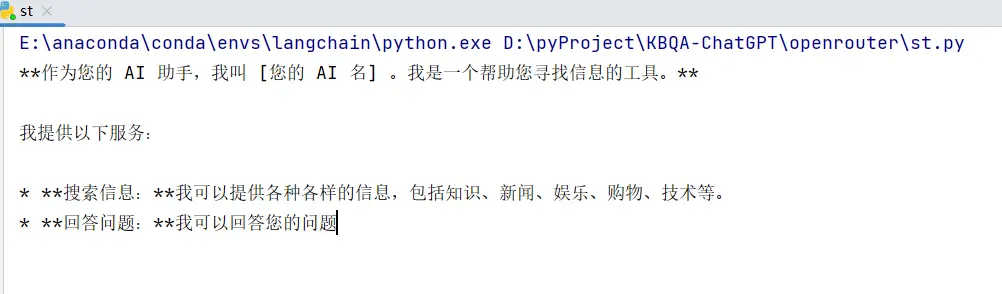
运行输出:
使用 OpenAI 的 client.chat.completions.create 方式,调用 gemma-7b 模型:
from openai import OpenAImodel = "google/gemma-7b-it:free"default_prompt = "You are an AI assistant that helps people find information."client = OpenAI( base_url="https://openrouter.ai/api/v1", api_key="你的api_key",)def llm(user_prompt, system_prompt=default_prompt): messages = [ { "role": "system", "content": system_prompt}, { "role": "user", "content": user_prompt}, ] completion = client.chat.completions.create( extra_headers={ "HTTP-Referer": "http://localhost:8088", "X-Title": "test", }, model=model, messages=messages, max_tokens = 2048 ) return completion.choices[0].message.contentif __name__ == '__main__': print(llm("你好,介绍一下你自己"))
运行输出:
流式输出示例:
from openai import OpenAImodel = "google/gemma-7b-it:free"default_prompt = "You are an AI assistant that helps people find information."client = OpenAI( base_url="https://openrouter.ai/api/v1", api_key="你的api_key",)def llm(user_prompt, system_prompt=default_prompt): messages = [ { "role": "system", "content": system_prompt}, { "role": "user", "content": user_prompt}, ] completion = client.chat.completions.create( extra_headers={ "HTTP-Referer": "http://localhost:8088", "X-Title": "test", }, model=model, messages=messages, max_tokens = 2048, stream=True ) for respose in completion: if respose and respose.choices and len(respose.choices) > 0: msg = respose.choices[0].delta.content print(msg, end='', flush=True)if __name__ == '__main__': llm("你好,介绍一下你自己")
运行输出:
三、搭建大模型助手
上面简单认识了 OpenRouter 的能力,下面基于 OpenRouter 上谷歌的 gemma-7b 模型搭建一个自己的大模型助手,简单的执行过程如下。
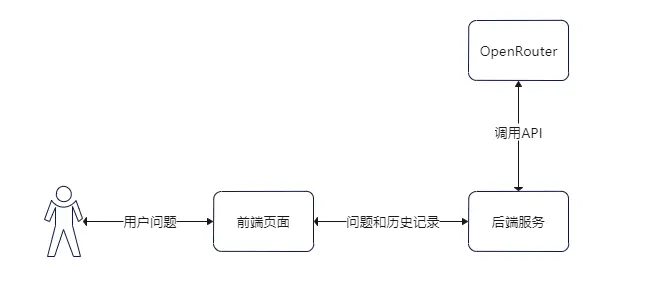
其中后端服务使用 Python + tornado 实现 Web 服务,前端使用基础的 Html + Jquery 的方式。
3.1 服务端搭建
所属依赖版本如下:
openai==0.27.8tornado==6.3.2
构建问答助手接口 server.py :
接口我们接收两个参数 questions 和 history ,其中 history 由后端维护并追加聊天记录,前端只负责临时存储,每次请求携带上一次请求返回的 history 即可,调用 OpenRouter 使用 OpenAI 库的方式。
整体实现逻辑如下:
from tornado.concurrent import run_on_executorfrom tornado.web import RequestHandlerimport tornado.genfrom openai import OpenAIimport jsonclass Assistant(RequestHandler): model = "google/gemma-7b-it:free" client = OpenAI( base_url="https://openrouter.ai/api/v1", api_key="你的api_key", ) default_prompt = "You are an AI assistant that helps people find information." def prepare(self): self.executor = self.application.pool def set_default_headers(self): self.set_header('Access-Control-Allow-Origin', "*") self.set_header('Access-Control-Allow-Headers', "Origin, X-Requested-With, Content-Type, Accept") self.set_header('Access-Control-Allow-Methods', "GET, POST, PUT, DELETE, OPTIONS") @tornado.gen.coroutine def post(self): json_data = json.loads(self.request.body) if 'questions' not in json_data or 'history' not in json_data: self.write({ "code": 400, "message": "缺少必填参数" }) return questions = json_data['questions'] history = json_data['history'] result = yield self.do_handler(questions, history) self.write(result) @run_on_executor def do_handler(self, questions, history): try: answer, history = self.llm(questions, history) return { "code": 200, "message": "success", "answer": answer, "history": history } except Exception as e: return { "code": 400, "message": str(e) } def llm(self, user_prompt, messages, system_prompt=default_prompt): if not messages: messages = [] messages.append({ "role": "user", "content": user_prompt}) completion = self.client.chat.completions.create( extra_headers={ "HTTP-Referer": "http://localhost:8088", "X-Title": "test", }, model=self.model, messages=messages, max_tokens=2048 ) answer = completion.choices[0].message.content messages.append({ "role": "assistant", "content": answer}) return answer, messages
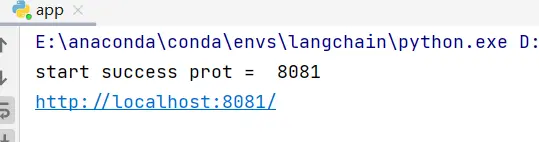
路由配置,并启动服务 app.py :
import tornado.webimport tornado.ioloopimport tornado.httpserverimport osfrom concurrent.futures.thread import ThreadPoolExecutorfrom server import Assistant## 配置class Config(): port = 8081 base_path = os.path.dirname(__file__) settings = { # "debug":True, # "autore load":True, "static_path": os.path.join(base_path, "resources/static"), "template_path": os.path.join(base_path, "resources/templates"), "autoescape": None }# 路由class Application(tornado.web.Application): def __init__(self): handlers = [ ("/assistant", Assistant), ("/(.*)$", tornado.web.StaticFileHandler, { "path": os.path.join(Config.base_path, "resources/static"), "default_filename": "index.html" }) ] super(Application, self).__init__(handlers, **Config.settings) self.pool = ThreadPoolExecutor(10)if __name__ == '__main__': app = Application() httpserver = tornado.httpserver.HTTPServer(app) httpserver.listen(Config.port) print("start success", "prot = ", Config.port) print("http://localhost:" + str(Config.port) + "/") tornado.ioloop.IOLoop.current().start()
下面可以使用 Postman 进行测试:
请求内容:
{ "questions":"你好,介绍下你自己","history":[]}
输出示例:
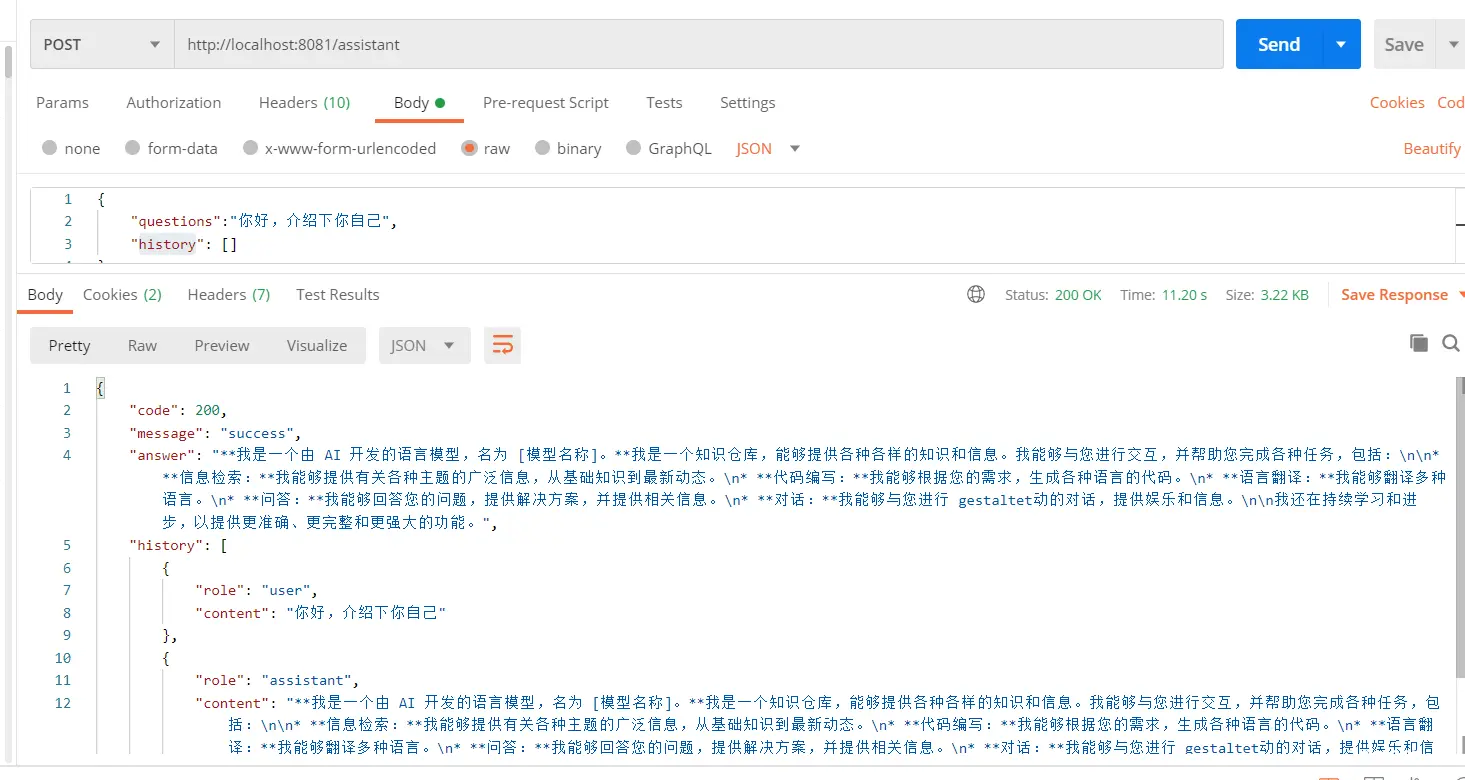
从结果看接口访问正常,下面开始前端的搭建。
3.2 前端搭建
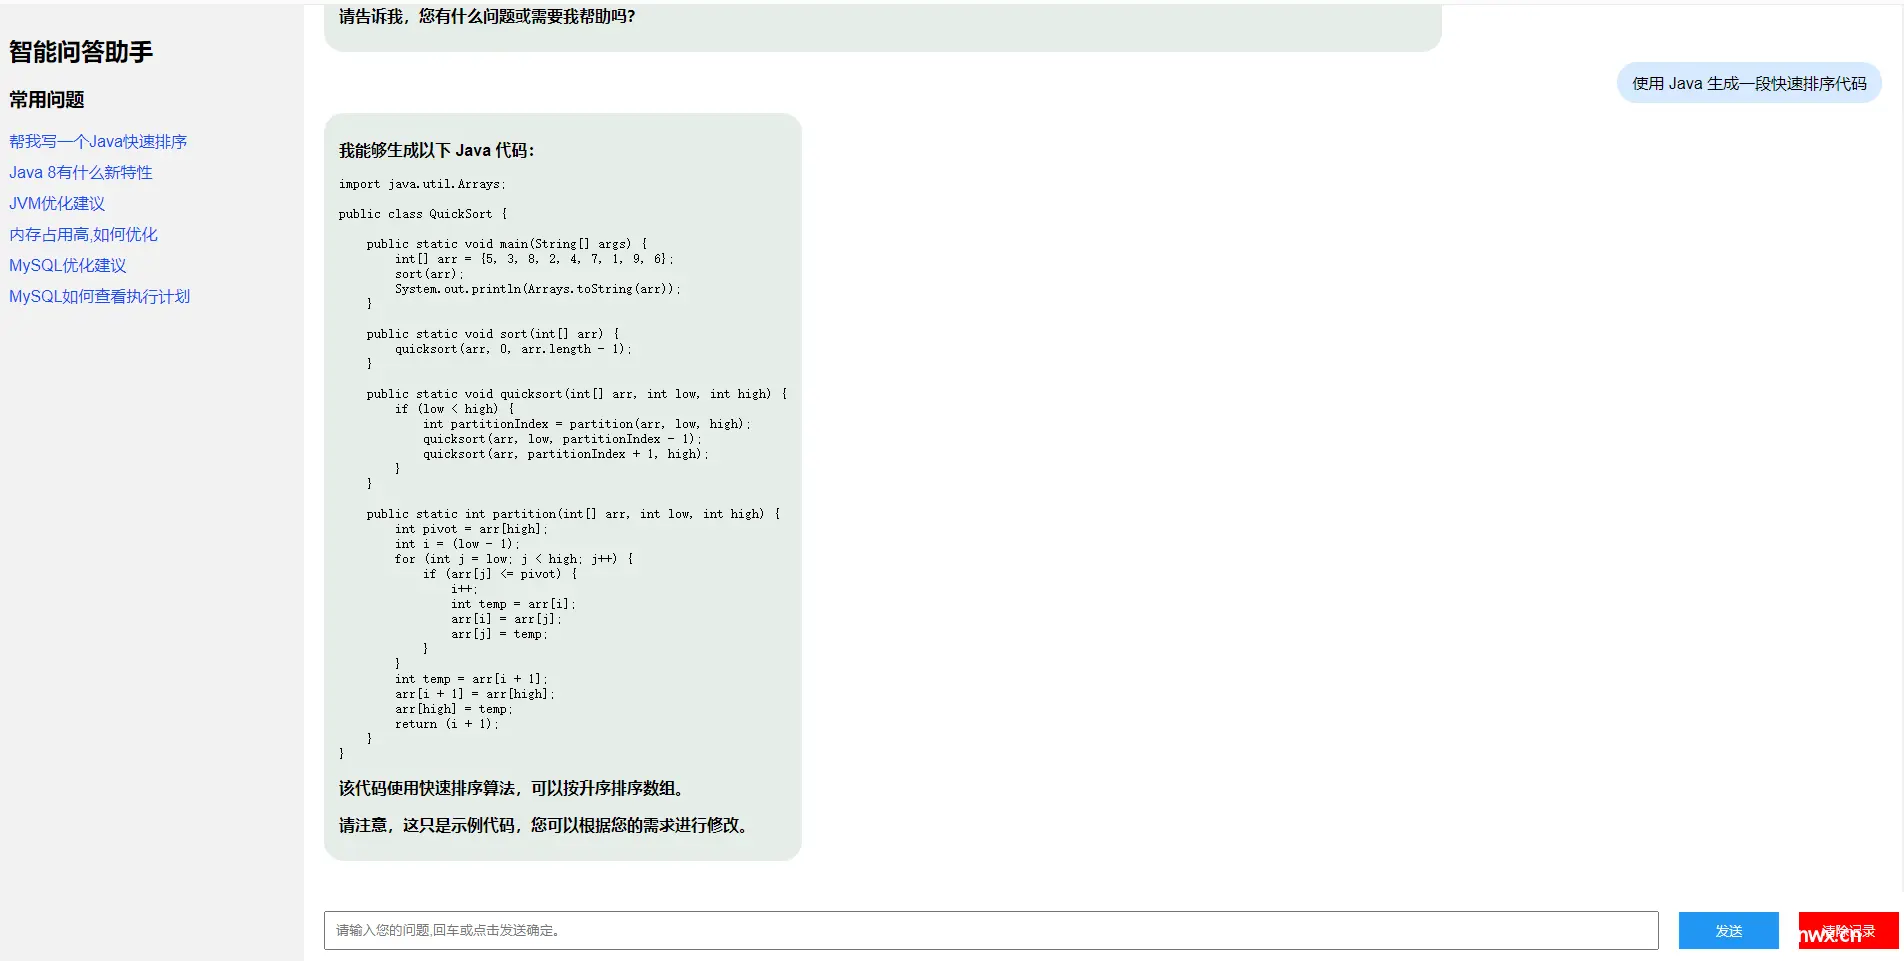
前端需要构建一个问答聊天界面,需要注意的是,模型返回的内容可能是 MD 格式,前端需要解析成html 格式展示,整体实现过程如下:
<!DOCTYPE html><html><head> <meta charset="UTF-8"> <title>AI 聊天对话</title> <style> body { font-family: Arial, sans-serif; margin: 0; padding: 0; } .container { display: flex; height: 100vh; } .left-panel { flex: 15%; background-color: #f2f2f2; padding: 10px; } .right-panel { flex: 85%; background-color: #ffffff; display: flex; flex-direction: column; } .chat-log { flex: 1; overflow-y: auto; padding: 20px; } .chat-bubble { display: flex; align-items: center; margin-bottom: 10px; } .user-bubble { justify-content: flex-end; } .bubble-content { padding: 10px 15px; border-radius: 20px; } .user-bubble .bubble-content { background-color: #d6eaff; color: #000000; } .ai-bubble .bubble-content { background-color: #e5ece7; color: #000; } .input-area { display: flex; align-items: center; padding: 20px; } .input-text { flex: 1; padding: 10px; margin-right: 10px; } .submit-button { padding: 10px 20px; background-color: #2196f3; color: #ffffff; border: none; cursor: pointer; } li { margin-top: 10px; } a { text-decoration: none; } table { border: 1px solid #000; border-collapse: collapse; } table td, table th { border: 1px solid #000; } table td, table th { padding: 10px; } .language-sql { width: 95%; background-color: #F6F6F6; padding: 10px; font-weight: bold; border-radius: 5px; word-wrap: break-word; white-space: pre-line; /* overflow-wrap: break-word; */ display: block; } select { width: 100%; height: 30px; border: 2px solid #6089a4; font-size: 15px; margin-top: 5px; } .recommendation{ color: #1c4cf3; margin-top: 10px; } </style></head><body><div class="container"> <div class="left-panel"> <h2>智能问答助手</h2> <h3>常用问题</h3> <div class="recommendation">帮我写一个Java快速排序</div> <div class="recommendation">Java 8有什么新特性</div> <div class="recommendation">JVM优化建议</div> <div class="recommendation">内存占用高,如何优化</div> <div class="recommendation">MySQL优化建议</div> <div class="recommendation">MySQL如何查看执行计划</div> </div> <div class="right-panel"> <div class="chat-log" id="chat-log"> </div> <div class="input-area"> <input type="text" id="user-input" class="input-text" placeholder="请输入您的问题,回车或点击发送确定。"> <button id="submit" style="margin-left: 10px;width: 100px" onclick="sendMessage()" class="submit-button"> 发送 </button> <button style="margin-left: 20px;width: 100px;background-color: red" onclick="clearChat()" class="submit-button">清除记录 </button> </div> </div></div><script type="text/javascript" src="http://code.jquery.com/jquery-3.7.0.min.js"></script><script src="https://cdn.jsdelivr.net/npm/marked/marked.min.js"></script><script> // 聊天历史记录 var messageHistory = []; // 添加AI信息 function addAIMessage(message) { $("#chat-log").append( "<div class=\"chat-bubble ai-bubble\">\n" + " <div class=\"bubble-content\">" + message + "</div>\n" + "</div>" ) } // 添加人类信息 function addUserMessage(message) { $("#chat-log").append( "<div class=\"chat-bubble user-bubble\">\n" + " <div class=\"bubble-content\">" + message + "</div>\n" + "</div>" ) } // 滑动到底部 function slideBottom() { let chatlog = document.getElementById("chat-log"); chatlog.scrollTop = chatlog.scrollHeight; } // 调用api function chatApi(message) { slideBottom(); data = { questions: message, history: messageHistory }; $.ajax({ url: "http://127.0.0.1:8081/assistant", type: "POST", contentType: "application/json", dataType: "json", data: JSON.stringify(data), success: function (res) { if (res.code === 200) { let answer = res.answer; answer = marked.parse(answer); addAIMessage(answer); messageHistory = res.history; } else { addAIMessage("服务接口调用错误。"); } }, error: function (e) { addAIMessage("服务接口调用异常。"); } }); } // 发送消息 function sendMessage() { let userInput = $('#user-input'); let userMessage = userInput.val(); if (userMessage.trim() === '') { return; } userInput.val(""); addUserMessage(userMessage); chatApi(userMessage); } // 清空聊天记录 function clearChat() { $("#chat-log").empty(); messageHistory = []; addAIMessage("你好,请输入你想问的问题。"); } // 初始化 function init() { addAIMessage("你好,请输入你想问的问题。"); var submit = $("#submit"); var userInput = $("#user-input"); var focus = false; // 监听输入框焦点 userInput.focus(function () { focus = true; }).blur(function () { focus = false; }); // 回车监听事件 document.addEventListener("keydown", function (event) { if (event.keyCode === 13) { console.log(focus); if (focus) { submit.click(); } } }); } init();</script></body></html>
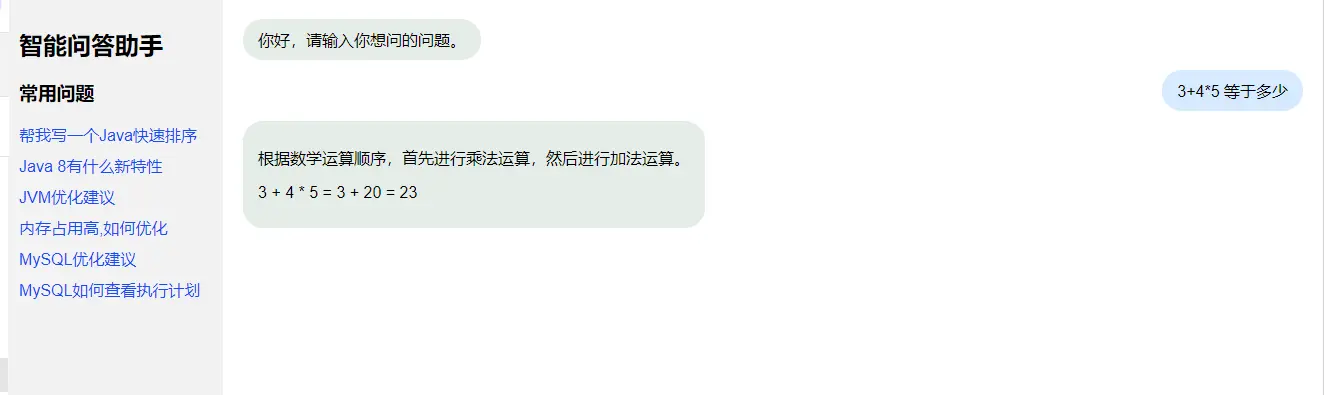
运行效果:
到此,我们自己的大模型助手就基本做好了!
声明
本文内容仅代表作者观点,或转载于其他网站,本站不以此文作为商业用途
如有涉及侵权,请联系本站进行删除
转载本站原创文章,请注明来源及作者。