使用Ollama和OpenWebUI,轻松探索Meta Llama3–8B
python慕遥 2024-08-19 16:03:03 阅读 92
大家好,2024年4月,Meta公司开源了Llama 3 AI模型,迅速在AI社区引起轰动。紧接着,Ollama工具宣布支持Llama 3,为本地部署大型模型提供了极大的便利。
本文将介绍如何利用Ollama工具,实现Llama 3–8B模型的本地部署与应用,以及通过Open WebUI进行模型交互的方法。
1.安装Ollama
使用“curl | sh”,可以一键下载并安装到本地:
<code>$curl -fsSL https://ollama.com/install.sh | sh
>>> Downloading ollama...
######################################################################## 100.0%
>>> Installing ollama to /usr/local/bin...
>>> Creating ollama user...
>>> Adding ollama user to video group...
>>> Adding current user to ollama group...
>>> Creating ollama systemd service...
>>> Enabling and starting ollama service...
Created symlink from /etc/systemd/system/default.target.wants/ollama.service to /etc/systemd/system/ollama.service.
>>> The Ollama API is now available at 127.0.0.1:11434.
>>> Install complete. Run "ollama" from the command line.
WARNING: No NVIDIA/AMD GPU detected. Ollama will run in CPU-only mode.
可以看到,下载后Ollama启动了一个ollama系统服务。这项服务是Ollama的核心API服务,并且它驻留在内存中。通过systemctl确认服务的运行状态:
$systemctl status ollama
● ollama.service - Ollama Service
Loaded: loaded (/etc/systemd/system/ollama.service; enabled; vendor preset: disabled)
Active: active (running) since 一 2024-04-22 17:51:18 CST; 11h ago
Main PID: 9576 (ollama)
Tasks: 22
Memory: 463.5M
CGroup: /system.slice/ollama.service
└─9576 /usr/local/bin/ollama serve
另外,这里对Ollama的systemd单元文件做了一些修改。修改了Environment的值,并添加了“OLLAMA_HOST=0.0.0.0”,以便在容器中运行的OpenWebUI能够访问Ollama API服务:
# cat /etc/systemd/system/ollama.service
[Unit]
Description=Ollama Service
After=network-online.target
[Service]
ExecStart=/usr/local/bin/ollama serve
User=ollama
Group=ollama
Restart=always
RestartSec=3
Environment="PATH=/root/.cargo/bin:/usr/local/cmake/bin:/usr/local/bin:.:/root/.bin/go1.21.4/bin:/root/go/bin:/usr/local/sbin:/usr/local/bin:/usr/sbin:/usr/bin:/root/bin" "OLLAMA_HOST=0.0.0.0"code>
[Install]
WantedBy=default.target
修改后,执行以下命令使其生效:
$systemctl daemon-reload
$systemctl restart ollama
2.下载并运行大模型
Ollama支持一键下载和运行模型。
这里用的是一台16/32GB的云虚拟机,但没有GPU。所以使用的是经过聊天/对话微调的Llama3-8B指令模型。只需使用以下命令快速下载并运行模型(4位量化):
$ollama run llama3
pulling manifest
pulling 00e1317cbf74... 0% ▕ ▏ 0 B/4.7 GB
pulling 00e1317cbf74... 7% ▕█ ▏ 331 MB/4.7 GB 34 MB/s 2m3s^C
pulling manifest
pulling manifest
pulling manifest
pulling manifest
pulling 00e1317cbf74... 61% ▕█████████ ▏ 2.8 GB/4.7 GB 21 MB/s 1m23s^C
... ...
下载和执行成功后,命令行将等待你的问题输入。我们可以随意输入一个关于Go的问题。以下是输出结果:
$ollama run llama3
>>> could you tell me something about golang language?
Go!
Here are some interesting facts and features about the Go programming language:
**What is Go?**
Go, also known as Golang, is a statically typed, compiled, and designed to be concurrent and garbage-collected language. It
was developed by Google in 2009.
**Key Features:**
1. **Concurrency**: Go has built-in concurrency support through goroutines (lightweight threads) and channels (communication
mechanisms). This makes it easy to write concurrent programs.
2. **Garbage Collection**: Go has a automatic garbage collector, which frees developers from worrying about memory
management.
3. **Static Typing**: Go is statically typed, meaning that the type system checks the types of variables at compile time,
preventing type-related errors at runtime.
4. **Simple Syntax**: Go's syntax is designed to be simple and easy to read. It has a minimalistic approach to programming
language design.
... ...
推理速度大约是每秒5到6个token,这个速度是可以接受的,但这个过程对CPU资源的消耗相当大:

除了可以通过命令行与Ollama API服务交互外,还可以使用Ollama的RESTful API:
<code>$curl http://localhost:11434/api/generate -d '{
> "model": "llama3",
> "prompt":"Why is the sky blue?"
> }'
{"model":"llama3","created_at":"2024-04-22T07:02:36.394785618Z","response":"The","done":false}
{"model":"llama3","created_at":"2024-04-22T07:02:36.564938841Z","response":" color","done":false}
{"model":"llama3","created_at":"2024-04-22T07:02:36.745215652Z","response":" of","done":false}
{"model":"llama3","created_at":"2024-04-22T07:02:36.926111842Z","response":" the","done":false}
{"model":"llama3","created_at":"2024-04-22T07:02:37.107460031Z","response":" sky","done":false}
{"model":"llama3","created_at":"2024-04-22T07:02:37.287201658Z","response":" can","done":false}
{"model":"llama3","created_at":"2024-04-22T07:02:37.468517901Z","response":" vary","done":false}
{"model":"llama3","created_at":"2024-04-22T07:02:37.649011829Z","response":" depending","done":false}
{"model":"llama3","created_at":"2024-04-22T07:02:37.789353456Z","response":" on","done":false}
{"model":"llama3","created_at":"2024-04-22T07:02:37.969236546Z","response":" the","done":false}
{"model":"llama3","created_at":"2024-04-22T07:02:38.15172159Z","response":" time","done":false}
{"model":"llama3","created_at":"2024-04-22T07:02:38.333323271Z","response":" of","done":false}
{"model":"llama3","created_at":"2024-04-22T07:02:38.514564929Z","response":" day","done":false}
{"model":"llama3","created_at":"2024-04-22T07:02:38.693824676Z","response":",","done":false}
... ...
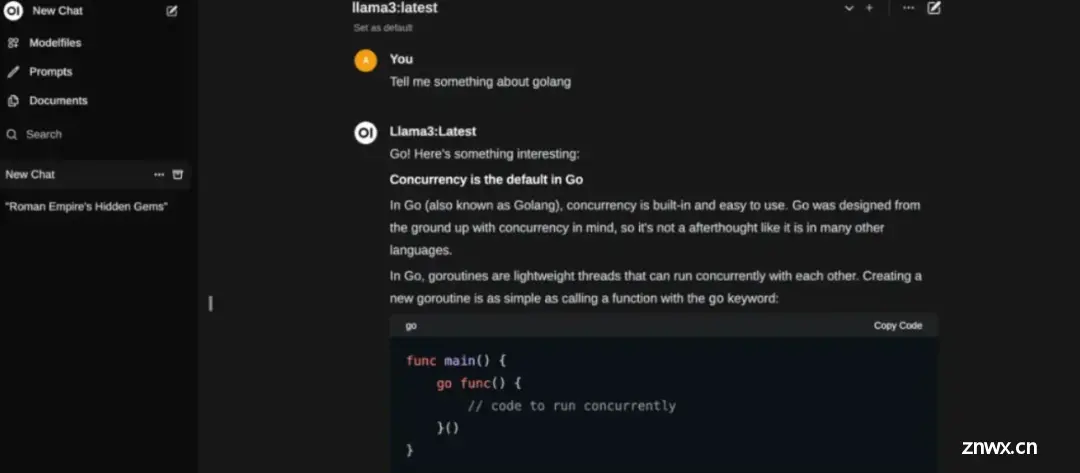
此外,可以在日常生活中使用大型模型的方式还有通过Web UI进行交互,有许多Web和桌面项目支持Ollama API。在这里选择了Open WebUI,它是从Ollama WebUI发展而来的。
3.使用Open WebUI与大模型交互
体验Open WebUI最快的方式当然是使用容器安装,但是官方镜像站点ghcr.io/open-webui/open-webui:main下载速度太慢,这里在Docker Hub上找到了一个个人镜像。以下是在本地安装Open WebUI的命令:
$docker run -d -p 13000:8080 --add-host=host.docker.internal:host-gateway -v open-webui:/app/backend/data -e OLLAMA_BASE_URL=http://host.docker.internal:11434 --name open-webui --restart always dyrnq/open-webui:main
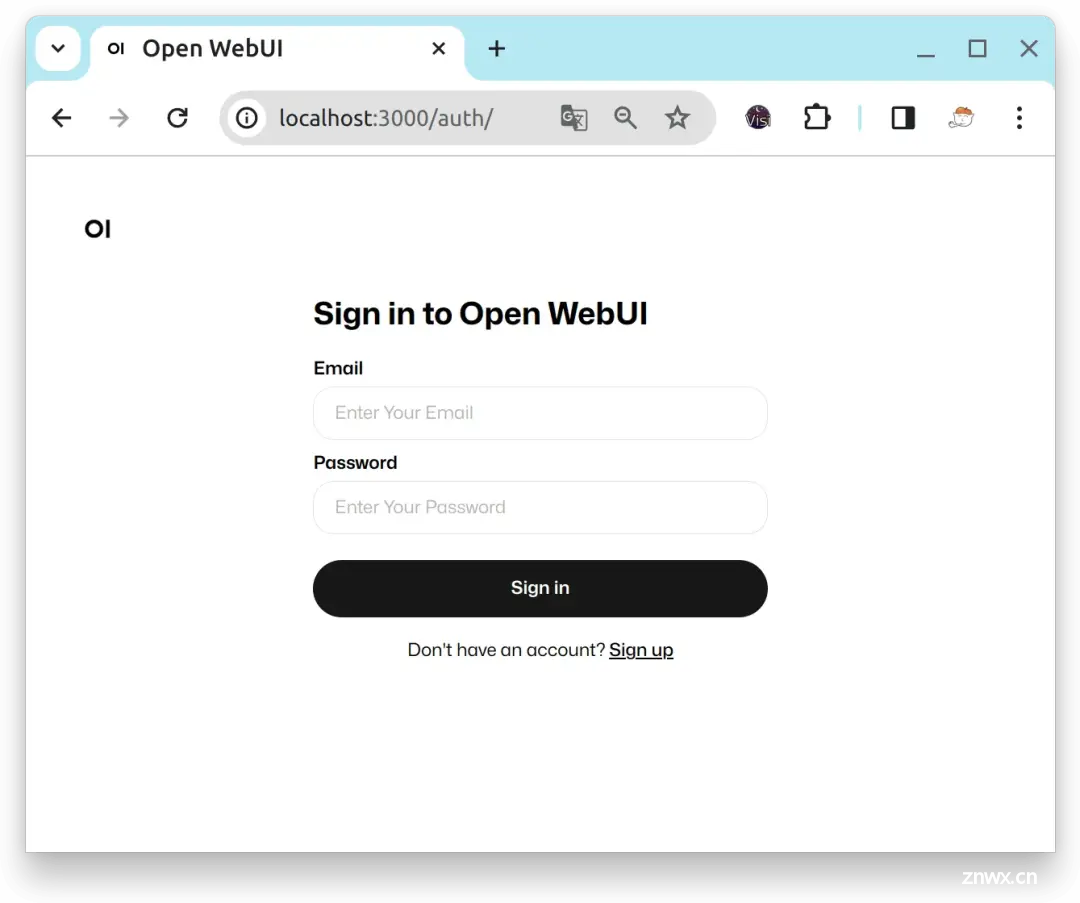
容器启动后,通过访问主机上的13000端口来打开Open WebUI页面:

Open WebUI会把第一个注册的用户视为管理员用户。注册并登录后,进入首页,在选择模型后,可以输入问题并与由Ollama部署的Llama3模型进行对话:

上一篇: Error in v-on handler: “TypeError: Cannot read properties of undefined (reading ‘apply‘)“ found in
下一篇: 【学一点儿前端】本地或jenkins打包报错:getaddrinfo ENOTFOUND registry.nlark.com.
本文标签
声明
本文内容仅代表作者观点,或转载于其他网站,本站不以此文作为商业用途
如有涉及侵权,请联系本站进行删除
转载本站原创文章,请注明来源及作者。