前端vue3打印,多页打印,不使用插件(工作中让我写一个打印功能)
实名上网张瀚文 2024-10-02 13:33:04 阅读 75
说下总体思路,创建一个组件,里面放多个span字段,然后根据父组件传入的参数,生成子组件,最好我们打印子组件的信息即可。通过我多次ai,探索最后成功了。
子组件代码
@media print 这个我要讲一下,这是控制在打印界面,打印的参数,这是css中的知识,我一开始不晓得,慢慢问ai和网上查资料晓得的。
<code><template>
<div id="printable-area">code>
<div v-for="(item, index) in printData" :key="index" class="print-item">code>
<div class="centered-content" style="font-size: 40px; margin-top: 55px">code>
图号:<span style="border-bottom: 1px solid black; display: inline-block; width: 300px;">{ { item.figureNumber }}</span><br>code>
名称:<span style="border-bottom: 1px solid black; display: inline-block; width: 300px;">{ { item.name }}</span><br>code>
编号:<span style="border-bottom: 1px solid black; display: inline-block; width: 300px; ">{ { item.number }}</span><br>code>
研制阶段:<span style="border-bottom: 1px solid black; display: inline-block; width: 300px; ">{ { item.developmentPhase }}</span><br>code>
出厂时间:<span style="border-bottom: 1px solid black; display: inline-block; width: 300px; ">{ { item.factoryTime }}</span><br>code>
</div>
<br>
<div v-if="index < printData.length - 1" class="page-break"></div>code>
</div>
</div>
</template>
<script>
import {defineComponent} from 'vue';
export default defineComponent({
props: {
queryParam: Array
},
setup(props) {
const printData = props.queryParam;
return { printData };
}
});
</script>
<style>
@media print {
body {
background: none !important;
text-align: center; /* 让 body 内容居中 */
}
@page {
size: 15cm 12cm; /* 设置纸张大小为A4 */
margin:0; /* 设置页边距 */
}
.noprint {
display: none;
}
body {
background: none !important;
}
.page-break {
page-break-before: always;
}
}
</style>
父组件
这是element 抽屉,我是为了看参数有没有传入进去,用来测试的。我是通过一个按钮,来实现对子组件传参,把参数传给子组件。
<div id="printArea">code>
<el-drawer v-model="drawer" title="I am the title" :with-header="false">code>
<Print ref="printComponent" :query-param="printData"></Print>code>
</el-drawer>
</div>
<el-button type="success" plain @click="print">打印</el-button>code>
这里也很关键,中间我遇到一个问题,那就是经常第一次点击按钮,dom元素没有加载完,就弹出打印框了,所以我加了一个异步事件,还有记得把抽屉关了。
//这里获取后端参数
state.drawer = true
// 使用nextTick确保DOM更新后执行
nextTick(() => {
const printableElement = document.querySelectorAll('.print-item');
console.log(printableElement);
func.getPrint()
// 确保在抽屉隐藏之前获取到元素
state.drawer = false;
});
func.getPrint() 就是我打印功能实际实现,为什么我这里是func,因为公司把所有方法都放在fun里面,节约了导出,免得一个个导出。我们要用直接点就行了。
中间注释的,是windo打印的方法,但是不晓得为啥子,关于打印的分页功能没有实现,我其实很迷惑。
但是使用这个popupWin就成功了。
讲一下大概思路,因为我前端写了比较少,所以理解这些还是花了一点点时间。
querySelectorAll 因为我们组件有class名字,根据class名字获取 了nodelist,一个元素数组。其实每个元素数组中就是前端的信息。
对了千万不要使用querySelectorOne,我ai生成的时候,发现为什么只打印了一个信息,一开始我以为是我分页没有生效,其实是我只获取了一个node。
const printableHTML = Array.from(printableElement).map(el => {
return el.outerHTML;
}).join('');
这是获取子组件的html元素,因为node节点,里面要通过outerHTML才能获取,反正里面也有很多方法,可以看看,我有点记不到了。
后面的思路就简单,开一个新窗口,然后把你从子节点获取的html元素放到这个窗口中,然后打印这个窗口,最后实现。
getPrint:()=>{
const printableElement = document.querySelectorAll('.print-item');
console.log(printableElement);
// 将 NodeList 转换为字符串,并添加分页符
// const printableHTML = Array.from(printableElement).map(el => {
// return `<div style="page-break-after: always;">${el.outerHTML}</div>`;code>
// }).join('');
const printableHTML = Array.from(printableElement).map(el => {
return el.outerHTML;
}).join('');
// console.log(printableHTML)
// let bodyHtml = document.body.innerHTML //获取整个页面内容
// document.body.innerHTML = printableHTML
// window.print() //打印
// document.body.innerHTML = bodyHtml//还原页面内容
// location.reload()
const popupWin = window.open('', '_blank', 'width=700,height=1000,scrollbars=no,menubar=no,toolbar=no,location=no,status=no,titlebar=no');
popupWin.document.write(`
<html>
<head>
<title>Print tab</title>
<style>
body {
background: none !important;
text-align: center; /* 让 body 内容居中 */
}
@media print {
.noprint {
display: none;
}
@page {
size: 18cm 15cm; /* 设置纸张大小为A4 */
margin:0; /* 设置页边距 */
}
.noprint {
display: none;
}
.page-break {
page-break-before: always;
}
}
</style>
</head>
<body>
${printableHTML}
</body>
</html>
`);
popupWin.document.close();
popupWin.focus();
popupWin.print();
popupWin.close();
},
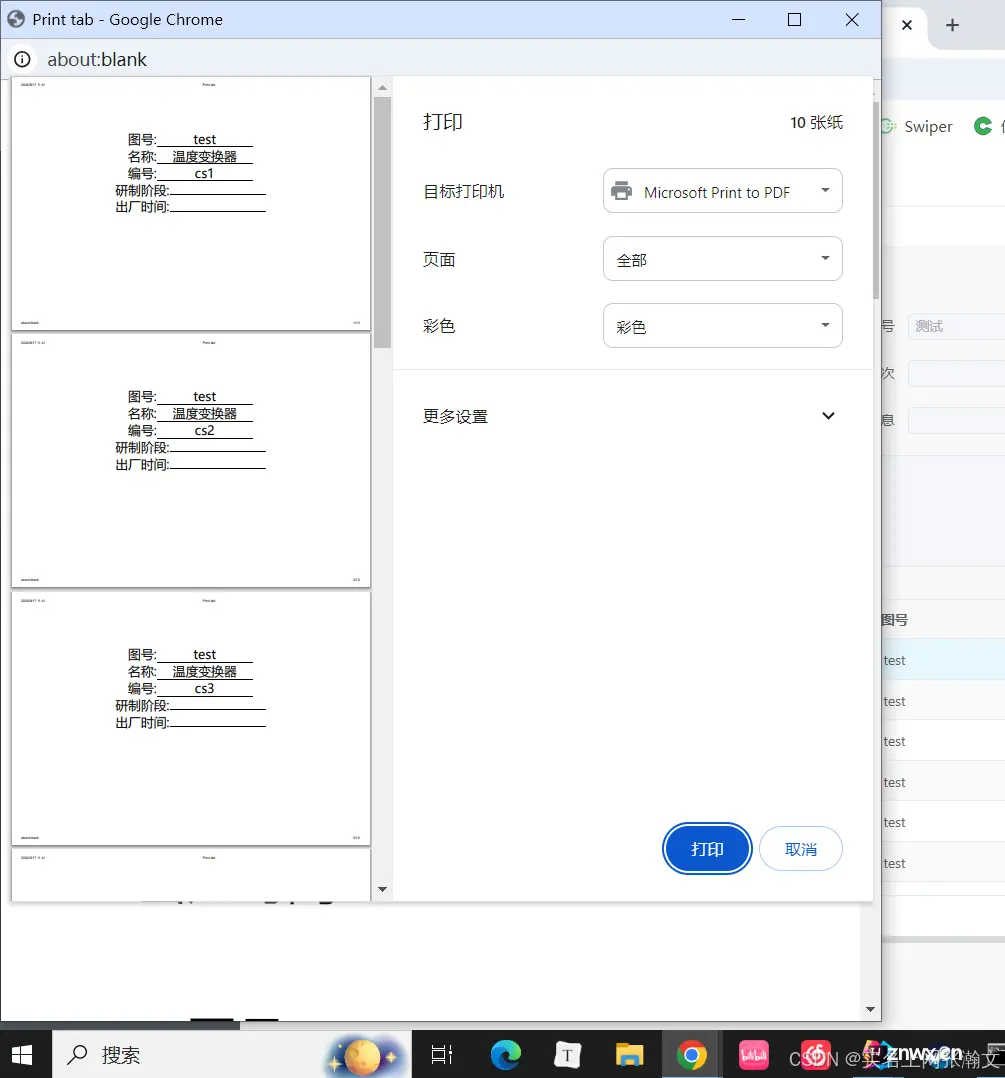
最后我给大家放下效果图,还有多多点赞,我为了完成这个功能,网上看了博客,都没找到。
虽然最好我是通过ai加上自己人脑慢慢摸索的,哈哈。
下一篇: 使用 WebStorm 导入已有的 Vue 项目并运行的步骤与注意事项
本文标签
声明
本文内容仅代表作者观点,或转载于其他网站,本站不以此文作为商业用途
如有涉及侵权,请联系本站进行删除
转载本站原创文章,请注明来源及作者。