前端Vue使用ffmpeg压缩视频再上传(全网唯一公开真正实现)
ispotu 2024-07-07 10:33:02 阅读 83
保姆级操作步骤,从我实际运行中的项目中摘取的所有相关代码展示如下:
1.Vue项目中安装插件ffmpeg
1.1 插件版本依赖配置
两个插件的版本 "@ffmpeg/core": "^0.10.0", "@ffmpeg/ffmpeg": "^0.10.1"
package.json 和 package-lock.json 都加入如下ffmpeg的版本配置:

1.2 把ffmpeg安装(下载)到项目依赖目录里
terminal运行命令:
<code>npm i
或直接运行命令安装ffmpeg:
npm install @ffmpeg/ffmpeg @ffmpeg/core -S
安装后package-lock.json会自动写入如下配置:

1.2.1 报错处理
如果出现安装问题:

①先在npm i命令后加--legacy-peer-deps 或者 --force运行
<code>npm i --force
②如果上步不行,尝试删除这个安装依赖目录node_modules

即
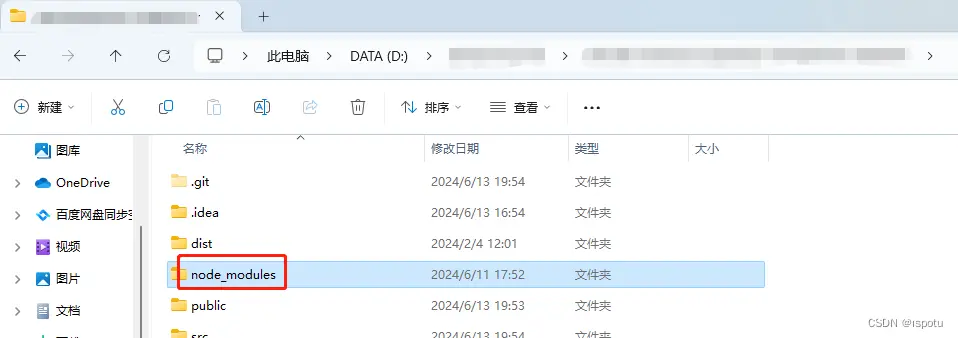
和package-lock.json文件,重试npm i
请参考:
npm ERR! code ERESOLVEnpm ERR! ERESOLVE could not resolve 报错,版本冲突,最全解决步骤(#^.^#)_npm err! code eresolve npm err! eresolve could not-CSDN博客
1.2.2 镜像过期
安装ffmpeg可能提示镜像证书过期
你使用的镜像地址可能还是这个过期的淘宝镜像:https://registry.npm.taobao.org/
按如下步骤重设镜像地址:
①查看镜像:npm config list
②强制清理镜像缓存:npm cache clean --force
③设置镜像:npm config set registry https://registry.npmmirror.com/(国内推荐淘宝新镜像)
也可:npm config set registry https://registry.npmjs.org/
1.3 把ffmpeg安装到项目里
在项目里的ffmpeg插件目录下找到:
ffmpeg-core.js
ffmpeg-core.wasm
ffmpeg-core-worker.js
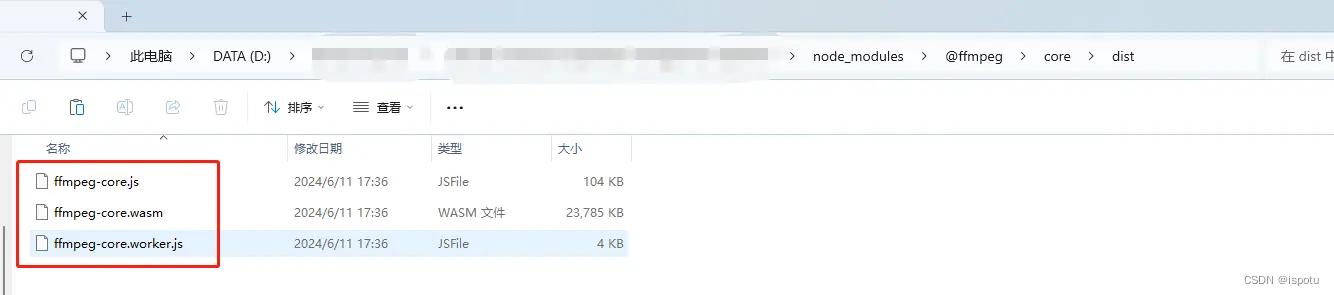
复制到项目代码的public目录里

至此,项目里安装ffmpeg完毕。
接下来就是在代码块里使用ffmpeg
2 项目里引用并封装ffmpeg
在util目录下封装ffmpeg.js以便项目全局引用

封装的工具通过:
<code>import { createFFmpeg, fetchFile } from '@ffmpeg/ffmpeg';
把ffmpeg插件引入到项目里使用。
完整ffmpeg.js代码:
import { createFFmpeg, fetchFile } from '@ffmpeg/ffmpeg';
let ffmpeg = {};
ffmpeg.squeezVideo = async function(file, filename, filetype, width, height, msg) {
console.log('file', file);
console.log('filename', filename);
console.log('filetype', filetype);
console.log('width', width);
console.log('height', height);
// 分辨率
const resolution = `${width}x${height}`;
// 实例化ffmpeg
const ffmpegObj = createFFmpeg({
// ffmpeg路径
corePath: 'ffmpeg-core.js',
// 日志
log: true,
// 进度
progress: ({ ratio }) => {
msg = `完成率: ${(ratio * 100.0).toFixed(1)}%`;
}
})
var { name } = file;
// msg = '正在加载 ffmpeg-core.js'
// 开始加载
await ffmpegObj.load();
// msg = '开始压缩'
// 把文件加到ffmpeg 写文件
ffmpegObj.FS('writeFile', name, await fetchFile(file));
// await ffmpeg.run('-i', name, '-b', '2000000', '-fs', '4194304', '-preset medium', 'superfast', 'output.mp4')
// 开始压缩视频
const compressedFileSize = this.computeFileSize(file);
console.log("After compression,this file size is " + compressedFileSize + " Bytes.");
await ffmpegObj.run('-i', name, '-b', '2000000', '-crf', '18', '-fs', compressedFileSize, '-s', resolution, 'output.mp4');
// msg = '压缩完成'
// 压缩所完成, 读文件 压缩后的文件名称为 output.mp4
const data = ffmpegObj.FS('readFile', 'output.mp4');
// 转换bolb类型
const blob = new Blob([data], { type: 'text/plain;charset=utf-8' });
return new Promise((resolve, reject) => {
const file = new window.File([blob], filename, { type: filetype });
resolve(file);
})
}
ffmpeg.computeFileSize = function(file) {
if(!file){
return '0';
}
if(file.size / 1024 / 1024 > 60){
//30M
return '31457280';
}else if(file.size / 1024 / 1024 <= 60 && file.size / 1024 / 1024 > 30){
return file.size / 2;
}else{
return file.size;
}
}
// 获取上传视频的url
ffmpeg.getObjectURL = function(file) {
let url = null;
window.URL = window.URL || window.webkitURL;
if (window.URL) {
url = window.URL.createObjectURL(file);
} else {
url = URL.createObjectURL(file);
}
return url;
}
// 获取视频的宽高分辨率
ffmpeg.getVideoData = function() {
return new Promise((resolve, reject) => {
const videoElement = document.getElementById('video');
videoElement.addEventListener('loadedmetadata', function () {
resolve({
width: this.videoWidth,
height: this.videoHeight,
duration: this.duration
})
});
})
}
export default ffmpeg;
2.1 ffmpeg压缩参数配置

-b:指定视频比特率
-crf:恒定速率因子,控制输出视频质量的参数。
这个参数的取值范围为0~51,其中0为无损模式。数值越大,画质越差,生成的文件却越小。
从主观上讲,18~28是一个合理的范围。18被认为是视觉无损的(从技术角度上看当然还是有损的),它的输出视频质量和输入视频相当。
-fs:压缩到指定大小,单位Byte
-s:分辨率
控制压缩后视频质量的最重要的是后面三个参数:crf、fs、s
3.视频上传元素
<code><template>
<el-upload
ref='operationVideoUpload'code>
:limit="1"code>
list-type='text'code>
:class="{disabled:addModelParam.attachments.operationVideo.length>0}"code>
:action='actionUrl'code>
:on-success="(res,file)=>handleVideoSuccess(res,file,'operationVideo')"code>
:before-upload='beforeAvatarUploadVideo'code>
:on-remove="(file,fileList)=>handleRemove(file,fileList,'operationVideo')"code>
:auto-upload='true'code>
:on-exceed="handelFileExceed"code>
accept='.mp4,.mov,.wmv,.flv,.mvi,.mkv'>code>
<el-button style="position: relative; margin: -5px"><i class="el-icon-circle-plus-outline" style="color: #66b1ff;">上传附件</i></el-button>code>
<br/><br/>
<p>{ { msg }}</p>
</el-upload>
<video id="video" hidden controls object-fill="fill"></video>code>
</template>
如果不想要展示压缩视频,可以去掉video标签。
4.上传压缩脚本
把封装的ffmpeg.js导入到页面使用:
import ffmpeg from "@/utils/ffmpeg";
完整js脚本:
<script>
import ffmpeg from "@/utils/ffmpeg";
export default {
data() {
return {
msg: '',
videoWidth: '',
videoHeight: '',
duration: '',
actionUrl: '',
addModelParam: {
attachments: {
operationVideo: []
}
},
}
},
created() {
this.actionUrl = "你的后端上传文件接口地址URL";
},
methods: {
handleVideoSuccess(res, file, code) {
this.msg = "已完成视频压缩后上传!";
file.url = res.data.url;
file.fileId = res.data.fileId;
this.addModelParam.attachments[code].push(file.fileId);
},
handleAvatarSuccess(res, file, code) {
file.url = res.data.url;
file.fileId = res.data.fileId;
this.addModelParam.attachments[code].push(file.fileId);
},
handleRemove(file, fileList, code) {
this.addModelParam.attachments[code].splice(this.addModelParam.attachments[code].indexOf(file.fileId),1)
},
beforeAvatarUploadVideo(file) {
const isLarge = file.size / 1024 / 1024 > 30;
if (isLarge) {
this.msg = "请稍等,过大的视频正在压缩上传中...";
//压缩视频
return this.uploadCompressVideo(file);
}
},
handelFileExceed(){
this.$message('文件数量超出限制!');
},
// 上传视频文件压缩后再上传
uploadCompressVideo(file) {
if (file) {
let filename = file.name;
let filetype = file.type;
const videoUrl = ffmpeg.getObjectURL(file);
const video = document.getElementById('video');
video.src = videoUrl;
return ffmpeg.getVideoData().then((videoObj) => {
const {width, height} = videoObj;
return ffmpeg.squeezVideo(file, filename, filetype, width, height, this.msg);
})
}
},
},
}
</script>
注意异步处理:异步压缩,再上传
可使用new Promise();
5.其他配置:
5.1 vue项目根目录下的vue.config.js里加配置
headers: {
'Cross-Origin-Opener-Policy': 'same-origin',
'Cross-Origin-Embedder-Policy': 'require-corp'
}
module.exports = {
publicPath: './',
devServer: {
client: {
overlay: false,
},
port: 9002,
headers: {
'Cross-Origin-Opener-Policy': 'same-origin',
'Cross-Origin-Embedder-Policy': 'require-corp'
}
},
transpileDependencies: []
}
以免出现如下SharedArrayBuffer的报错:

6.其他实现方案
插件video-conversion.js
7.其他视频压缩工具
有时视频过大会导致上传超时,需要将视频压缩小点(不是压缩成zip文件)
在线压缩视频:
迅捷在线压缩视频:视频压缩 - 免费视频压缩软件在线 – 迅捷压缩在线
https://yasuo.xunjiepdf.com/video/
PickFrom在线压缩:在线视频压缩 - 免费在线压缩视频,无论是手机还是电脑, 一键就可以压缩任意视频 - PickFrom
一键压缩:免费在线图片/视频压缩工具 | 视频压缩工具 | 高清无损 | 支持MP4、AVI、FLV视频压缩
(质优

)在线视频压缩:https://compress-video-online.com/
https://compress-video-online.com/zh/
(首推)ApowerSoft:免费在线视频压缩工具 - 无水印、无需下载
免费在线视频压缩工具 - 无水印、无需下载
sp简剪:视频压缩工具-在线无损压缩-sp简剪
youcompress:Compress Video, Image, Audio and PDF Files Online | YouCompress
video2Edit:Compress video - make video files smaller online
Media.io:Online Video Compressor - Reduce Large Video Files Size Online
OnlineConvert :Compress Video, reduce video file size - Online Converter
Compress Video, reduce video file size - Online Converter
ClipChamp:https://clipchamp.com/en/utilities-discontinued/
WeCompress :File Compressor — Compress documents and images online free
Video file converter:Online video converter
File Converter:File Converter - FreeConvert.com
file-converter-online.com:Compress video online for free - file-converter-online.com
下一篇: OpenLayers基础教程——WebGLPoints图层样式的设置方法
本文标签
声明
本文内容仅代表作者观点,或转载于其他网站,本站不以此文作为商业用途
如有涉及侵权,请联系本站进行删除
转载本站原创文章,请注明来源及作者。