【wiki知识库】05.分类管理实现--前端Vue模块
CSDN 2024-06-25 08:03:05 阅读 95

📝个人主页:哈__
期待您的关注

目录
一、🔥今日目标
二、🌏前端部分的改造
2.1 新增一个tool.ts
2.2 新增admin-categoty.vue
2.3 添加新的路由规则
2.4 添加the-welcome.vue
2.5 修改HomeView.vue
三、❗注意
一、🔥今日目标
【wiki知识库】04.SpringBoot后端实现电子书的增删改查以及前端界面的展示-CSDN博客
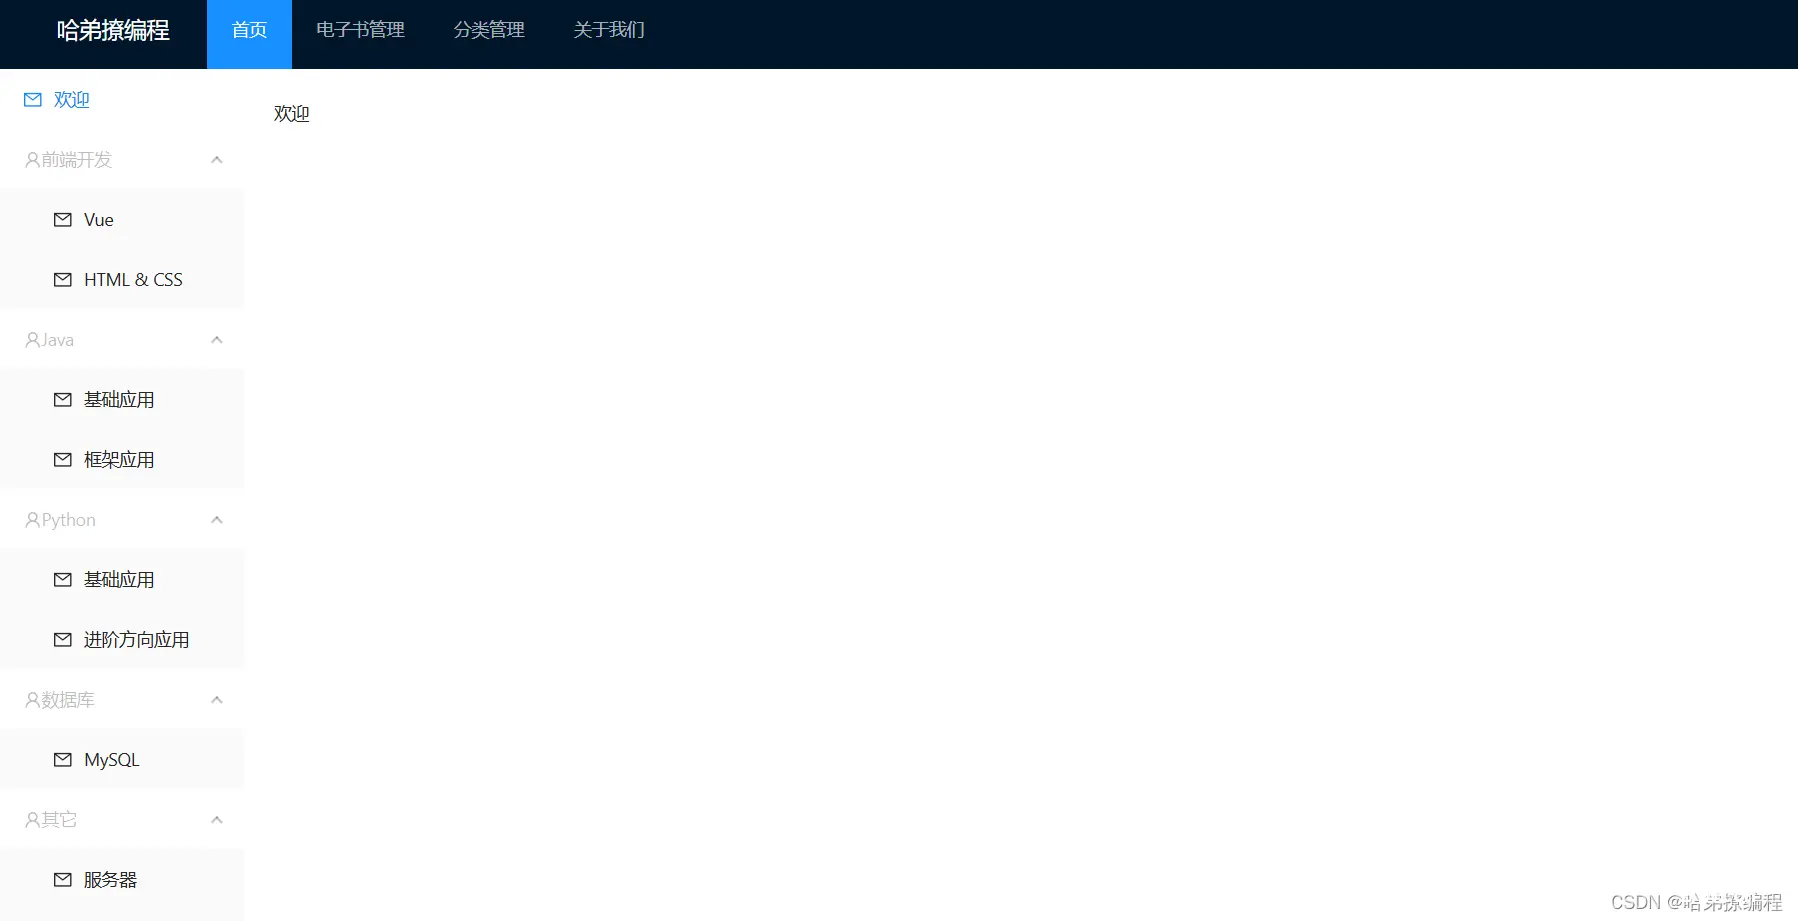
上回带大家把电子书管理的模块做了出来,能够实现电子书的添加、修改和删除功能了,今天带着大家把分类的接口实现一下。下方我添加了一个分类管理的组件,展示我们当前的所有分类,你可以看到这个分类页面还是一个树形结构的。
除了分类管理,我们的首页也变动了一下。首页的导航栏加载的是我们已经有的分类,同时还加上了一个欢迎页面。

二、🌏前端部分的改造
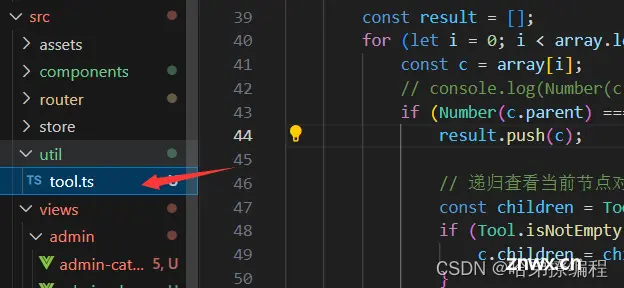
2.1 新增一个tool.ts
在util包下建立一个tool.ts文件,这个文件是我们的工具文件,之前的代码可能也用到过了,我忘记给大家了。
export class Tool {
/**
* 空校验 null或""都返回true
*/
public static isEmpty(obj: any) {
if ((typeof obj === 'string')) {
return !obj || obj.replace(/\s+/g, "") === ""
} else {
return (!obj || JSON.stringify(obj) === "{}" || obj.length === 0);
}
}
/**
* 非空校验
*/
public static isNotEmpty(obj: any) {
return !this.isEmpty(obj);
}
/**
* 对象复制
* @param obj
*/
public static copy(obj: object) {
if (Tool.isNotEmpty(obj)) {
return JSON.parse(JSON.stringify(obj));
}
}
/**
* 使用递归将数组转为树形结构
* 父ID属性为parent
*/
public static array2Tree(array: any, parentId: number) {
if (Tool.isEmpty(array)) {
return [];
}
const result = [];
for (let i = 0; i < array.length; i++) {
const c = array[i];
// console.log(Number(c.parent), Number(parentId));
if (Number(c.parent) === Number(parentId)) {
result.push(c);
// 递归查看当前节点对应的子节点
const children = Tool.array2Tree(array, c.id);
if (Tool.isNotEmpty(children)) {
c.children = children;
}
}
}
return result;
}
/**
* 随机生成[len]长度的[radix]进制数
* @param len
* @param radix 默认62
* @returns {string}
*/
public static uuid(len: number, radix = 62) {
const chars = '0123456789ABCDEFGHIJKLMNOPQRSTUVWXYZabcdefghijklmnopqrstuvwxyz'.split('');
const uuid = [];
radix = radix || chars.length;
for (let i = 0; i < len; i++) {
uuid[i] = chars[0 | Math.random() * radix];
}
return uuid.join('');
}
}
2.2 新增admin-categoty.vue
在admin包下,创建admin-category.vue,这个组件用来展示我们的分类信息。这一部分我带着大家稍微过一下。
分类添加功能:
在我们点击添加或者编辑功能的时候,会把下边的代码以一个窗口的模式弹出,在这个窗口中展示了当前分类的名称,当前分类的父分类是谁以及当前分类的分类序号。在我们为一个分类进行添加或者修改的时候,我们都要涉及到这个分类到底是第一分类还是第二分类的问题,我们使用了一个level1变量来保存我们的分类结构,这个结构下边在讲。
<a-modal
title="分类表单"
v-model:visible="modalVisible"
:confirm-loading="modalLoading"
@ok="handleModalOk"
>
<a-form :model="category" :label-col="{ span: 6 }" :wrapper-col="{ span: 18 }">
<a-form-item label="名称">
<a-input v-model:value="category.name" />
</a-form-item>
<a-form-item label="父分类">
<a-select
v-model:value="category.parent"
ref="select"
>
<a-select-option :value="0">
无
</a-select-option>
<a-select-option v-for="c in level1" :key="c.id" :value="c.id" :disabled="category.id === c.id">
{ {c.name}}
</a-select-option>
</a-select>
</a-form-item>
<a-form-item label="顺序">
<a-input v-model:value="category.sort" />
</a-form-item>
</a-form>
</a-modal>
我们的分类结构可以用一张图来表示。 我给每一个分类都排上了一个编号,第一级分类的parent编号都为0,二级分类的parent编号则要相对应其父分类的编号。
level变量的封装过程:
我们的level变量是和我们全部的分类变量有关的,我们先要获取所有的分类然后对分类进行重新组合。
const handleQuery = () => {
loading.value = true;
// 如果不清空现有数据,则编辑保存重新加载数据后,再点编辑,则列表显示的还是编辑前的数据
level1.value = [];
axios.get("/category/all").then((response) => {
loading.value = false;
const data = response.data;
if (data.success) {
categorys.value = data.content;
console.log("原始数组:", categorys.value);
level1.value = [];
level1.value = Tool.array2Tree(categorys.value, 0);
console.log("树形结构:", level1);
} else {
message.error(data.message);
}
});
};
这时候打开我们的tool.ts来看一看。你会看到一共有两个参数,第一个参数呢我们传的是一个数据数组,第二个我们传来的是0。
首先我们判断一下传过来的数组是不是空的,如果是空的直接返回,否则的话执行下方逻辑。
首先遍历我们所有的分类,检查每一个分类的父分类的编号是不是我们传过来的0,这里你应该会理解为什么这样做,因为我们要把一个数据数据重新格式化成树的形式,那我们一定要先找到这棵树的一级分类,也就是父节点编号为0的分类,找到了之后呢我们把这个分类加到result当中。然后呢我们再次调用array2Tree这个方法,同时传入两个参数,第一个参数还是之前的全部分类的数组,但是第二个参数就不是0了,是我们刚才加入到result中的分类的编号,我们这次调用这个方法的目的是为了找到一级分类的子分类:二级分类。
这样的一次递归调用就可以将数据进行树化。(不懂私信我)
/**
* 使用递归将数组转为树形结构
* 父ID属性为parent
*/
public static array2Tree(array: any, parentId: number) {
if (Tool.isEmpty(array)) {
return [];
}
const result = [];
for (let i = 0; i < array.length; i++) {
const c = array[i];
// console.log(Number(c.parent), Number(parentId));
if (Number(c.parent) === Number(parentId)) {
result.push(c);
// 递归查看当前节点对应的子节点
const children = Tool.array2Tree(array, c.id);
if (Tool.isNotEmpty(children)) {
c.children = children;
}
}
}
return result;
}
全部代码如下:
<template>
<a-layout>
<a-layout-content
:style="{ background: '#fff', padding: '24px', margin: 0, minHeight: '280px' }"
>
<p>
<a-form layout="inline" :model="param">
<a-form-item>
<a-input v-model:value="param.name" placeholder="名称">
</a-input>
</a-form-item>
<a-form-item>
<a-button type="primary" @click="handleQuery()">
查询
</a-button>
</a-form-item>
<a-form-item>
<a-button type="primary" @click="add()">
新增
</a-button>
</a-form-item>
</a-form>
</p>
<p>
<a-alert
class="tip"
message="小提示:这里的分类会显示到首页的侧边菜单"
type="info"
closable
/>
</p>
<a-table
v-if="level1.length > 0"
:columns="columns"
:row-key="record => record.id"
:data-source="level1"
:loading="loading"
:pagination="false"
:defaultExpandAllRows="true"
>
<template #cover="{ text: cover }">
<img v-if="cover" :src="cover" alt="avatar" />
</template>
<template v-slot:action="{ text, record }">
<a-space size="small">
<a-button type="primary" @click="edit(record)">
编辑
</a-button>
<a-popconfirm
title="删除后不可恢复,确认删除?"
ok-text="是"
cancel-text="否"
@confirm="handleDelete(record.id)"
>
<a-button type="danger">
删除
</a-button>
</a-popconfirm>
</a-space>
</template>
</a-table>
</a-layout-content>
</a-layout>
<a-modal
title="分类表单"
v-model:visible="modalVisible"
:confirm-loading="modalLoading"
@ok="handleModalOk"
>
<a-form :model="category" :label-col="{ span: 6 }" :wrapper-col="{ span: 18 }">
<a-form-item label="名称">
<a-input v-model:value="category.name" />
</a-form-item>
<a-form-item label="父分类">
<a-select
v-model:value="category.parent"
ref="select"
>
<a-select-option :value="0">
无
</a-select-option>
<a-select-option v-for="c in level1" :key="c.id" :value="c.id" :disabled="category.id === c.id">
{ {c.name}}
</a-select-option>
</a-select>
</a-form-item>
<a-form-item label="顺序">
<a-input v-model:value="category.sort" />
</a-form-item>
</a-form>
</a-modal>
</template>
<script lang="ts">
import { defineComponent, onMounted, ref } from 'vue';
import axios from 'axios';
import { message } from 'ant-design-vue';
import {Tool} from "@/util/tool";
export default defineComponent({
name: 'AdminCategory',
setup() {
const param = ref();
param.value = {};
const categorys = ref();
const loading = ref(false);
const columns = [
{
title: '名称',
dataIndex: 'name'
},
// {
// title: '父分类',
// key: 'parent',
// dataIndex: 'parent'
// },
{
title: '顺序',
dataIndex: 'sort'
},
{
title: 'Action',
key: 'action',
slots: { customRender: 'action' }
}
];
/**
* 一级分类树,children属性就是二级分类
* [{
* id: "",
* name: "",
* children: [{
* id: "",
* name: "",
* }]
* }]
*/
const level1 = ref(); // 一级分类树,children属性就是二级分类
level1.value = [];
/**
* 数据查询
**/
const handleQuery = () => {
loading.value = true;
// 如果不清空现有数据,则编辑保存重新加载数据后,再点编辑,则列表显示的还是编辑前的数据
level1.value = [];
axios.get("/category/all").then((response) => {
loading.value = false;
const data = response.data;
if (data.success) {
categorys.value = data.content;
console.log("原始数组:", categorys.value);
level1.value = [];
level1.value = Tool.array2Tree(categorys.value, 0);
console.log("树形结构:", level1);
} else {
message.error(data.message);
}
});
};
// -------- 表单 ---------
const category = ref({});
const modalVisible = ref(false);
const modalLoading = ref(false);
const handleModalOk = () => {
modalLoading.value = true;
axios.post("/category/save", category.value).then((response) => {
modalLoading.value = false;
const data = response.data; // data = commonResp
if (data.success) {
modalVisible.value = false;
// 重新加载列表
handleQuery();
} else {
message.error(data.message);
}
});
};
/**
* 编辑
*/
const edit = (record: any) => {
modalVisible.value = true;
category.value = Tool.copy(record);
};
/**
* 新增
*/
const add = () => {
modalVisible.value = true;
category.value = {};
};
const handleDelete = (id: number) => {
axios.delete("/category/delete/" + id).then((response) => {
const data = response.data; // data = commonResp
if (data.success) {
// 重新加载列表
handleQuery();
} else {
message.error(data.message);
}
});
};
onMounted(() => {
handleQuery();
});
return {
param,
// categorys,
level1,
columns,
loading,
handleQuery,
edit,
add,
category,
modalVisible,
modalLoading,
handleModalOk,
handleDelete
}
}
});
</script>
<style scoped>
img {
width: 50px;
height: 50px;
}
</style>
2.3 添加新的路由规则
{
path: '/admin/category',
name: 'AdminCateGory',
component: AdminCategory
},
2.4 添加the-welcome.vue
在component文件夹下边 添加the-welcome.vue页面。
<template>
<span>欢迎</span>
</template>
<script lang="ts">
name: 'the-welcome'
</script>
<style scoped>
</style>
2.5 修改HomeView.vue
这里做出了一些修改,一个是the-welcome组件的展示,还有一个就是页面侧边栏的展示,我们之前展示的是页面默认的,现在我们要展示数据库当中的分类结构。里边我们有一些代码还用不到,但是我没有注释掉。
<template>
<a-layout>
<a-layout-sider width="200" style="background: #fff">
<a-menu
mode="inline"
:style="{ height: '100%', borderRight: 0 }"
@click="handleClick"
:openKeys="openKeys"
>
<a-menu-item key="welcome">
<MailOutlined />
<span>欢迎</span>
</a-menu-item>
<a-sub-menu v-for="item in level1" :key="item.id" :disabled="true">
<template v-slot:title>
<span><user-outlined />{ {item.name}}</span>
</template>
<a-menu-item v-for="child in item.children" :key="child.id">
<MailOutlined /><span>{ {child.name}}</span>
</a-menu-item>
</a-sub-menu>
<a-menu-item key="tip" :disabled="true">
<span>以上菜单在分类管理配置</span>
</a-menu-item>
</a-menu>
</a-layout-sider>
<a-layout-content
:style="{ background: '#fff', padding: '24px', margin: 0, minHeight: '280px' }"
>
<div class="welcome" v-show="isShowWelcome">
<the-welcome></the-welcome>
</div>
<a-list v-show="!isShowWelcome" item-layout="vertical" size="large" :grid="{ gutter: 20, column: 3 }" :data-source="ebooks">
<template #renderItem="{ item }">
<a-list-item key="item.name">
<template #actions>
<span>
<component v-bind:is="'FileOutlined'" style="margin-right: 8px" />
{ { item.docCount }}
</span>
<span>
<component v-bind:is="'UserOutlined'" style="margin-right: 8px" />
{ { item.viewCount }}
</span>
<span>
<component v-bind:is="'LikeOutlined'" style="margin-right: 8px" />
{ { item.voteCount }}
</span>
</template>
<a-list-item-meta :description="item.description">
<template #title>
<router-link :to="'/doc?ebookId=' + item.id">
{ { item.name }}
</router-link>
</template>
<template #avatar><a-avatar :src="item.cover"/></template>
</a-list-item-meta>
</a-list-item>
</template>
</a-list>
</a-layout-content>
</a-layout>
</template>
<script lang="ts">
import { defineComponent, onMounted, ref, reactive, toRef } from 'vue';
import axios from 'axios';
import { message } from 'ant-design-vue';
import {Tool} from "@/util/tool";
import TheWelcome from '@/components/the-welcome.vue';
export default defineComponent({
name: 'Home',
components: {
TheWelcome
},
setup() {
const ebooks = ref();
// const ebooks1 = reactive({books: []});
const openKeys = ref();
const level1 = ref();
let categorys: any;
/**
* 查询所有分类
**/
const handleQueryCategory = () => {
axios.get("/category/all").then((response) => {
const data = response.data;
if (data.success) {
categorys = data.content;
console.log("原始数组:", categorys);
// 加载完分类后,将侧边栏全部展开
openKeys.value = [];
for (let i = 0; i < categorys.length; i++) {
openKeys.value.push(categorys[i].id)
}
level1.value = [];
level1.value = Tool.array2Tree(categorys, 0);
console.log("树形结构:", level1.value);
} else {
message.error(data.message);
}
});
};
const isShowWelcome = ref(true);
let categoryId2 = 0;
const handleQueryEbook = () => {
axios.get("/ebook/list", {
params: {
page: 1,
size: 1000,
categoryId2: categoryId2
}
}).then((response) => {
const data = response.data;
ebooks.value = data.content.list;
// ebooks1.books = data.content;
});
};
const handleClick = (value: any) => {
// console.log("menu click", value)
if (value.key === 'welcome') {
isShowWelcome.value = true;
} else {
categoryId2 = value.key;
isShowWelcome.value = false;
handleQueryEbook();
}
// isShowWelcome.value = value.key === 'welcome';
};
onMounted(() => {
handleQueryCategory();
// handleQueryEbook();
});
return {
ebooks,
// ebooks2: toRef(ebooks1, "books"),
// listData,
pagination: {
onChange: (page: any) => {
console.log(page);
},
pageSize: 3,
},
handleClick,
level1,
isShowWelcome,
openKeys
}
}
});
</script>
<style scoped>
.ant-avatar {
width: 50px;
height: 50px;
line-height: 50px;
border-radius: 8%;
margin: 5px 0;
}
</style>

三、❗注意
在之前写的admin-ebook.vue当中还有一些代码是注释掉的,因为之前没有写分类模块,现在我们需要使用分类的功能了,我们还需要解除一些注释。大家可以看看哪些地方有关category的被注释掉了,大家可以打开,后端接口下一篇文章就会带大家写出来。
这里需要修改一些onMounted()函数中的代码,修改成下边的部分。
onMounted(() => {
handleQueryCategory();
// handleQueryEbook();
});
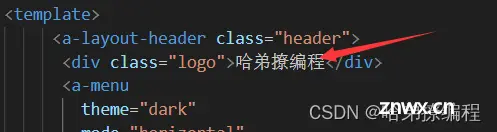
此外,这个网站的标题头部的信息可能我之前没加上去,就是这个。
在the-header.vue中修改一下自己的代码。
在下边的style中加上样式。然后就可以展示出来了。
<style>
.logo {
width: 120px;
height: 31px;
/*background: rgba(255, 255, 255, 0.2);*/
/*margin: 16px 28px 16px 0;*/
float: left;
color: white;
font-size: 18px;
}
</style>

声明
本文内容仅代表作者观点,或转载于其他网站,本站不以此文作为商业用途
如有涉及侵权,请联系本站进行删除
转载本站原创文章,请注明来源及作者。