【python教程】打包和发布自己的项目,让别人去pip
cnblogs 2024-08-24 14:09:00 阅读 69
@
目录
- <li>1.环境搭建
- 1.1 换源
- 1.2 安装wheel
- 1.3 安装twine
- 1.4 注册PyPI账号
- 2.编写setup.py
- 2.1 项目文件树
- 2.2 编写setup.py文件
- 3.构建
- 4.上传
- ERROR:The user 'XXX' isn't allowed to upload to project ''
- 2024.1.19更新:
1.环境搭建
1.1 换源
- 在pip安装时使用<code>-i参数,可以指定源。以下有许多种国内源可以选择li>
https://pypi.tuna.tsinghua.edu.cn/simple
http://mirrors.aliyun.com/pypi/simple/
https://pypi.mirrors.ustc.edu.cn/simple/
http://pypi.hustunique.com/
http://pypi.sdutlinux.org/
http://pypi.douban.com/simple/
1.2 安装wheel
pip install wheel -i https://pypi.tuna.tsinghua.edu.cn/simple
1.3 安装twine
pip install twine -i https://pypi.tuna.tsinghua.edu.cn/simple
1.4 注册PyPI账号
去此网址注册一个即可
2.编写setup.py
2.1 项目文件树
- 你的项目可能是这样的...
xu736946693@ubuntu:~/Desktop/python-template$ tree
.
├── bin
│ └── start.py
├── conf
│ └── yourfile.conf
├── dataBase
│ └── yourDB
├── docs
│ └── introduction.md
├── lib
│ └── yourlib.py
├── LICENSE
├── log
│ └── version.md
├── package_name
│ ├── __init__.py
│ └── module1
│ └── __init__.py
├── README.md
├── res
│ ├── READMEimgRes
│ │ ├── 7ac23192b1904eb790272d8462cec5b8.png
│ │ └── d919d615def3466f9ff73488c4e62aac.png
│ └── yourResource
│ └── resourceFile
├── settings.zip
├── setup.py
└── tests
└── test.py
12 directories, 16 files
2.2 编写setup.py文件
setup.py文件是用来打包和上传你的包的重要文件,它有固定的编写范式。下面我将给出我的demo并附上详细注释。
from setuptools import setup, find_packages
from os import path
this_directory = path.abspath(path.dirname(__file__))
with open(path.join(this_directory, 'README.md'), encoding='utf-8') as f:code>
my_long_description = f.read()
setup(
# 关于classifiers的描述详见如下
# https://pypi.org/search/?q=&o=&c=Topic+%3A%3A+Software+Development+%3A%3A+Build+Tools
classifiers=[
# 属于什么类型
"Topic :: Software Development :: Libraries :: Python Modules",
# 发展时期,常见的如下
# Development Status:: 1 - Planning
# Development Status:: 2 - Pre - Alpha
# Development Status:: 3 - Alpha
# Development Status:: 4 - Beta
# Development Status:: 5 - Production / Stable
# Development Status:: 6 - Mature
# Development Status:: 7 - Inactive
"Development Status :: 4 - Beta",
# 许可证信息
"License :: OSI Approved :: MIT License",
# 目标编程语言
# Programming Language :: C
# Programming Language :: C++
# Programming Language :: Python :: 3.4
# Programming Language :: Python :: 3.5
# Programming Language :: Python :: 3.6
# Programming Language :: Python :: 3.7
# Programming Language :: Python :: 3.8
# Programming Language :: Python :: 3.9
"Programming Language :: Python :: 3",
"Programming Language :: Python :: 3.3",
"Programming Language :: Python :: 3.4",
"Programming Language :: Python :: 3.5",
"Programming Language :: Python :: 3.6",
"Programming Language :: Python :: 3.7",
"Programming Language :: Python :: 3.8",
"Programming Language :: Python :: 3.9",
# 运行的操作系统
# "Operating System :: POSIX :: Linux",
"Operating System :: Microsoft :: Windows",
# 运行的环境
# "Environment :: GPU :: NVIDIA CUDA :: 12",
# 开发的目标用户
# Intended Audience :: Customer Service
# Intended Audience :: Developers
# Intended Audience :: Education
# ...
# Intended Audience :: End Users/Desktop
# Intended Audience :: Financial and Insurance Industry
# Intended Audience :: Healthcare Industry
"Intended Audience :: End Users/Desktop",
# 自然语言
"Natural Language :: English",
"Natural Language :: Chinese (Simplified)",
],
# 如果上传时出现ERROR:The user '' isn't allowed to upload to project '',换个名字,长一点无所谓,不能跟别人重复
name="projectTemplate",code>
version="1.0.0",code>
author="Han Xu",code>
author_email="736946693@qq.com",code>
description="This is a project template.",code>
long_description=my_long_description,
# 存放源码的地址,填入gitee的源码网址即可
# url="https://gitee.com/UnderTurrets/",code>
packages=find_packages(),
# README.md文本的格式,如果希望使用markdown语言就需要下面这句话
long_description_content_type="text/markdown",code>
# 安装过程中,需要安装的静态文件,如配置文件、service文件、图片等
# data_files=[
# ("", ["conf/*.conf"]),
# ("/usr/lib/systemd/system", ["bin/*.service"]),
# ],
# 希望被打包的文件
# package_data={
# "":["*.txt"],
# "bandwidth_reporter":["*.txt"]
# },
# 不打包某些文件
# exclude_package_data={
# "bandwidth_reporter":["*.txt"]
# },
# 表明当前模块依赖哪些包,若环境中没有,则会从pypi中下载安装
# install_requires=["requests",],
# setup.py 本身要依赖的包,这通常是为一些setuptools的插件准备的配置
# 这里列出的包,不会自动安装。
# setup_requires=["",],
# 仅在测试时需要使用的依赖,在正常发布的代码中是没有用的。
# 在执行python setup.py test时,可以自动安装这三个库,确保测试的正常运行。
# tests_require=[
# "",
# ],
# install_requires 在安装模块时会自动安装依赖包
# 而 extras_require 不会,这里仅表示该模块会依赖这些包
# 但是这些包通常不会使用到,只有当你深度使用模块时,才会用到,这里需要你手动安装
# extras_require={
# "": [""],
# },
)
- 根据自己的需要更改即可
3.构建
- 在项目空间下执行如下指令:
python setup.py sdist bdist_wheel
- 可以看到项目下会自动生成build目录和lib目录等:
xu736946693@ubuntu:~/Desktop/python-template$ tree -L 3
.
├── bin
│ └── start.py
├── build
│ ├── bdist.linux-x86_64
│ └── lib
│ └── package_name
├── conf
│ └── yourfile.conf
├── dataBase
│ └── yourDB
├── dist
│ ├── projectTemplate-1.0.0-py3-none-any.whl
│ └── projectTemplate-1.0.0.tar.gz
├── docs
│ └── introduction.md
├── lib
│ └── yourlib.py
├── LICENSE
├── log
│ └── version.md
├── package_name
│ ├── __init__.py
│ └── module1
│ └── __init__.py
├── projectTemplate.egg-info
│ ├── dependency_links.txt
│ ├── PKG-INFO
│ ├── SOURCES.txt
│ └── top_level.txt
├── README.md
├── res
│ ├── READMEimgRes
│ │ ├── 7ac23192b1904eb790272d8462cec5b8.png
│ │ └── d919d615def3466f9ff73488c4e62aac.png
│ └── yourResource
│ └── resourceFile
├── settings.zip
├── setup.py
└── tests
└── test.py
4.上传
- 在项目空间下执行如下指令:
twine upload -u <the usrname of your PyPI account> -p <the password of your PyPI account> dist/<the files you want to upload>
- 如果你更新了代码,记得更新setup.py中的版本号,重新构建你的代码,再次上传就好了。
ERROR:The user 'XXX' isn't allowed to upload to project ''
- 你的软件包名字是PyPI用以区分的唯一标识,因此必须全球唯一
如果上传时出现ERROR:The user 'XXX' isn't allowed to upload to project '',换个名字,长一点无所谓,不能跟别人重复。
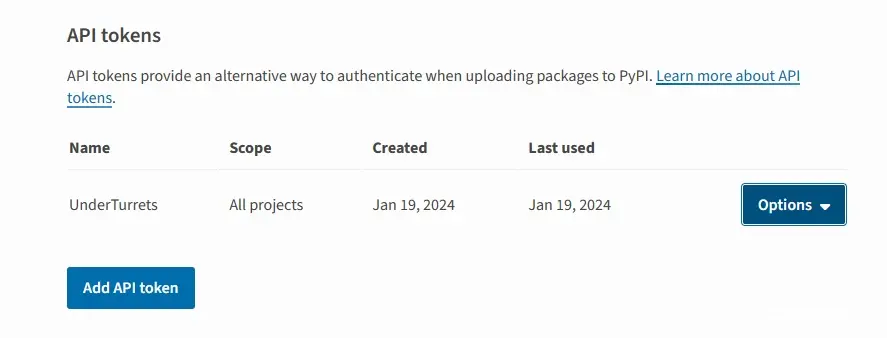
2024.1.19更新:
目前PyPI官方强制要求两步验证,同时关闭了在终端中输入账密上传包的方式。目前需要在账户中设置API才可以上传。
- 设置API
- <li>在家目录建立<code>.pypirc文件。对于windows用户,即
- twine上传
'C:\Users\<Your name>\.pypirc。对于Linux用户,即'~\.pypirc。li> twine upload dist/*
本文由博客一文多发平台 OpenWrite 发布!
声明
本文内容仅代表作者观点,或转载于其他网站,本站不以此文作为商业用途
如有涉及侵权,请联系本站进行删除
转载本站原创文章,请注明来源及作者。