Spring MVC 中使用 RESTFul 编程风格
cnblogs 2024-07-05 08:39:01 阅读 70
1. Spring MVC 中使用 RESTFul 编程风格
@
目录
- 1. Spring MVC 中使用 RESTFul 编程风格
- 2. RESTFul 编程风格
- 2.1 RESTFul 是什么
- 2.2 RESTFul风格与传统方式对比
- 3. Spring MVC 中使用 RESTFul 编程风格(增删改查)的使用
- 3.1 准备工作
- 3.2 RESTFul 风格的 “查询” 所有(RESTFul 规范 需要发送 GET请求)
- 3.3 RESTFul 风格的 根据 “id 查询”( RESTFul 规范 需要发送 GET请求)
- 3.4 RESTFul 风格的 “增加数据” (RESTFul 规范 需要发送 POST 请求)
- 3.5 RESTFul 风格的 “修改数据” (RESTFul 规范 需要发送 PUT 请求)
- 3.6 RESTFul 风格的 “删除数据” 数据(RESTFul 规范 需要发送 DELETE 请求)
- 4. 补充: HiddenHttpMethodFilter 过滤器源码说明
- 5. 总结:
- 6. 最后:
2. RESTFul 编程风格
2.1 RESTFul 是什么
RESTFul 是 <code>web 服务器接口 的一种设计风格。
RESTFul 定义了一组约束条件和规范,可以让 web服务器接口 更加简洁,易于理解,易于扩展,安全可靠。
RESTFUl 对一个 web 服务器接口 都规定了哪些东西 ?
- 对请求的 URL 格式有约束和规范
- 对 HTTP 的请求方式有约束和规范
- 对请求和响应的数据格式有约束和规范
- 对 HTTP 状态码有约束和规范
- 等......
REST 对请求方式的约束是这样的:
- 查询必须发送 GET 请求
- 新增必须发送 POST 请求
- 修改必须发送 PUT 请求
- 删除必须发送 DELETE 请求
REST对 URL 的约束时这样的:
- 传统的 URL : get 请求,/springmvc/getUserById?id=1
- REST风格的 URL:get 请求,/springmvc/user/1
- 传统的URL :get 请求,/springmvc/deleteUserById?id=1
- REST风格的URL:delete 请求,/springmvc/user/1
RESTFul 对 URL 的约束和规范的核心时:通过采用 :不同的请求方式 + URL 来确定 web 服务中的资源。
RESTFul 的英文全称时:Representational State Transfer(表述性状态转移),简称 REST。
表述性(Representational) 是:URL + 请求方式。
状态(State) 是 :服务器端的数据。
转移(Transfer) 是:变化。
表述性转移是指:通过 URL + 请求方式来控制服务器端数据的变化。
2.2 RESTFul风格与传统方式对比
统的 URL 与 RESTful URL 的区别是传统的 URL 是基于方法名进行资源访问和操作,而 RESTful URL 是基于资源的结构和状态进行操作的。下面是一张表格,展示两者之间的具体区别:
| 传统的 URL | RESTful URL |
|---|---|
| GET /getUserById?id=1 | GET /user/1 |
| GET /getAllUser | GET /user |
| POST /addUser | POST /user |
| POST /modifyUser | PUT /user |
| GET /deleteUserById?id=1 | DELETE /user/1 |
从上表中我们可以看出,传统的 URL是基于动作的,而 RESTful URL 是基于资源和状态的,因此 RESTful URL 更加清晰和易于理解,这也是 REST 架构风格被广泛使用的主要原因之一。
3. Spring MVC 中使用 RESTFul 编程风格(增删改查)的使用
3.1 准备工作
导入相关依赖 jar 包。
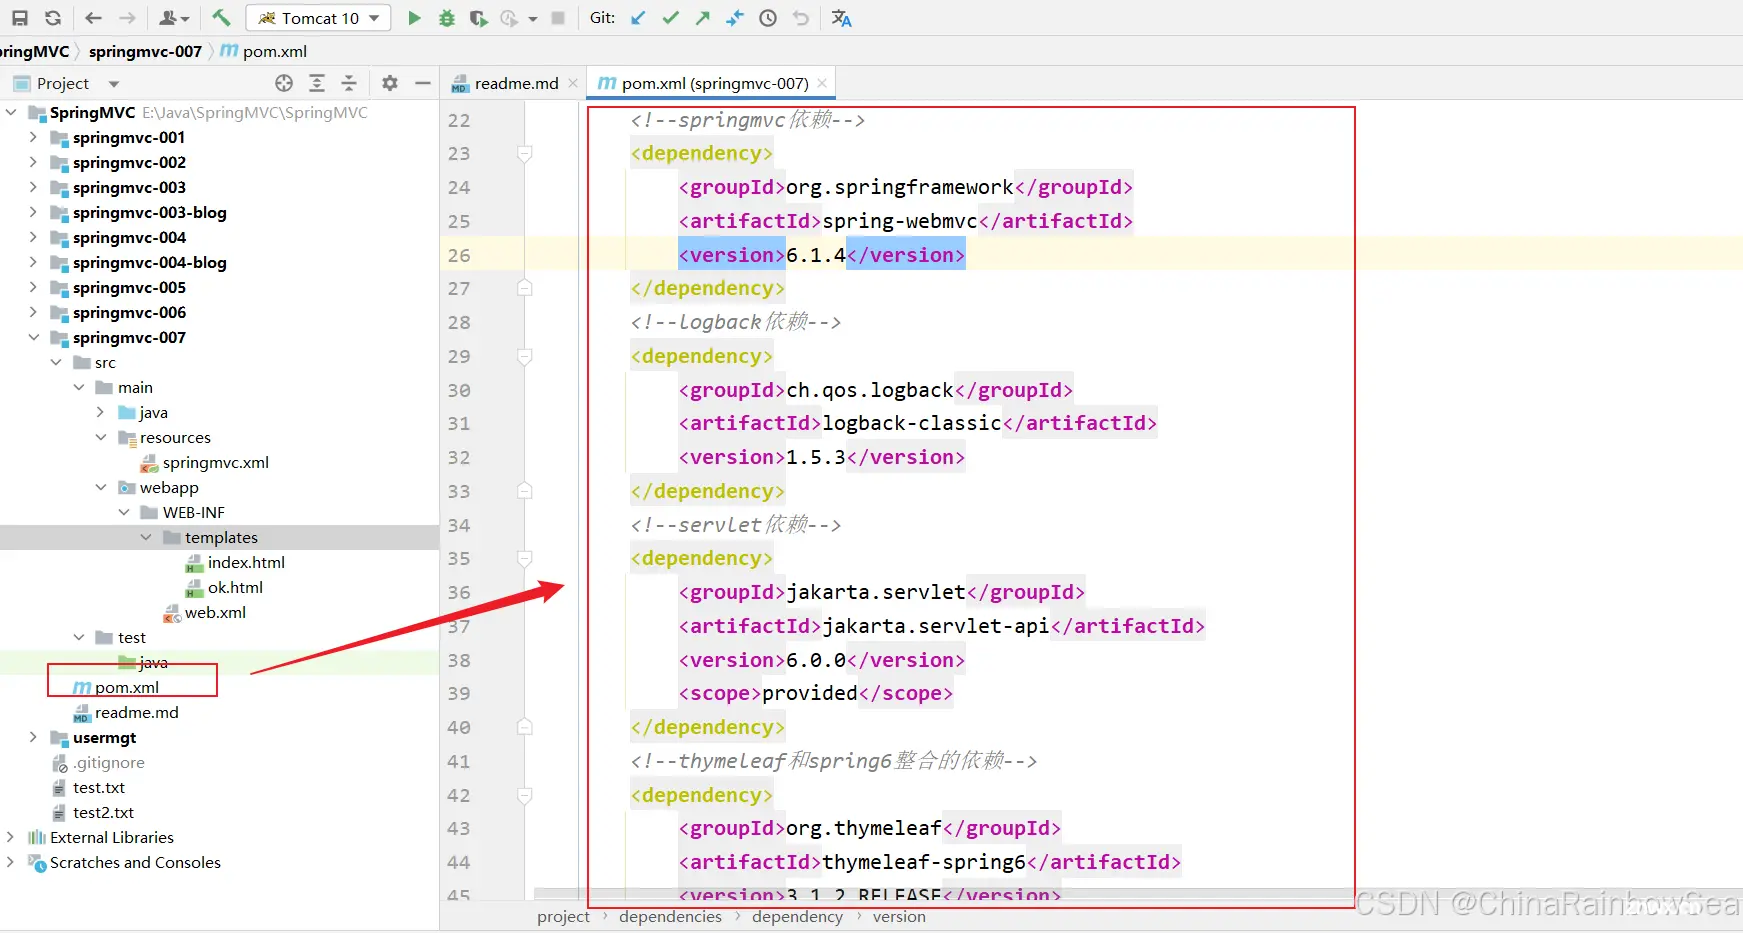

<code><?xml version="1.0" encoding="UTF-8"?>code>
<project xmlns="http://maven.apache.org/POM/4.0.0"code>
xmlns:xsi="http://www.w3.org/2001/XMLSchema-instance"code>
xsi:schemaLocation="http://maven.apache.org/POM/4.0.0 http://maven.apache.org/xsd/maven-4.0.0.xsd">code>
<modelVersion>4.0.0</modelVersion>
<groupId>com.rainbowsea</groupId>
<artifactId>springmvc-007</artifactId>
<version>1.0-SNAPSHOT</version>
<packaging>war</packaging>
<properties>
<maven.compiler.source>17</maven.compiler.source>
<maven.compiler.target>17</maven.compiler.target>
</properties>
<dependencies>
<!--springmvc依赖-->
<dependency>
<groupId>org.springframework</groupId>
<artifactId>spring-webmvc</artifactId>
<version>6.1.4</version>
</dependency>
<!--logback依赖-->
<dependency>
<groupId>ch.qos.logback</groupId>
<artifactId>logback-classic</artifactId>
<version>1.5.3</version>
</dependency>
<!--servlet依赖-->
<dependency>
<groupId>jakarta.servlet</groupId>
<artifactId>jakarta.servlet-api</artifactId>
<version>6.0.0</version>
<scope>provided</scope>
</dependency>
<!--thymeleaf和spring6整合的依赖-->
<dependency>
<groupId>org.thymeleaf</groupId>
<artifactId>thymeleaf-spring6</artifactId>
<version>3.1.2.RELEASE</version>
</dependency>
</dependencies>
</project>
相关包 / 目录的创建,配置。
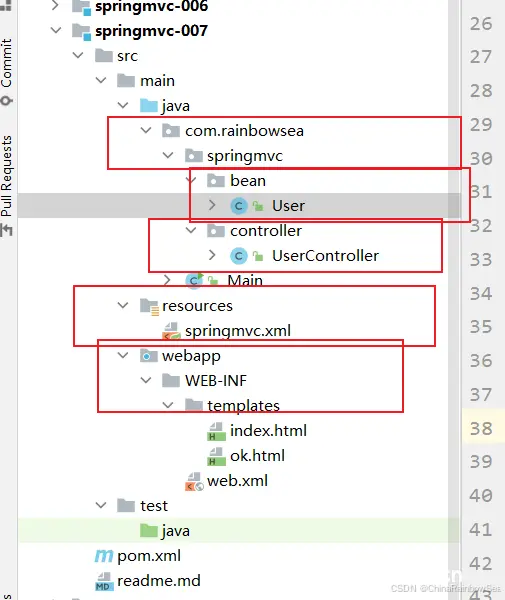
springmvc.xml 配置文件的配置;
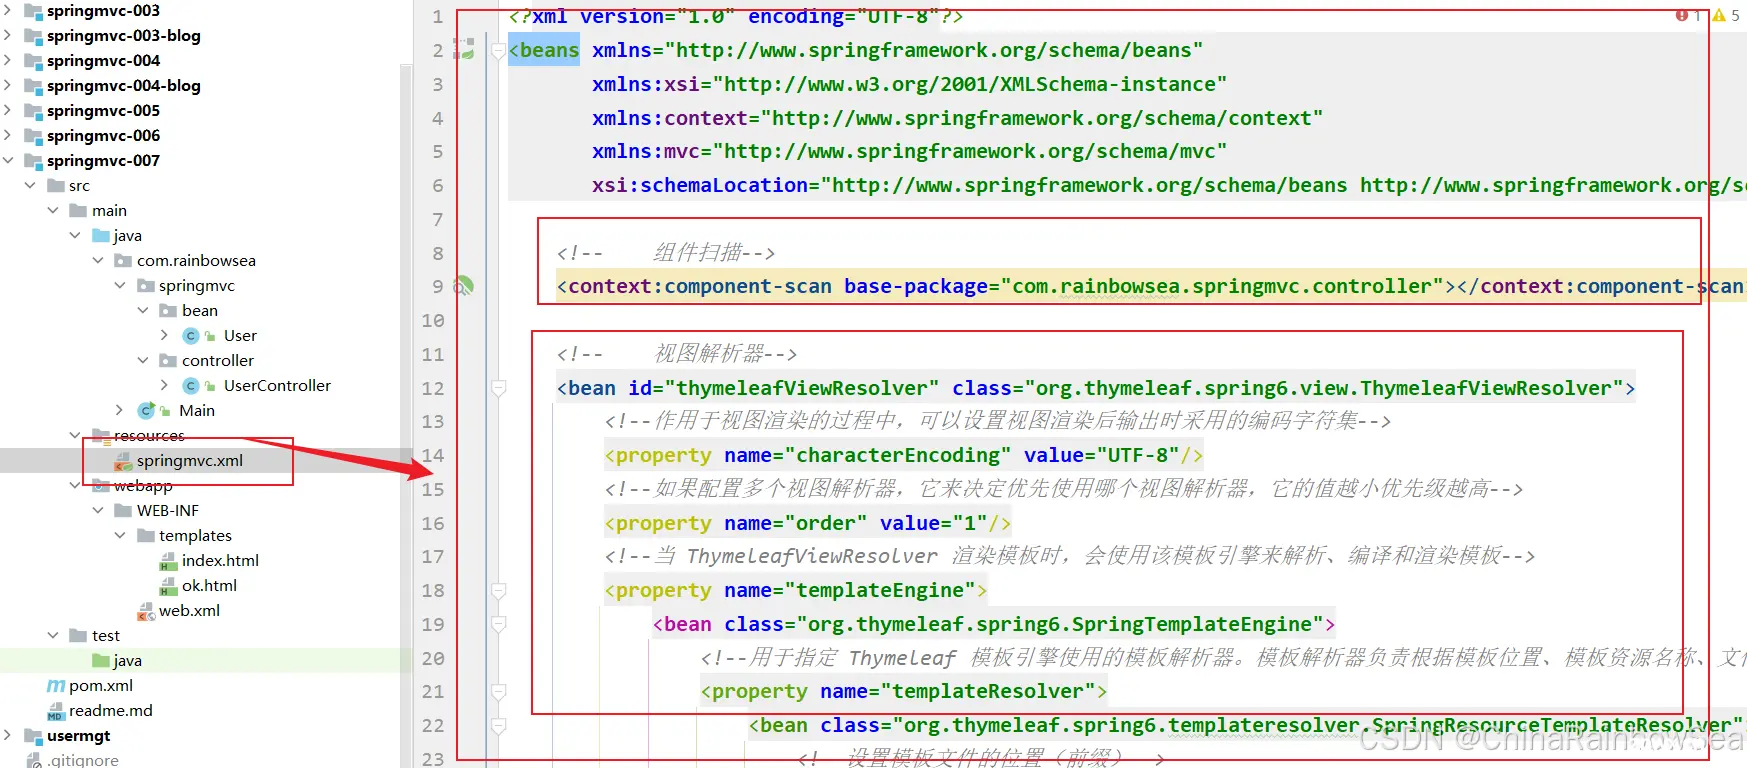
<code><?xml version="1.0" encoding="UTF-8"?>code>
<beans xmlns="http://www.springframework.org/schema/beans"code>
xmlns:xsi="http://www.w3.org/2001/XMLSchema-instance"code>
xmlns:context="http://www.springframework.org/schema/context"code>
xmlns:mvc="http://www.springframework.org/schema/mvc"code>
xsi:schemaLocation="http://www.springframework.org/schema/beans http://www.springframework.org/schema/beans/spring-beans.xsd http://www.springframework.org/schema/context https://www.springframework.org/schema/context/spring-context.xsd http://www.springframework.org/schema/cache http://www.springframework.org/schema/cache/spring-cache.xsd http://www.springframework.org/schema/mvc https://www.springframework.org/schema/mvc/spring-mvc.xsd">code>
<!-- 组件扫描-->
<context:component-scan base-package="com.rainbowsea.springmvc.controller"></context:component-scan>code>
<!-- 视图解析器-->
<bean >
<!--作用于视图渲染的过程中,可以设置视图渲染后输出时采用的编码字符集-->
<property name="characterEncoding" value="UTF-8"/>code>
<!--如果配置多个视图解析器,它来决定优先使用哪个视图解析器,它的值越小优先级越高-->
<property name="order" value="1"/>code>
<!--当 ThymeleafViewResolver 渲染模板时,会使用该模板引擎来解析、编译和渲染模板-->
<property name="templateEngine">code>
<bean >
<!--用于指定 Thymeleaf 模板引擎使用的模板解析器。模板解析器负责根据模板位置、模板资源名称、文件编码等信息,加载模板并对其进行解析-->
<property name="templateResolver">code>
<bean >
<!--设置模板文件的位置(前缀)-->
<property name="prefix" value="/WEB-INF/templates/"/>code>
<!--设置模板文件后缀(后缀),Thymeleaf文件扩展名不一定是html,也可以是其他,例如txt,大部分都是html-->
<property name="suffix" value=".html"/>code>
<!--设置模板类型,例如:HTML,TEXT,JAVASCRIPT,CSS等-->
<property name="templateMode" value="HTML"/>code>
<!--用于模板文件在读取和解析过程中采用的编码字符集-->
<property name="characterEncoding" value="UTF-8"/>code>
</bean>
</property>
</bean>
</property>
</bean>
<!-- 开启注解驱动-->
<mvc:annotation-driven></mvc:annotation-driven>
<!-- 视图控制器, 这个配置可以只写 对应 index的视图,不写对应的Controller,简化配置 -->
<mvc:view-controller path="/" view-name="index"></mvc:view-controller>code>
</beans>
3.2 RESTFul 风格的 “查询” 所有(RESTFul 规范 需要发送 GET请求)
RESTFul 规范中规定,如果要查询数据,需要发送 GET 请求。
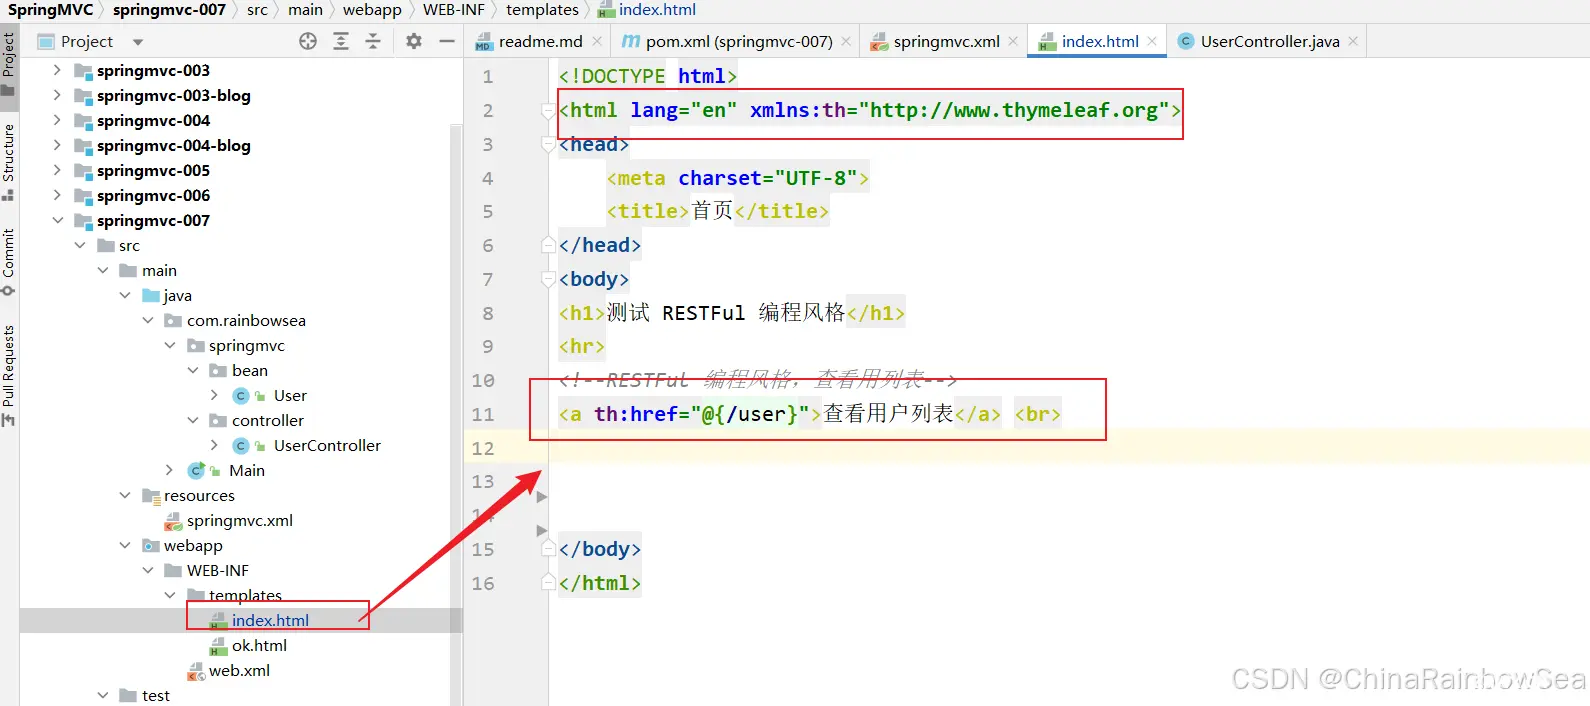
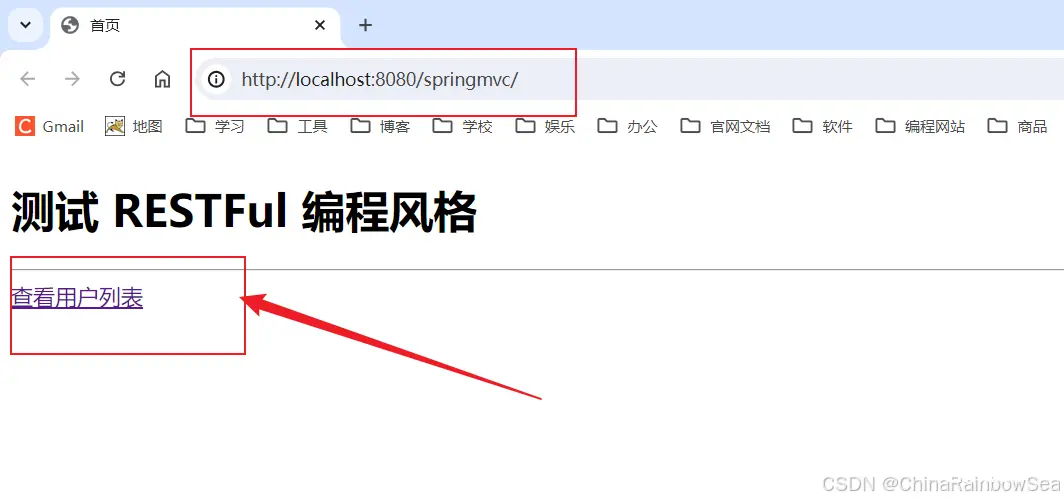
<code><!DOCTYPE html>
<html lang="en" xmlns:th="http://www.thymeleaf.org">code>
<head>
<meta charset="UTF-8">code>
<title>首页</title>
</head>
<body>
<h1>测试 RESTFul 编程风格</h1>
<hr>
<!--RESTFul 编程风格,查看用列表-->
<a th:href="@{/user}">查看用户列表</a> <br>code>
</body>
</html>
控制器 Controller:
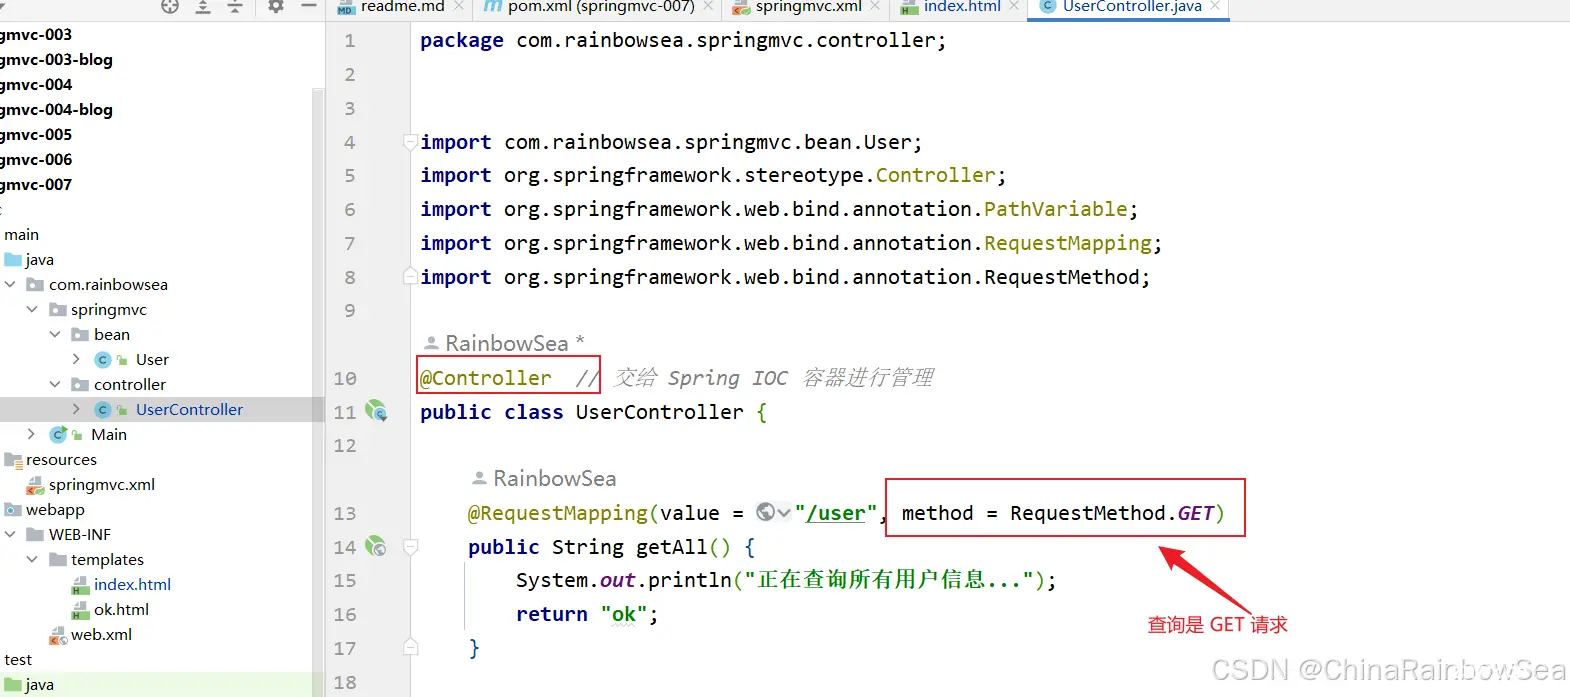
<code>
import com.rainbowsea.springmvc.bean.User;
import org.springframework.stereotype.Controller;
import org.springframework.web.bind.annotation.PathVariable;
import org.springframework.web.bind.annotation.RequestMapping;
import org.springframework.web.bind.annotation.RequestMethod;
@Controller // 交给 Spring IOC 容器进行管理
public class UserController {
@RequestMapping(value = "/user", method = RequestMethod.GET)
public String getAll() {
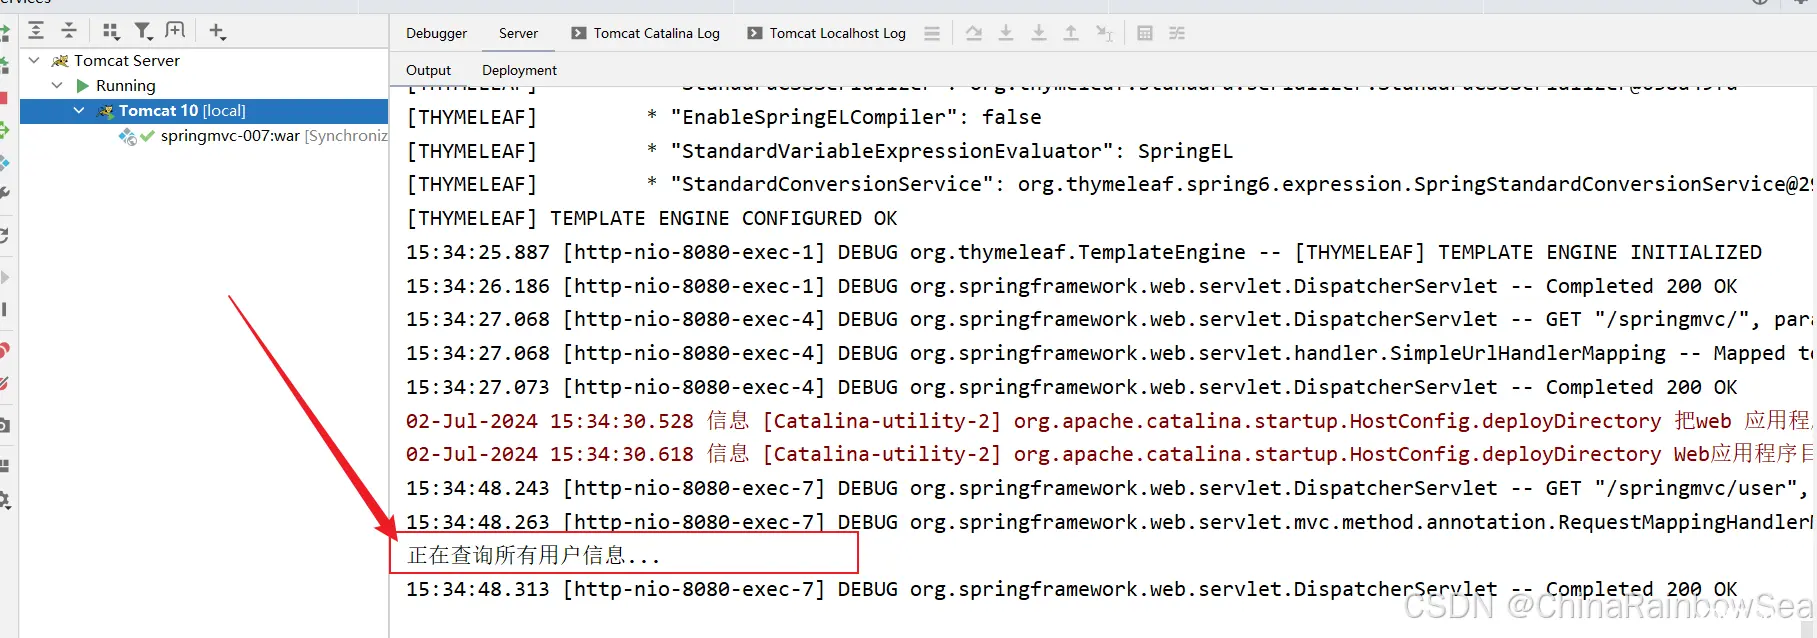
System.out.println("正在查询所有用户信息...");
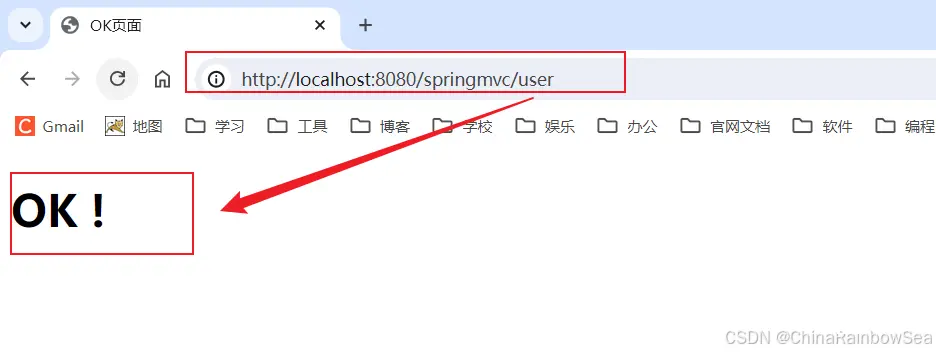
return "ok";
}
}
ok 的页面视图:
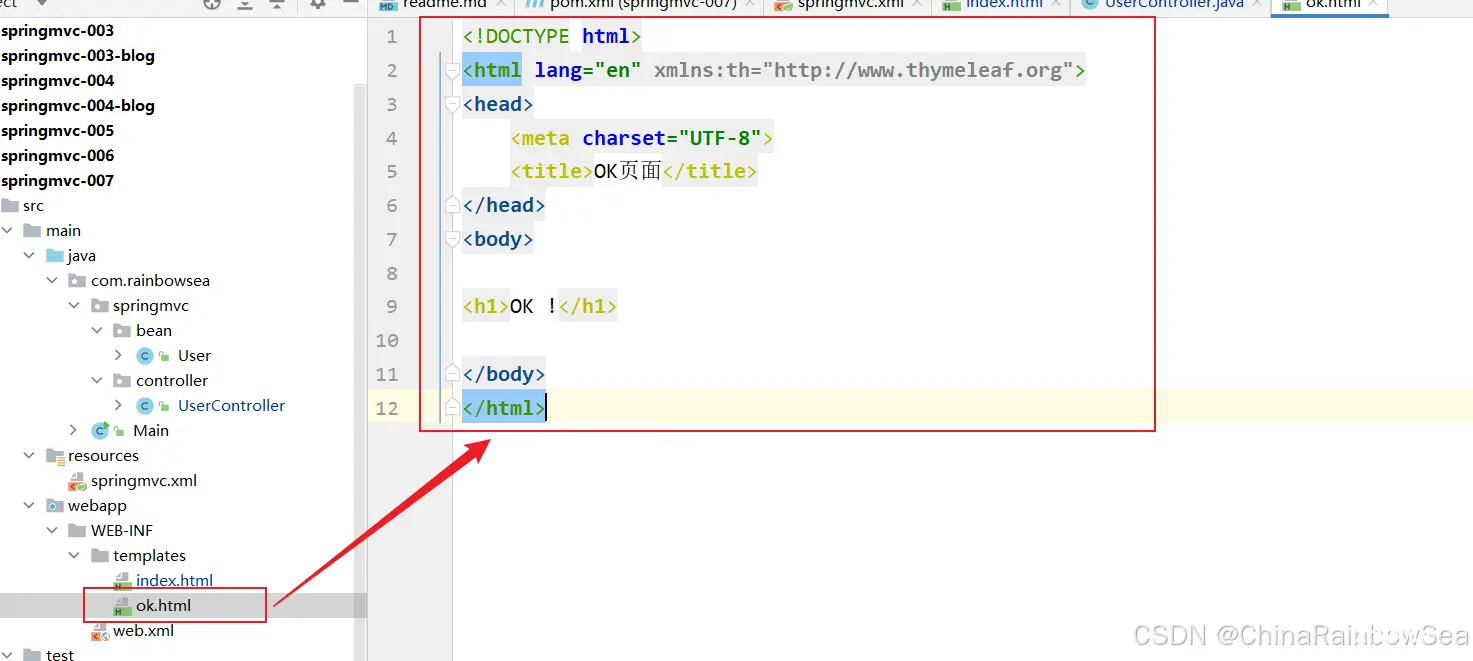
<code><!DOCTYPE html>
<html lang="en" xmlns:th="http://www.thymeleaf.org">code>
<head>
<meta charset="UTF-8">code>
<title>OK页面</title>
</head>
<body>
<h1>OK !</h1>
</body>
</html>
启动服务器,测试:http://localhost:8080/springmvc
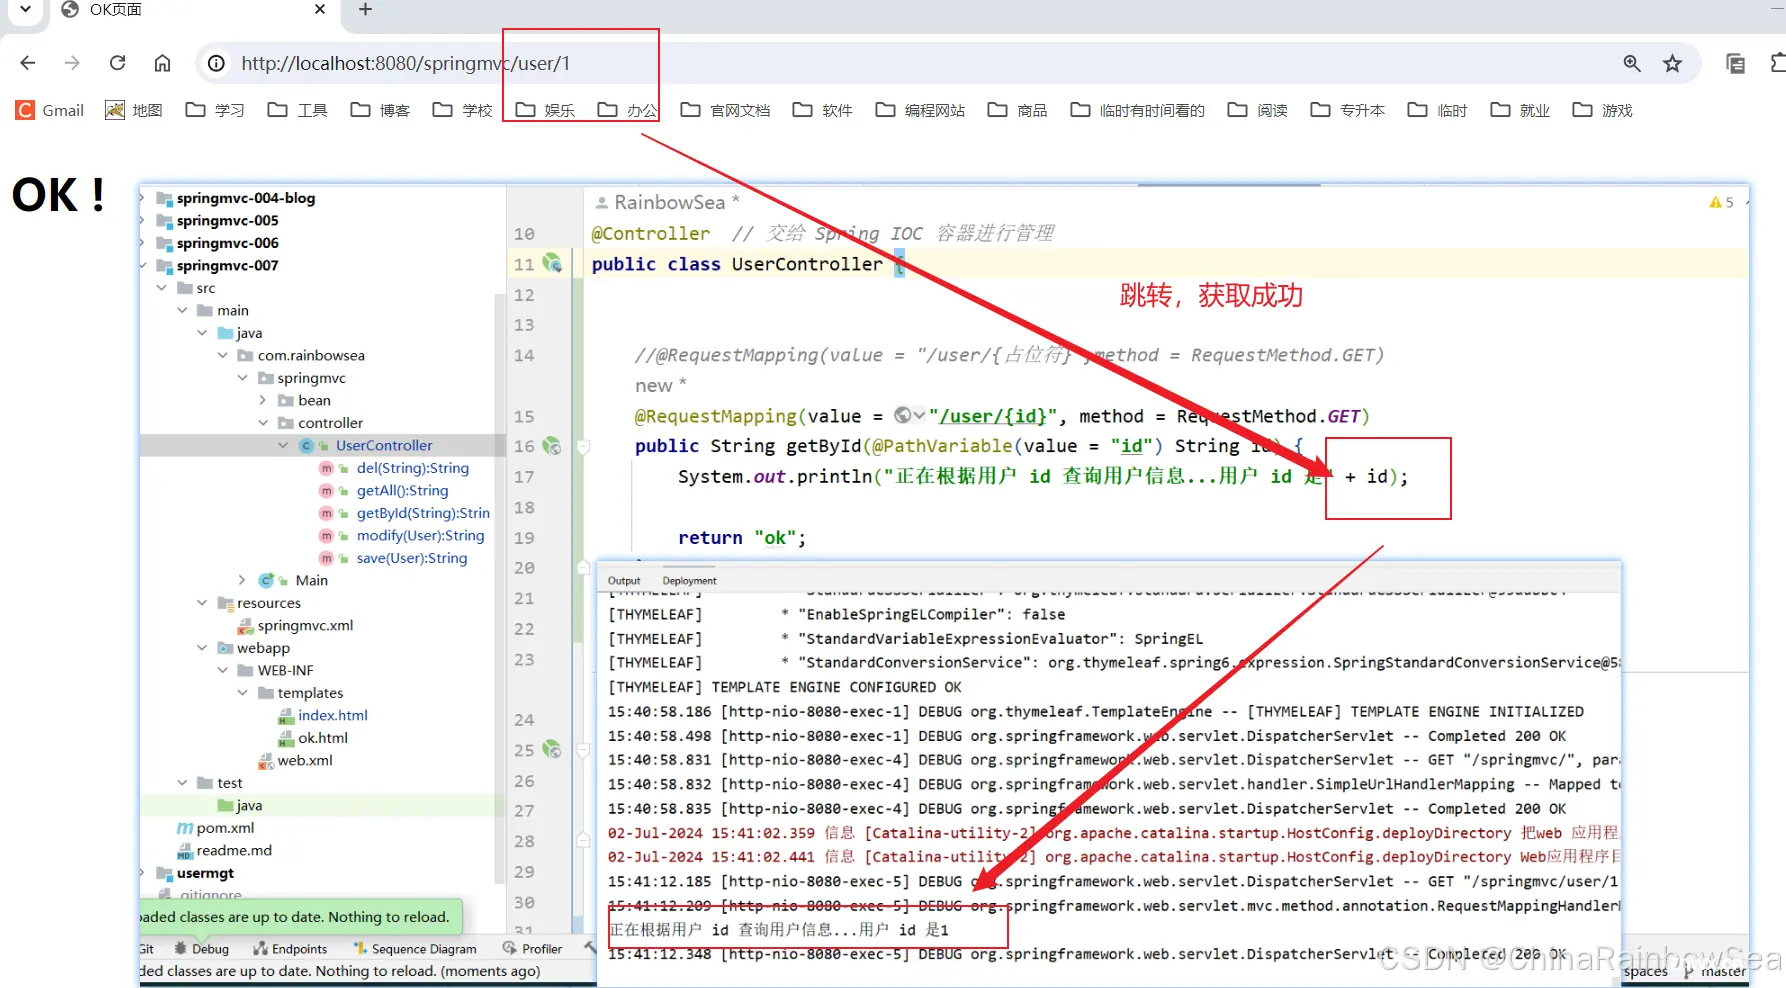
3.3 RESTFul 风格的 根据 “id 查询”( RESTFul 规范 需要发送 GET请求)
RESTFul 规范中规定,如果要查询数据,需要发送GET请求。
首页index.html
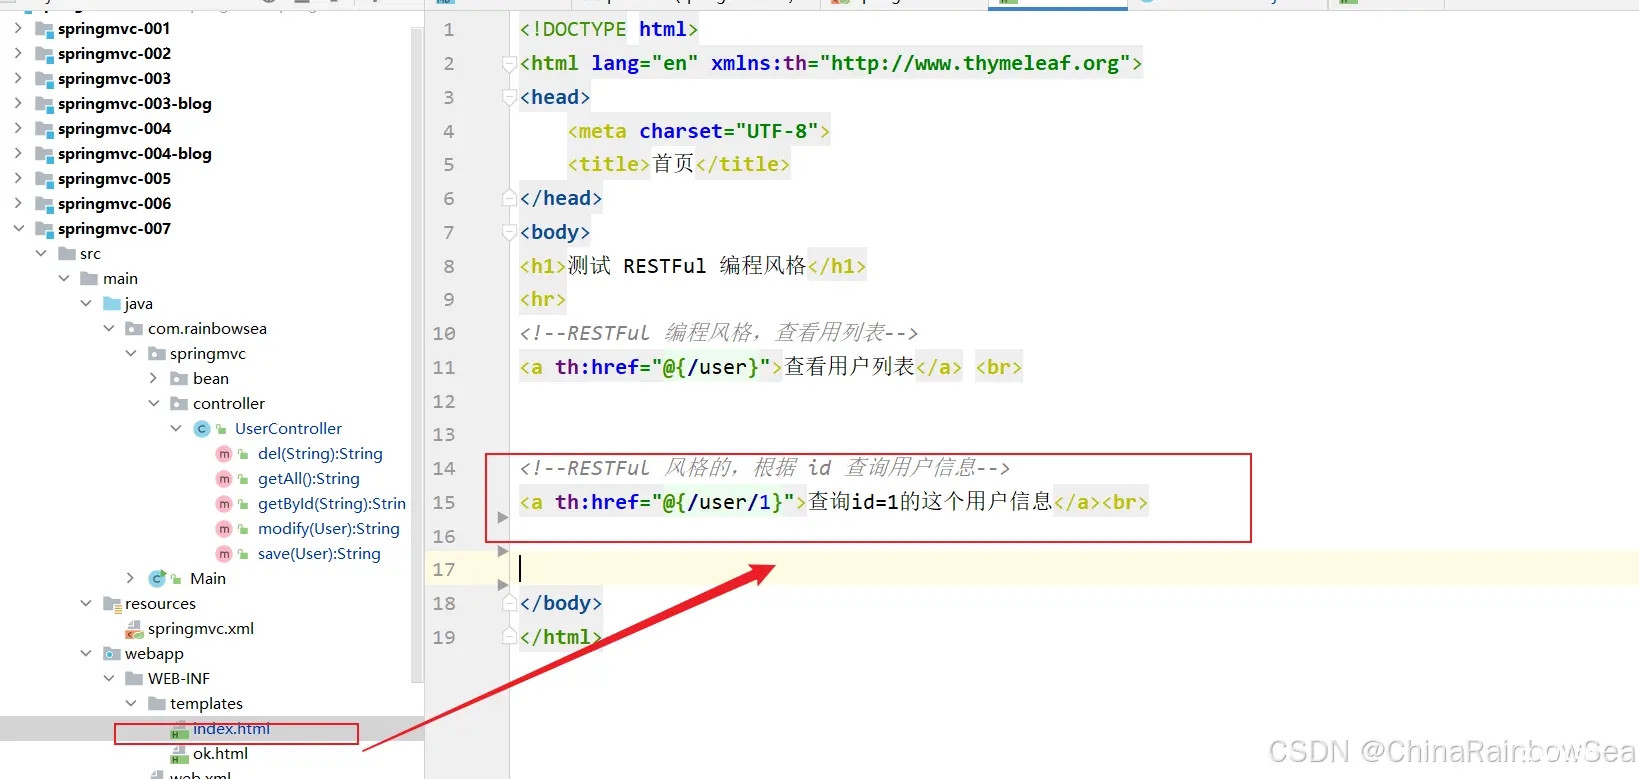
<code><!DOCTYPE html>
<html lang="en" xmlns:th="http://www.thymeleaf.org">code>
<head>
<meta charset="UTF-8">code>
<title>首页</title>
</head>
<body>
<h1>测试 RESTFul 编程风格</h1>
<hr>
<!--RESTFul 编程风格,查看用列表-->
<a th:href="@{/user}">查看用户列表</a> <br>code>
<!--RESTFul 风格的,根据 id 查询用户信息-->
<a th:href="@{/user/1}">查询id=1的这个用户信息</a><br>code>
</body>
</html>
控制器 Controller:
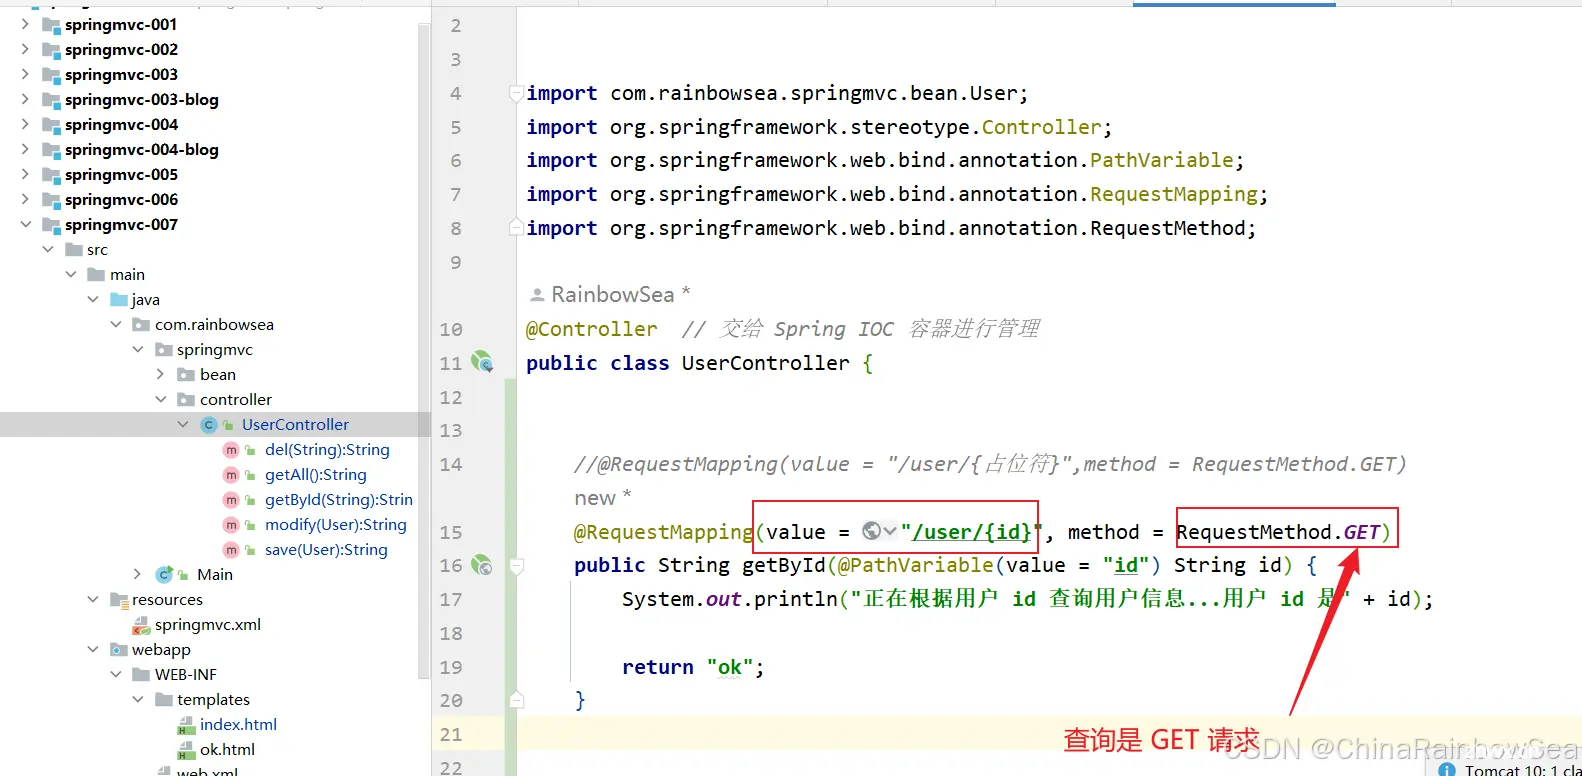
<code>
import com.rainbowsea.springmvc.bean.User;
import org.springframework.stereotype.Controller;
import org.springframework.web.bind.annotation.PathVariable;
import org.springframework.web.bind.annotation.RequestMapping;
import org.springframework.web.bind.annotation.RequestMethod;
@Controller // 交给 Spring IOC 容器进行管理
public class UserController {
//@RequestMapping(value = "/user/{占位符}",method = RequestMethod.GET)
@RequestMapping(value = "/user/{id}", method = RequestMethod.GET)
public String getById(@PathVariable(value = "id") String id) {
System.out.println("正在根据用户 id 查询用户信息...用户 id 是" + id);
return "ok";
}
}
启动服务器测试:
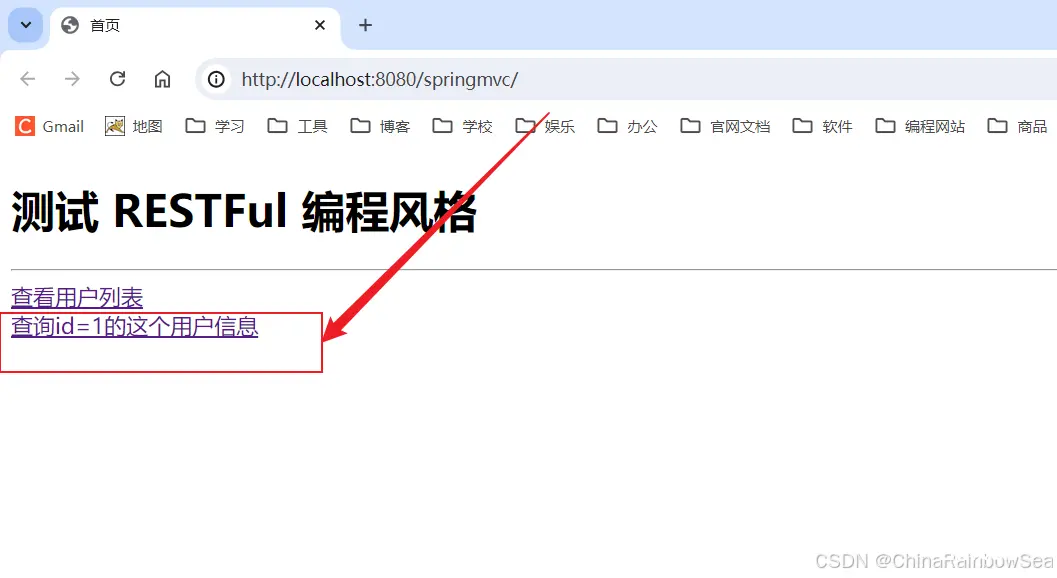
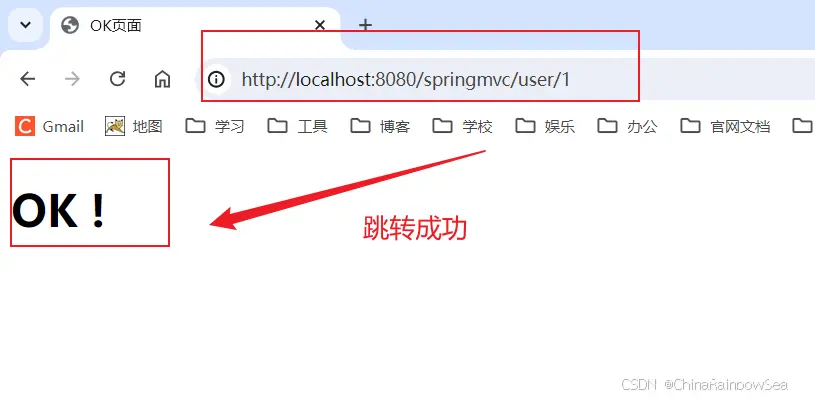
3.4 RESTFul 风格的 “增加数据” (RESTFul 规范 需要发送 POST 请求)
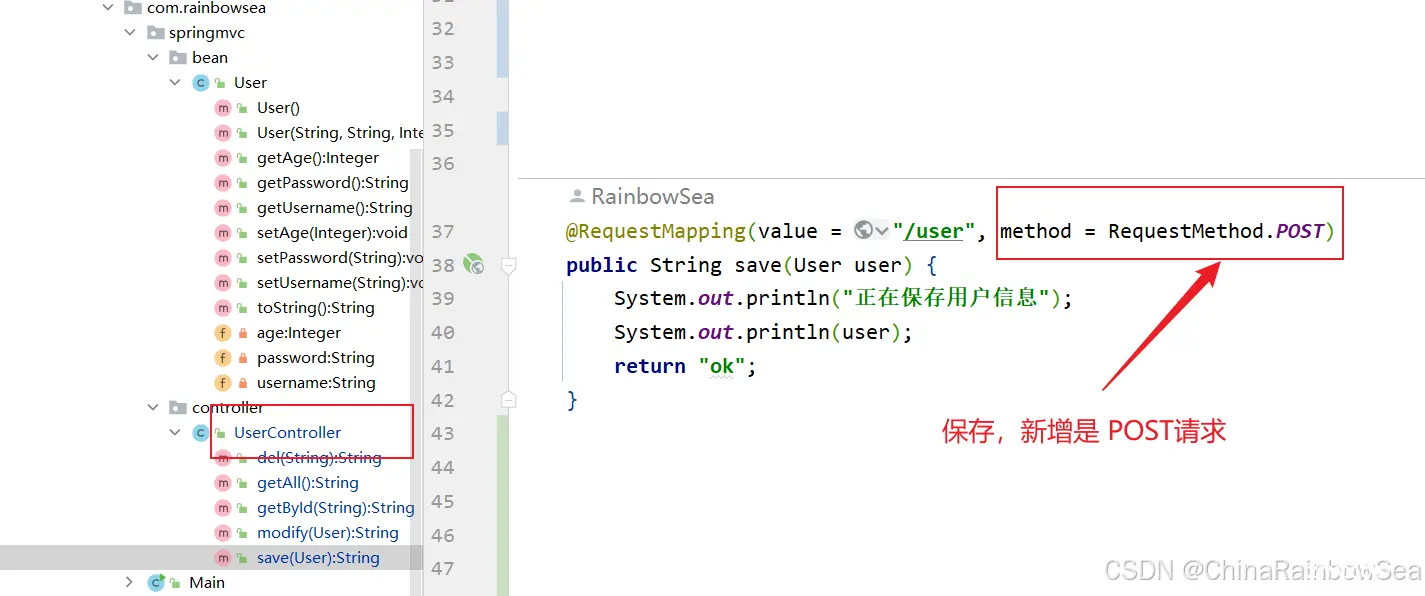
RESTFul规范中规定,如果要进行保存操作,需要发送POST请求。
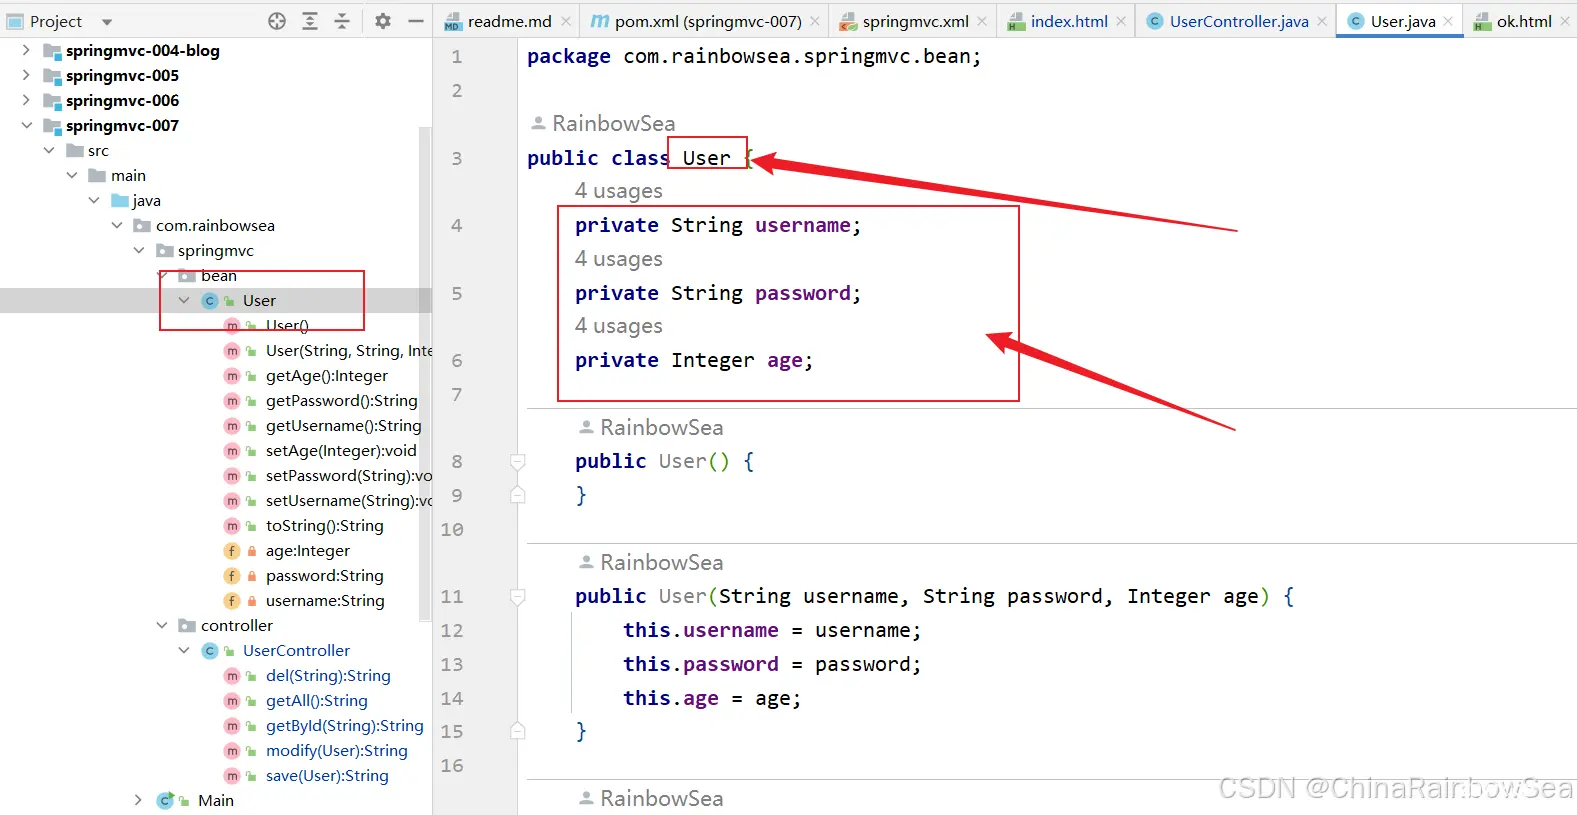
这里我们添加一个 User Bean 类,用于作为对象进行存储。
<code>package com.rainbowsea.springmvc.bean;
public class User {
private String username;
private String password;
private Integer age;
public User() {
}
public User(String username, String password, Integer age) {
this.username = username;
this.password = password;
this.age = age;
}
@Override
public String toString() {
return "User{" +
"username='" + username + '\'' +code>
", password='" + password + '\'' +code>
", age=" + age +
'}';
}
public String getUsername() {
return username;
}
public void setUsername(String username) {
this.username = username;
}
public String getPassword() {
return password;
}
public void setPassword(String password) {
this.password = password;
}
public Integer getAge() {
return age;
}
public void setAge(Integer age) {
this.age = age;
}
}
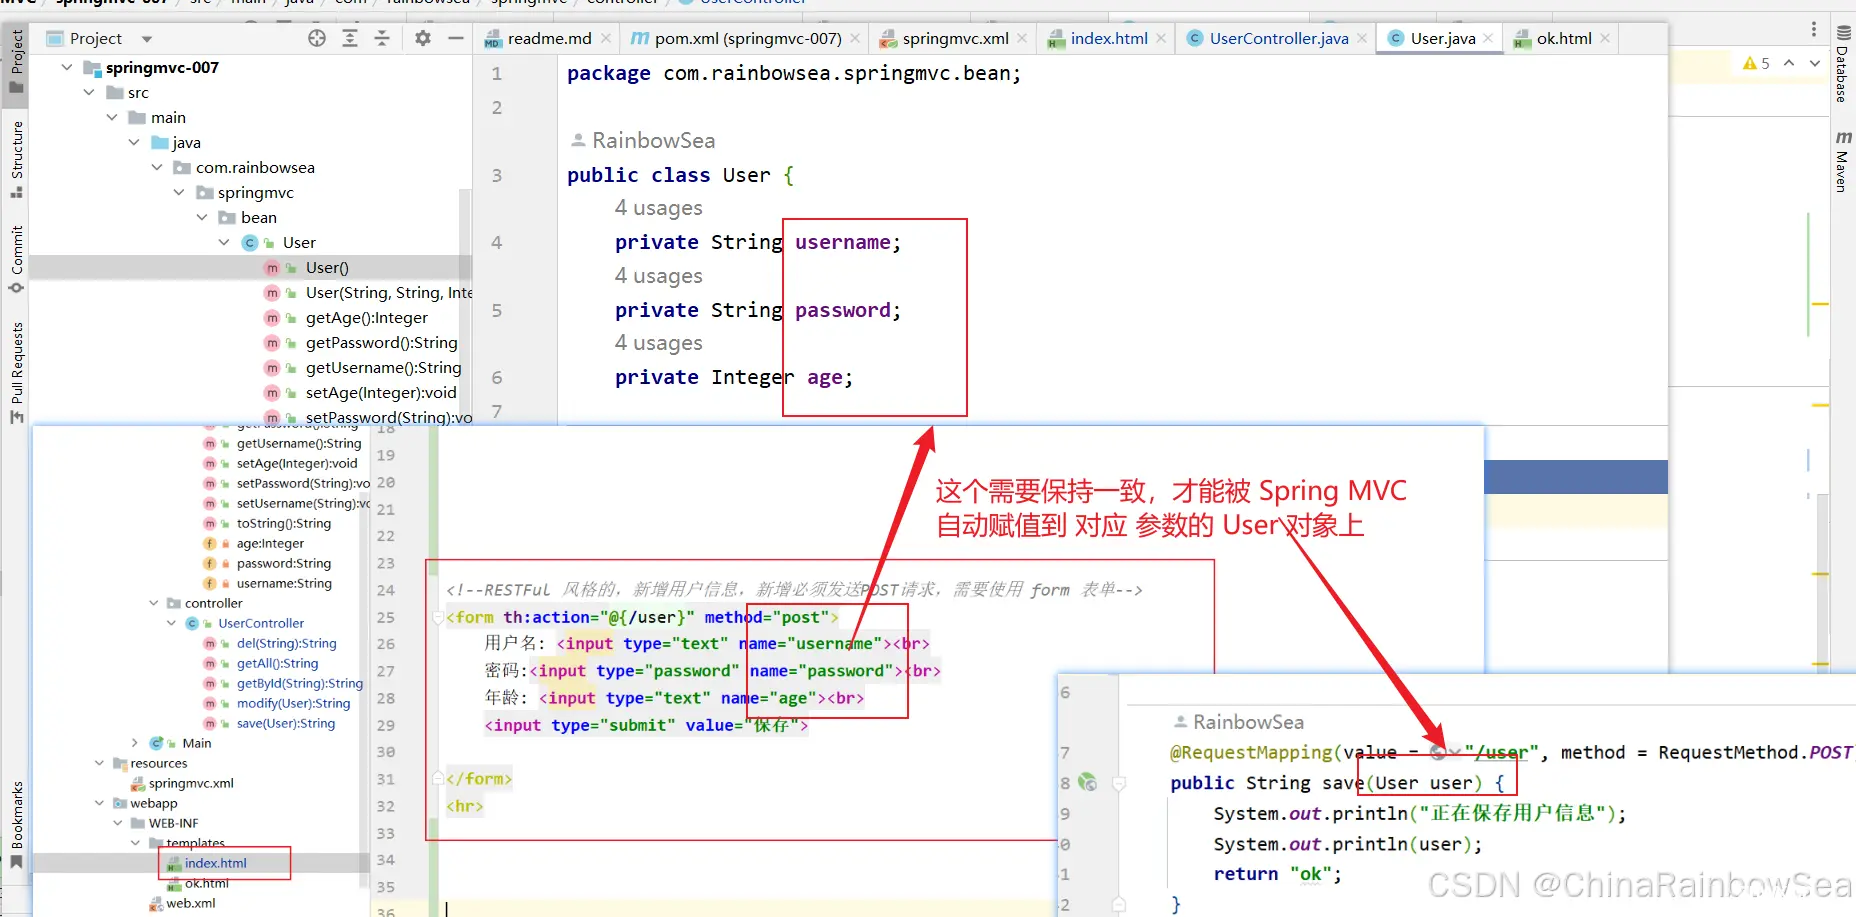
页面编写:
<code><!DOCTYPE html>
<html lang="en" xmlns:th="http://www.thymeleaf.org">code>
<head>
<meta charset="UTF-8">code>
<title>首页</title>
</head>
<body>
<h1>测试 RESTFul 编程风格</h1>
<hr>
<!--RESTFul 编程风格,查看用列表-->
<a th:href="@{/user}">查看用户列表</a> <br>code>
<!--RESTFul 风格的,根据 id 查询用户信息-->
<a th:href="@{/user/1}">查询id=1的这个用户信息</a><br>code>
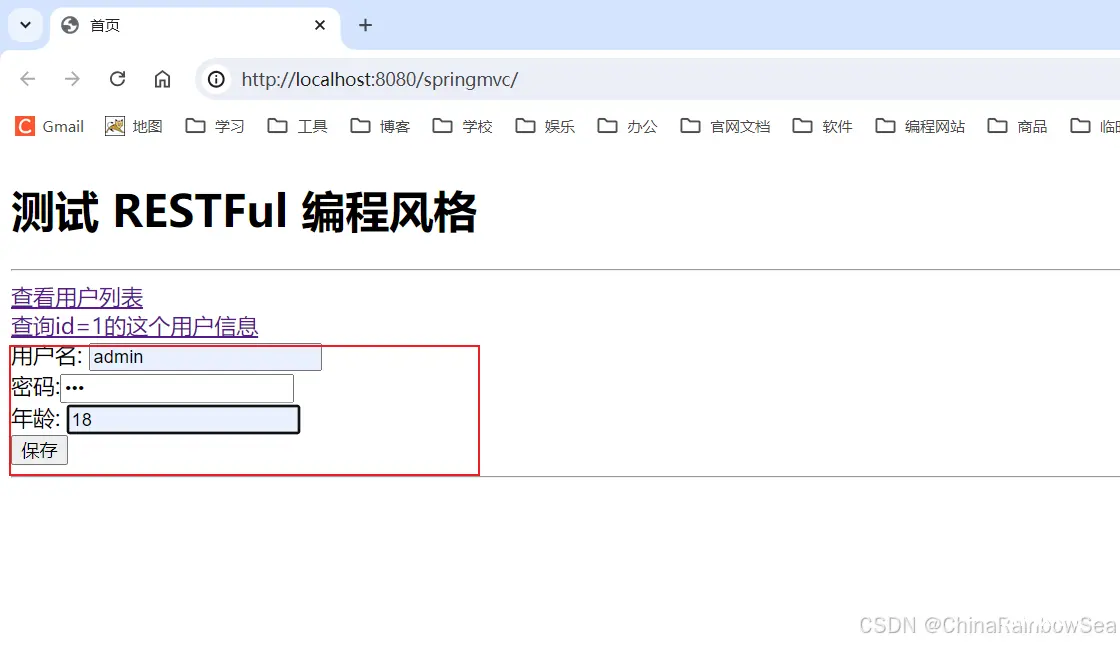
<!--RESTFul 风格的,新增用户信息,新增必须发送POST请求,需要使用 form 表单-->
<form th:action="@{/user}" method="post">code>
用户名: <input type="text" name="username"><br>code>
密码:<input type="password" name="password"><br>code>
年龄: <input type="text" name="age"><br>code>
<input type="submit" value="保存">code>
</form>
<hr>
</body>
</html>
控制器 Controller:
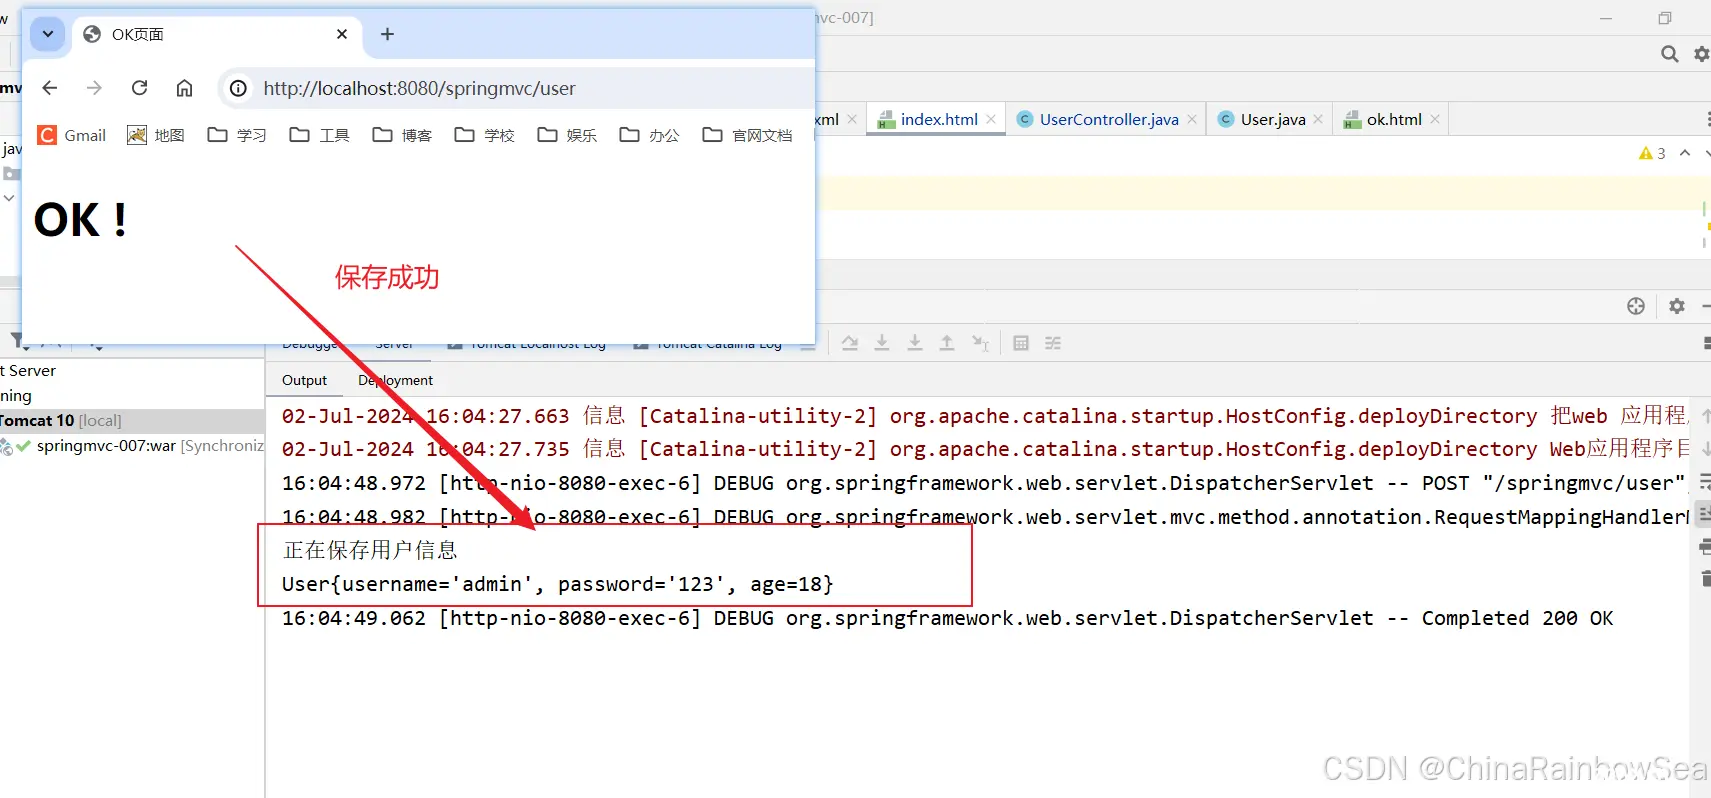
启动服务器测试:
3.5 RESTFul 风格的 “修改数据” (RESTFul 规范 需要发送 PUT 请求)
RESTFul规范中规定,如果要进行保存操作,需要发送PUT请求。
如何发送PUT请求?
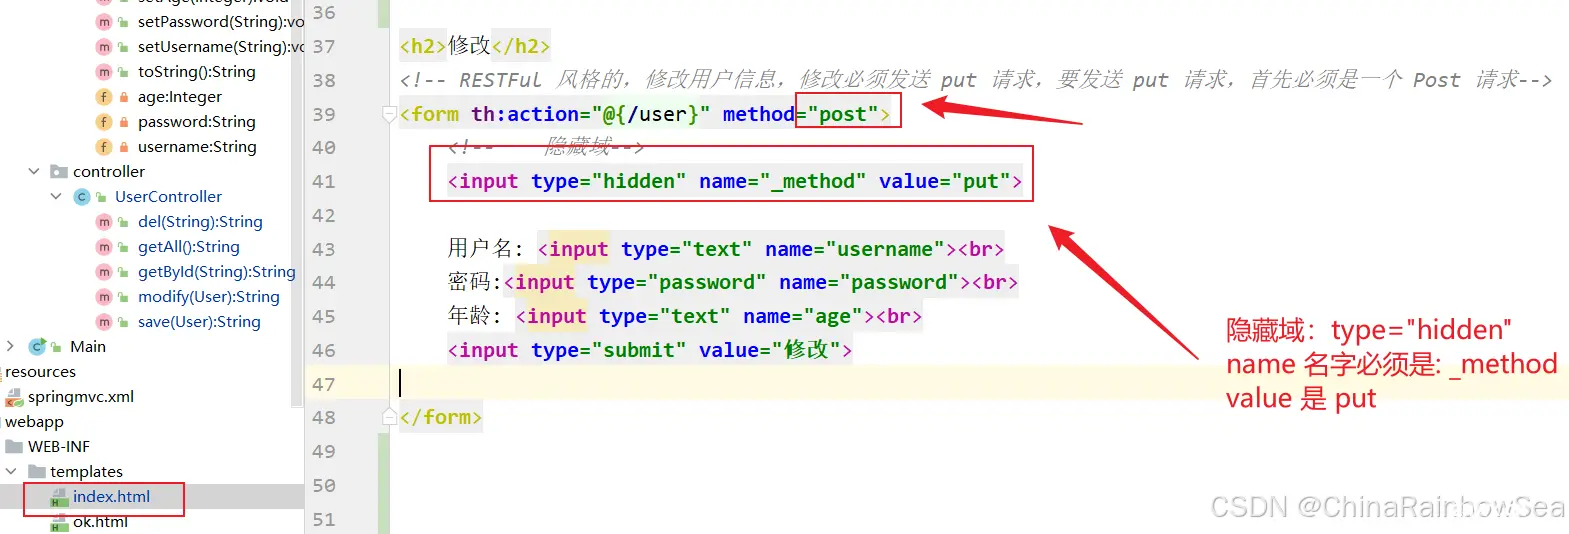
第一步:首先你必须是一个POST请求。
第二步:在发送POST请求的时候,提交这样的数据:<code>_method=PUT ,使用隐藏域进行配置
第三步:在web.xml文件配置SpringMVC提供的过滤器:HiddenHttpMethodFilter
注意:
<code> <!-- 隐藏域-->
<input type="hidden" name="_method" value="put">code>
隐藏域的 name 必须只能是 “_method”, value是 put(大小写忽略)
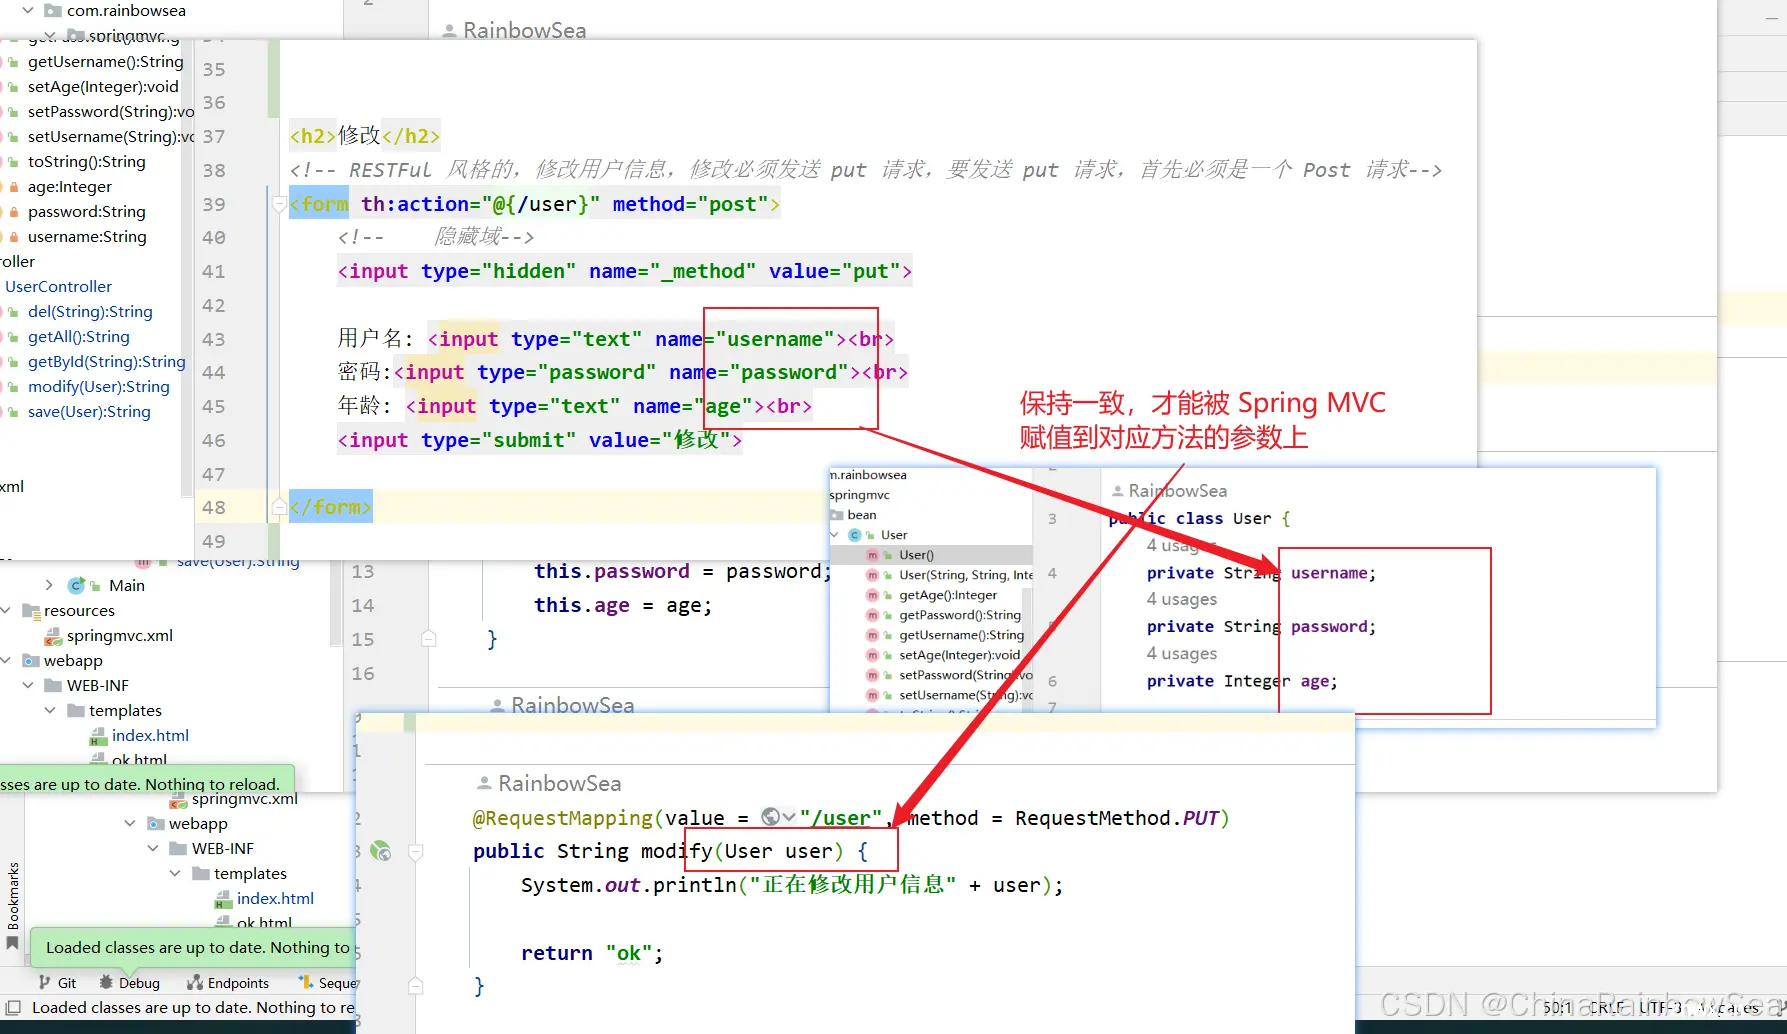
第一步:首先你必须是一个POST请求。
第二步:在发送POST请求的时候,提交这样的数据:_method=PUT
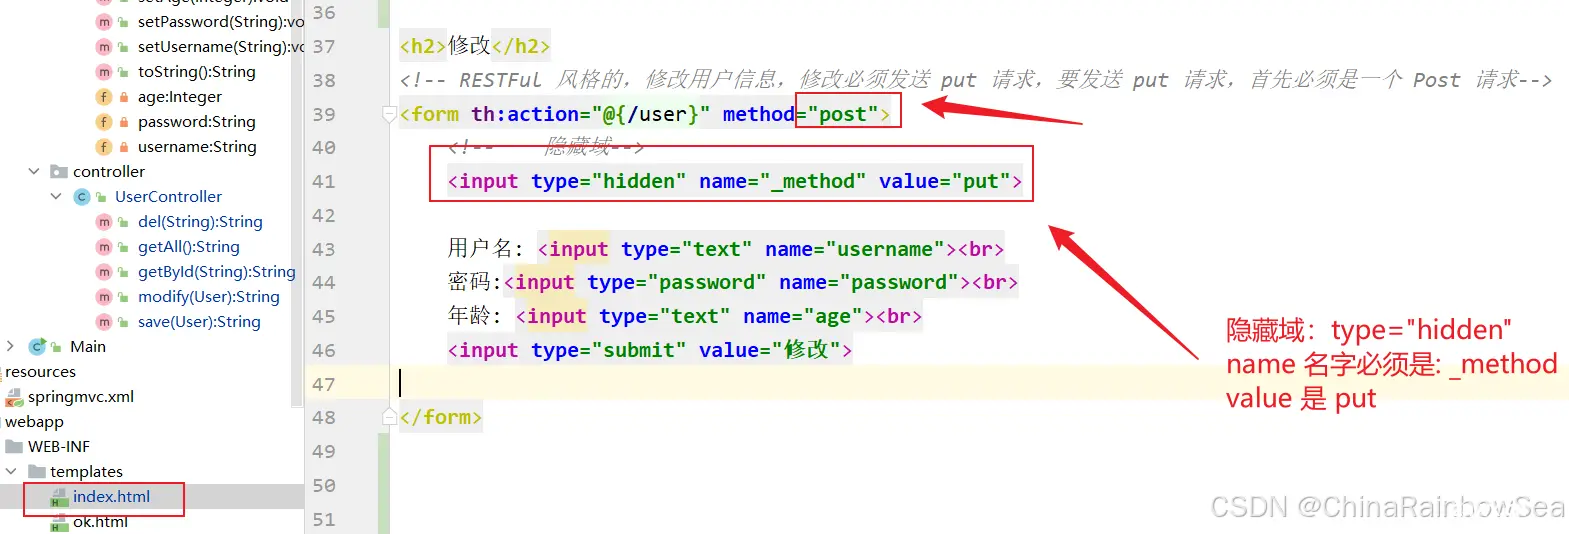
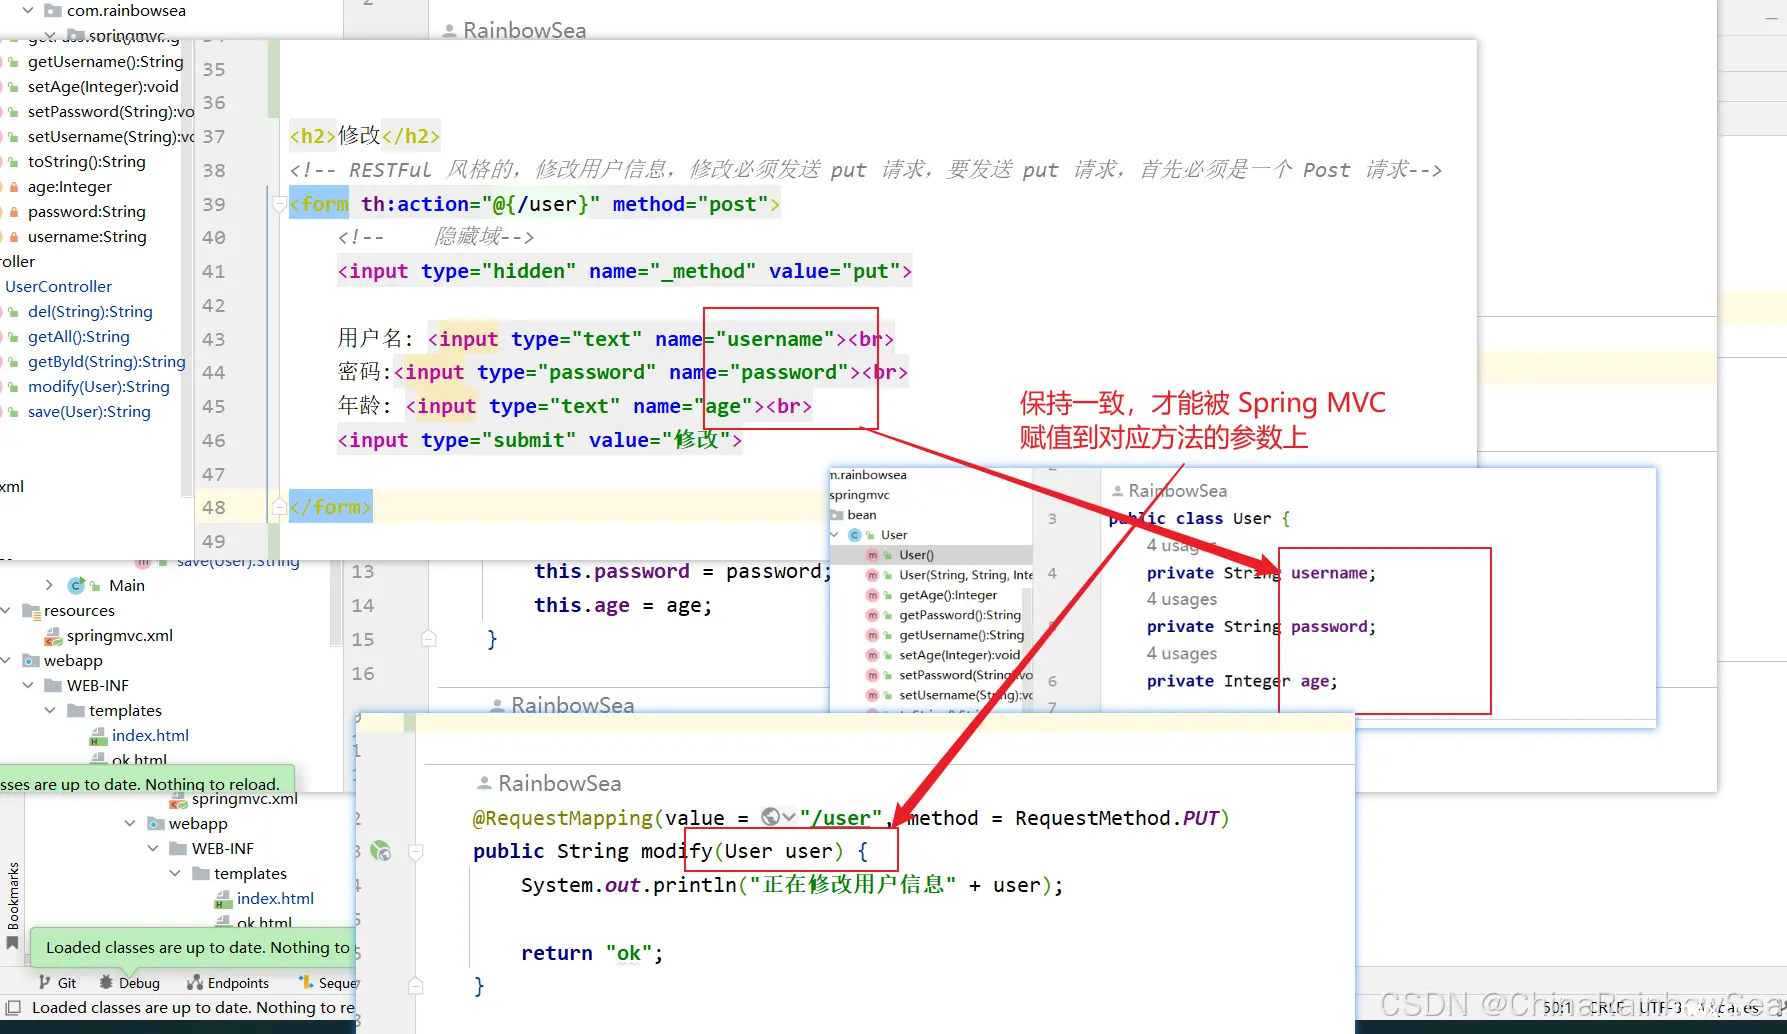
<code><h2>修改</h2>
<!-- RESTFul 风格的,修改用户信息,修改必须发送 put 请求,要发送 put 请求,首先必须是一个 Post 请求-->
<form th:action="@{/user}" method="post">code>
<!-- 隐藏域-->
<input type="hidden" name="_method" value="put">code>
用户名: <input type="text" name="username"><br>code>
密码:<input type="password" name="password"><br>code>
年龄: <input type="text" name="age"><br>code>
<input type="submit" value="修改">code>
</form>
第三步:在web.xml文件配置SpringMVC提供的过滤器:HiddenHttpMethodFilter
注意:该过滤器一定要在字符编码过滤器后面配置,不然,先设置的话,可能会出现获取到的请求数据是乱码
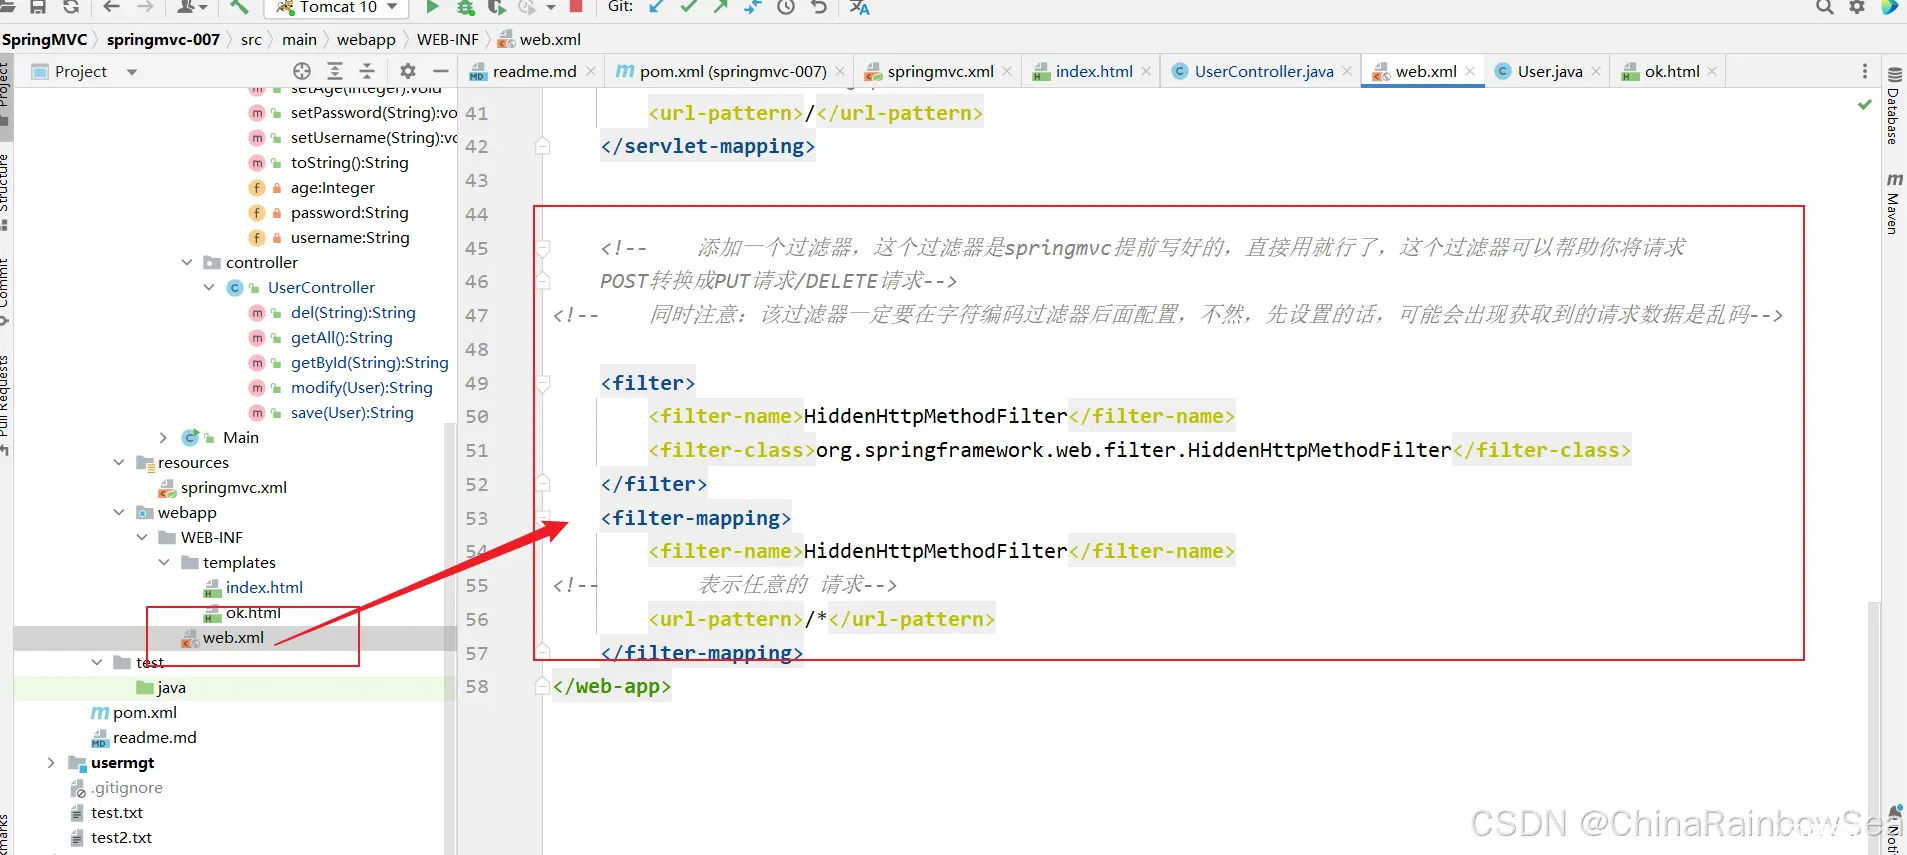
<code> <!-- 添加一个过滤器,这个过滤器是springmvc提前写好的,直接用就行了,这个过滤器可以帮助你将请求
POST转换成PUT请求/DELETE请求-->
<!-- 同时注意: -->
<filter>
<filter-name>HiddenHttpMethodFilter</filter-name>
<filter-class>org.springframework.web.filter.HiddenHttpMethodFilter</filter-class>
</filter>
<filter-mapping>
<filter-name>HiddenHttpMethodFilter</filter-name>
<!-- 表示任意的 请求-->
<url-pattern>/*</url-pattern>
</filter-mapping>
页面编写:
<code><!DOCTYPE html>
<html lang="en" xmlns:th="http://www.thymeleaf.org">code>
<head>
<meta charset="UTF-8">code>
<title>首页</title>
</head>
<body>
<h1>测试 RESTFul 编程风格</h1>
<hr>
<!--RESTFul 编程风格,查看用列表-->
<a th:href="@{/user}">查看用户列表</a> <br>code>
<!--RESTFul 风格的,根据 id 查询用户信息-->
<a th:href="@{/user/1}">查询id=1的这个用户信息</a><br>code>
<!--RESTFul 风格的,新增用户信息,新增必须发送POST请求,需要使用 form 表单-->
<form th:action="@{/user}" method="post">code>
用户名: <input type="text" name="username"><br>code>
密码:<input type="password" name="password"><br>code>
年龄: <input type="text" name="age"><br>code>
<input type="submit" value="保存">code>
</form>
<hr>
<h2>修改</h2>
<!-- RESTFul 风格的,修改用户信息,修改必须发送 put 请求,要发送 put 请求,首先必须是一个 Post 请求-->
<form th:action="@{/user}" method="post">code>
<!-- 隐藏域-->
<input type="hidden" name="_method" value="put">code>
用户名: <input type="text" name="username"><br>code>
密码:<input type="password" name="password"><br>code>
年龄: <input type="text" name="age"><br>code>
<input type="submit" value="修改">code>
</form>
</body>
</html>
控制器 Controller:

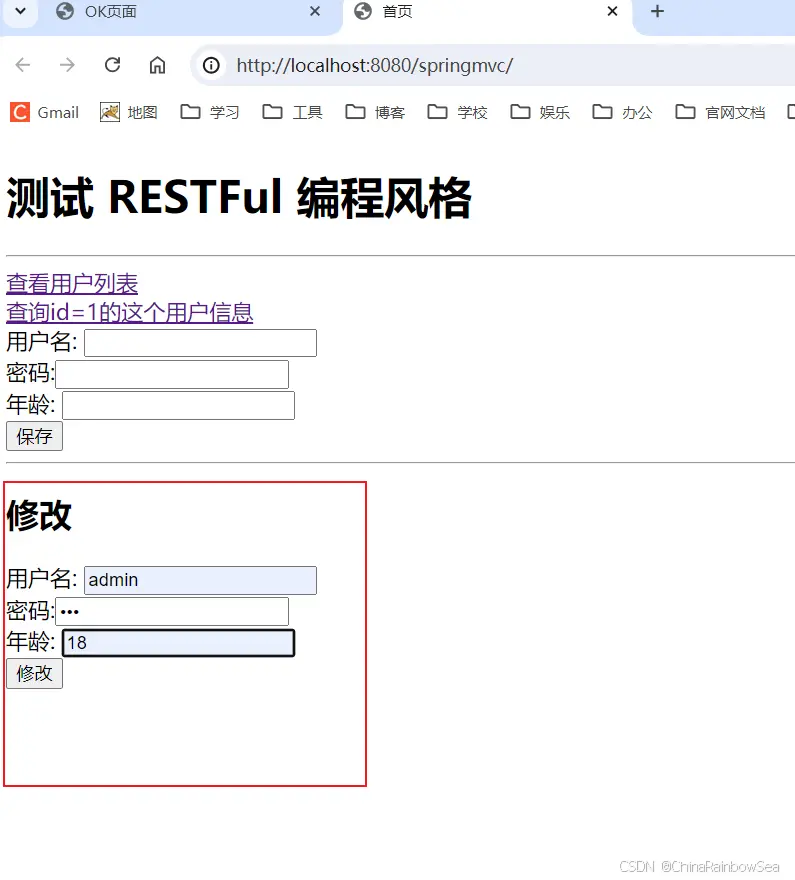
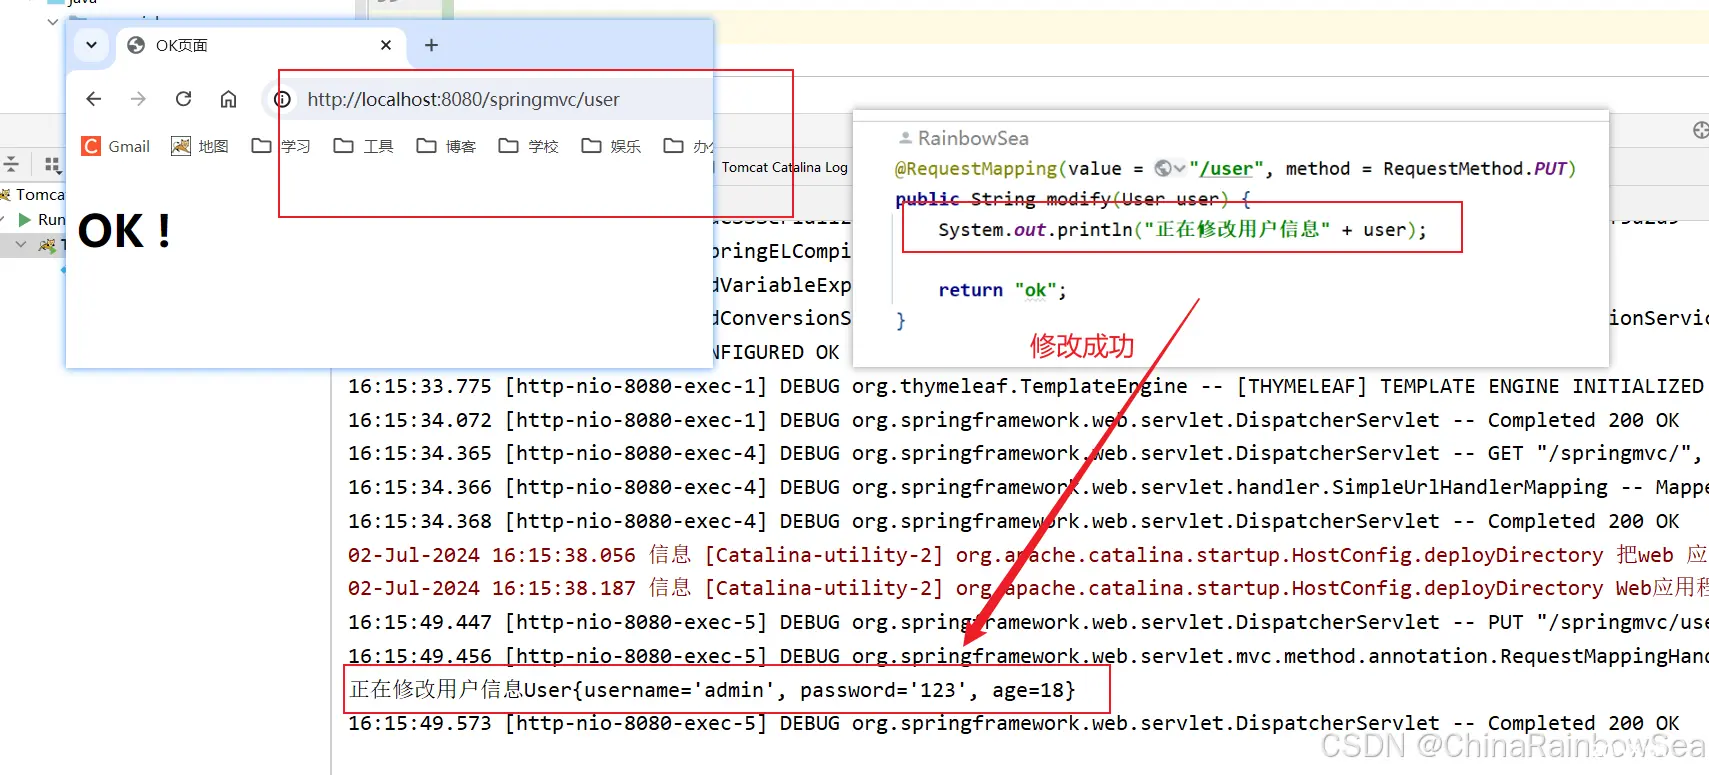
启动服务器测试:
3.6 RESTFul 风格的 “删除数据” 数据(RESTFul 规范 需要发送 DELETE 请求)
RESTFul规范中规定,如果要进行 删除 操作,需要发送DELETE 请求。
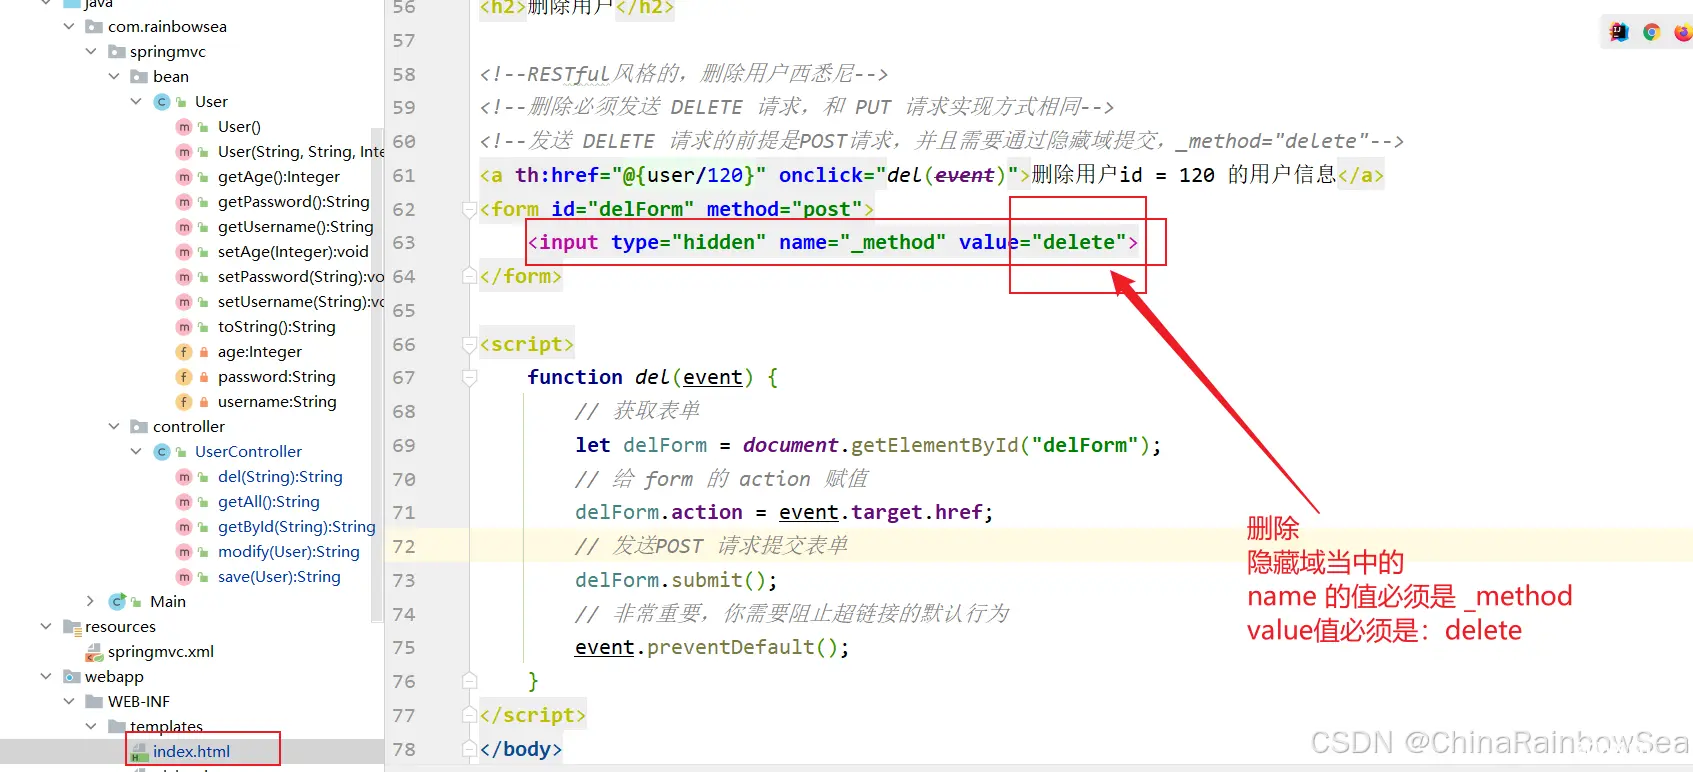
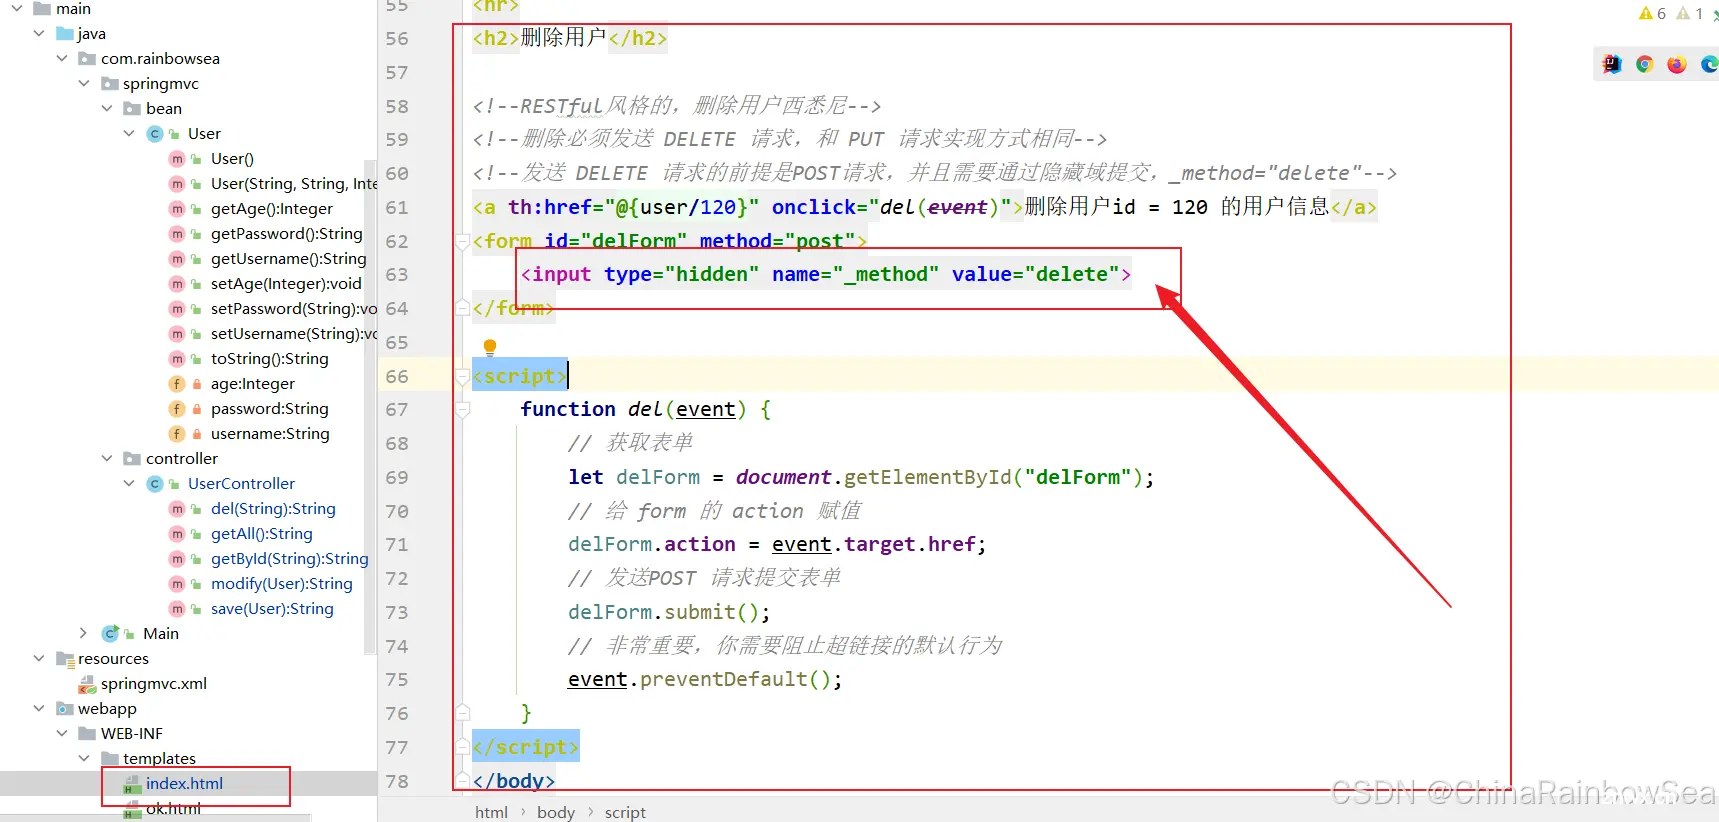
如何发送 DELETE 请求?,和 发送 PUT 请求的三步是一样的,只需要将 value 的值改为 delete 即可
第一步:首先你必须是一个POST请求。
第二步:在发送POST请求的时候,提交这样的数据:<code>_method=PUT ,使用隐藏域进行配置
第三步:在web.xml文件配置SpringMVC提供的过滤器:HiddenHttpMethodFilter
注意:
<code> <!-- 隐藏域-->
<input type="hidden" name="_method" value="delete">code>
隐藏域的 name 必须只能是 “_method”, value是 delete (大小写忽略)
页面编写:
<code>
<hr>
<h2>删除用户</h2>
<!--RESTful风格的,删除用户西悉尼-->
<!--删除必须发送 DELETE 请求,和 PUT 请求实现方式相同-->
<!--发送 DELETE 请求的前提是POST请求,并且需要通过隐藏域提交,_method="delete"-->code>
<a th:href="@{user/120}" onclick="del(event)">删除用户id = 120 的用户信息</a>code>
<form method="post">code>
<input type="hidden" name="_method" value="delete">code>
</form>
<script>
function del(event) {
// 获取表单
let delForm = document.getElementById("delForm");
// 给 form 的 action 赋值
delForm.action = event.target.href;
// 发送POST 请求提交表单
delForm.submit();
// 非常重要,你需要阻止超链接的默认行为
event.preventDefault();
}
</script>
<!DOCTYPE html>
<html lang="en" xmlns:th="http://www.thymeleaf.org">code>
<head>
<meta charset="UTF-8">code>
<title>首页</title>
</head>
<body>
<h1>测试 RESTFul 编程风格</h1>
<hr>
<!--RESTFul 编程风格,查看用列表-->
<a th:href="@{/user}">查看用户列表</a> <br>code>
<!--RESTFul 风格的,根据 id 查询用户信息-->
<a th:href="@{/user/1}">查询id=1的这个用户信息</a><br>code>
<!--RESTFul 风格的,新增用户信息,新增必须发送POST请求,需要使用 form 表单-->
<form th:action="@{/user}" method="post">code>
用户名: <input type="text" name="username"><br>code>
密码:<input type="password" name="password"><br>code>
年龄: <input type="text" name="age"><br>code>
<input type="submit" value="保存">code>
</form>
<hr>
<h2>修改</h2>
<!-- RESTFul 风格的,修改用户信息,修改必须发送 put 请求,要发送 put 请求,首先必须是一个 Post 请求-->
<form th:action="@{/user}" method="post">code>
<!-- 隐藏域-->
<input type="hidden" name="_method" value="put">code>
用户名: <input type="text" name="username"><br>code>
密码:<input type="password" name="password"><br>code>
年龄: <input type="text" name="age"><br>code>
<input type="submit" value="修改">code>
</form>
<hr>
<h2>删除用户</h2>
<!--RESTful风格的,删除用户西悉尼-->
<!--删除必须发送 DELETE 请求,和 PUT 请求实现方式相同-->
<!--发送 DELETE 请求的前提是POST请求,并且需要通过隐藏域提交,_method="delete"-->code>
<a th:href="@{user/120}" onclick="del(event)">删除用户id = 120 的用户信息</a>code>
<form method="post">code>
<input type="hidden" name="_method" value="delete">code>
</form>
<script>
function del(event) {
// 获取表单
let delForm = document.getElementById("delForm");
// 给 form 的 action 赋值
delForm.action = event.target.href;
// 发送POST 请求提交表单
delForm.submit();
// 非常重要,你需要阻止超链接的默认行为
event.preventDefault();
}
</script>
</body>
</html>
控制器 Controller:
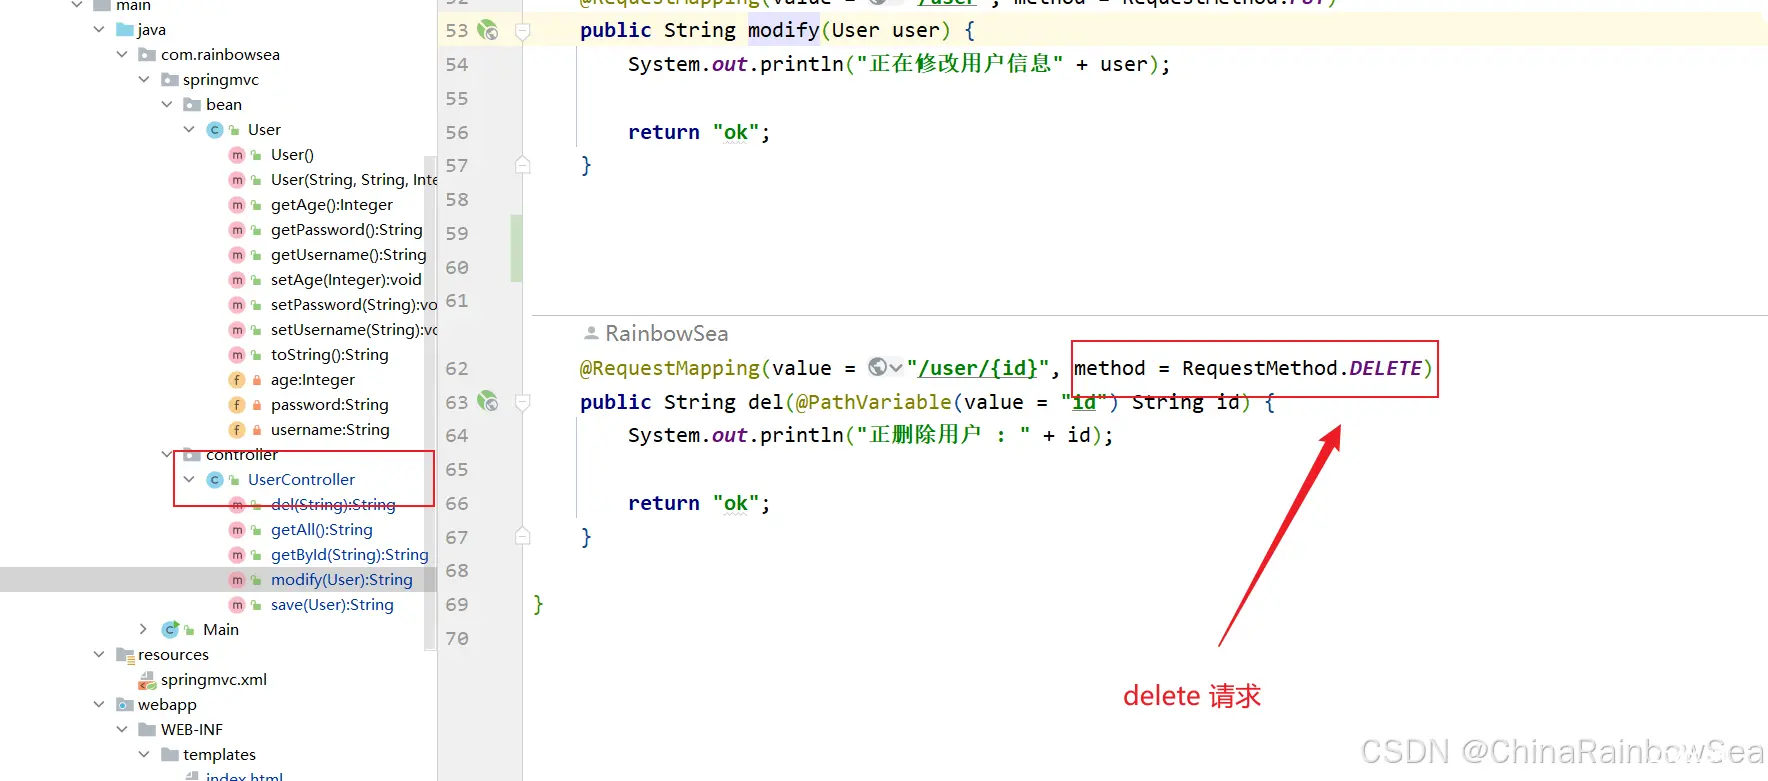
<code>package com.rainbowsea.springmvc.controller;
import com.rainbowsea.springmvc.bean.User;
import org.springframework.stereotype.Controller;
import org.springframework.web.bind.annotation.PathVariable;
import org.springframework.web.bind.annotation.RequestMapping;
import org.springframework.web.bind.annotation.RequestMethod;
@Controller // 交给 Spring IOC 容器进行管理
public class UserController {
//@RequestMapping(value = "/user/{占位符}",method = RequestMethod.GET)
@RequestMapping(value = "/user/{id}", method = RequestMethod.GET)
public String getById(@PathVariable(value = "id") String id) {
System.out.println("正在根据用户 id 查询用户信息...用户 id 是" + id);
return "ok";
}
@RequestMapping(value = "/user", method = RequestMethod.GET)
public String getAll() {
System.out.println("正在查询所有用户信息...");
return "ok";
}
@RequestMapping(value = "/user", method = RequestMethod.POST)
public String save(User user) {
System.out.println("正在保存用户信息");
System.out.println(user);
return "ok";
}
@RequestMapping(value = "/user", method = RequestMethod.PUT)
public String modify(User user) {
System.out.println("正在修改用户信息" + user);
return "ok";
}
@RequestMapping(value = "/user/{id}", method = RequestMethod.DELETE)
public String del(@PathVariable(value = "id") String id) {
System.out.println("正删除用户 : " + id);
return "ok";
}
}
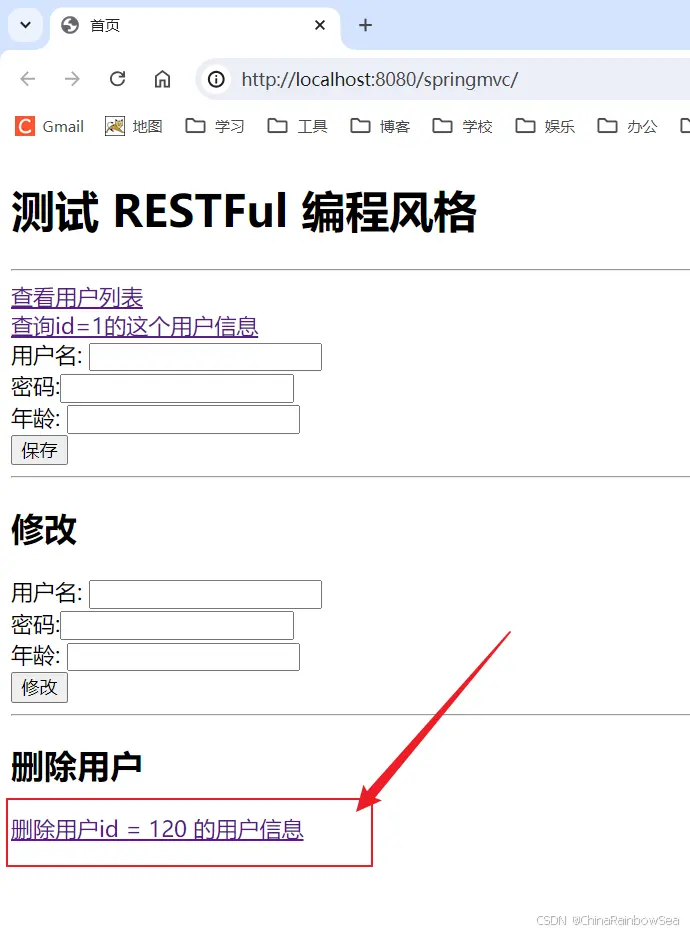
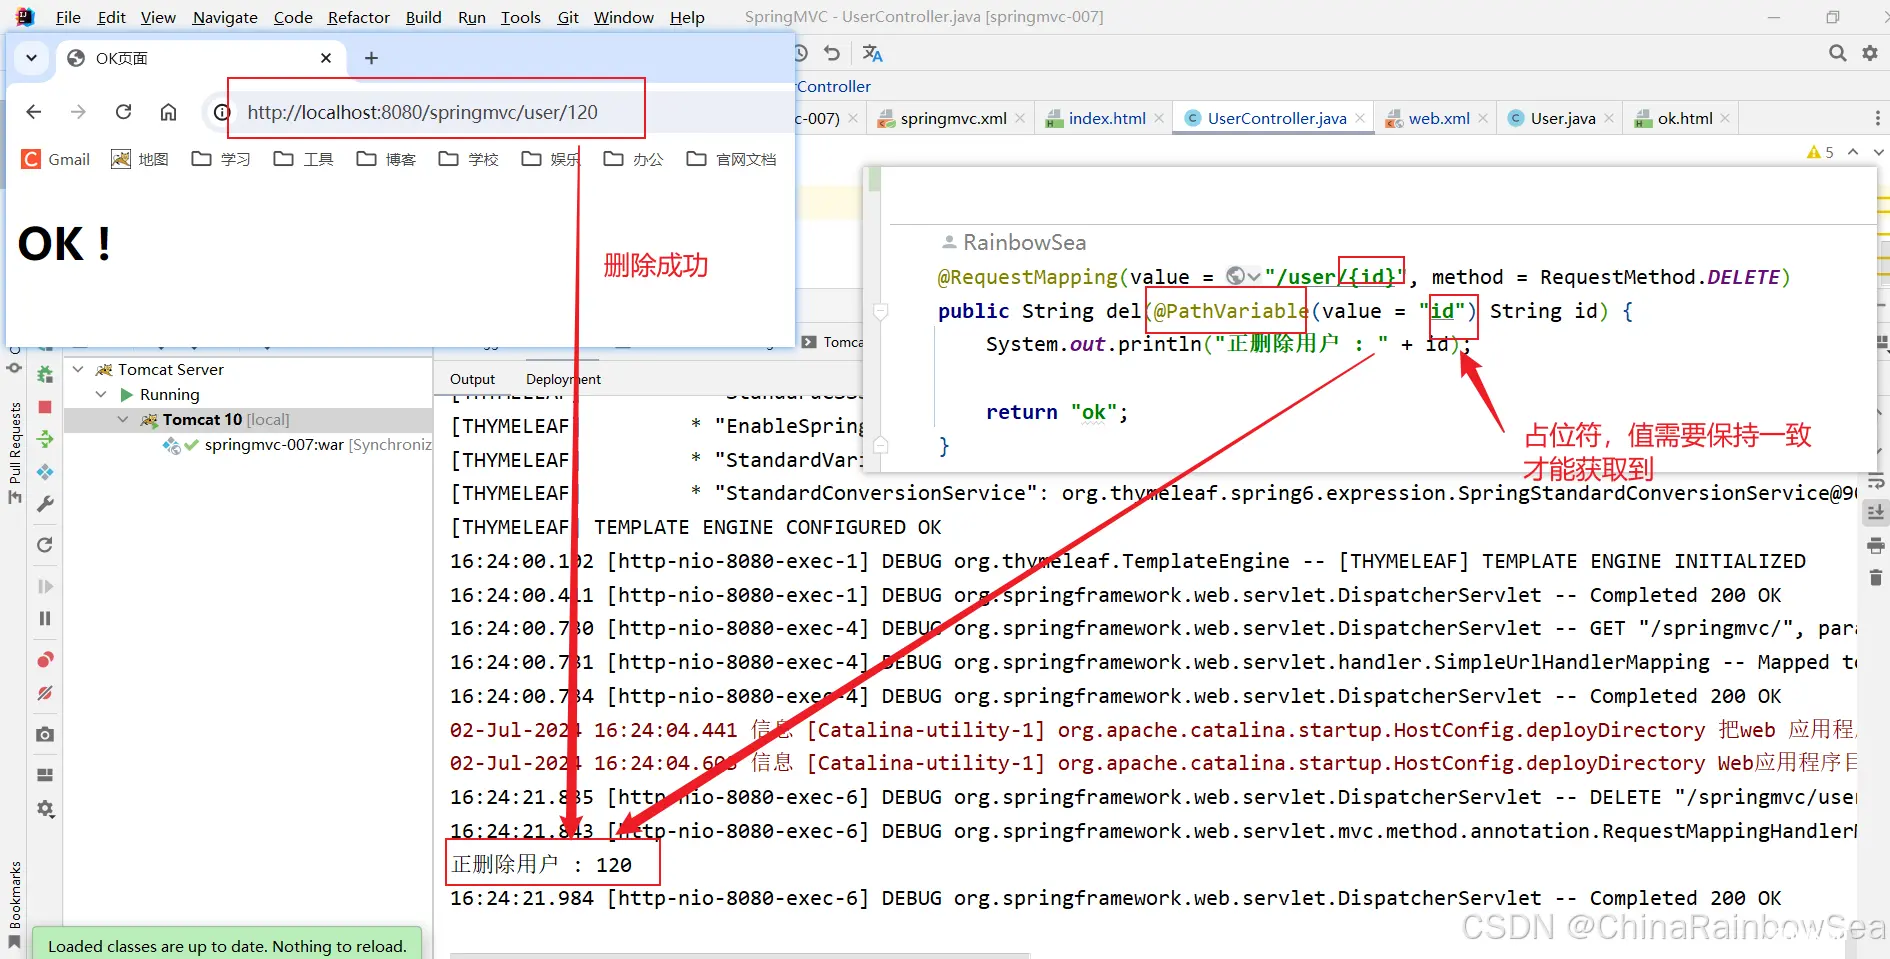
启动服务器测试:
4. 补充: HiddenHttpMethodFilter 过滤器源码说明
HiddenHttpMethodFilter是Spring MVC框架提供的,专门用于RESTFul编程风格。
实现原理可以通过源码查看:
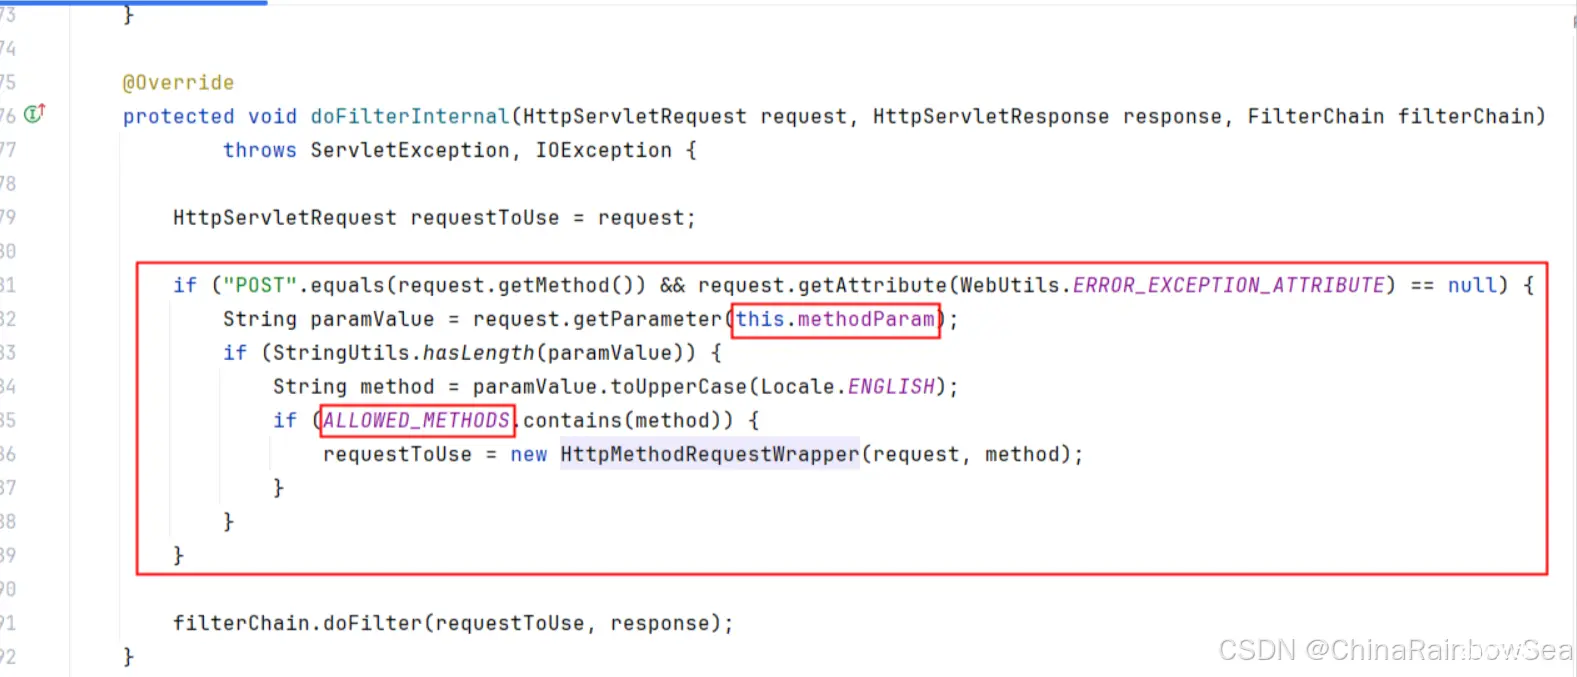


通过源码可以看到,if语句中,首先判断是否为POST请求,如果是POST请求,调用<code>request.getParameter(this.methodParam)。可以看到this.methodParam是_method,这样就要求我们在提交请求方式的时候必须采用这个格式:_method=put。获取到请求方式之后,调用了toUpperCase转换成大写了。因此前端页面中小写的put或者大写的PUT都是可以的。if语句中嵌套的if语句说的是,只有请求方式是 PUT,DELETE,PATCH的时候会创建HttpMethodRequestWrapper对象。而HttpMethodRequestWrapper对象的构造方法是这样的:
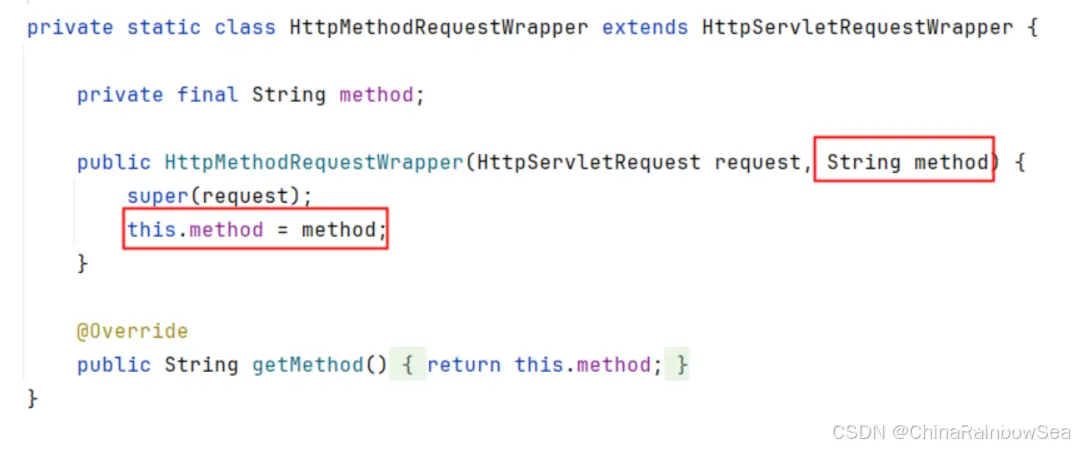
这样method就从POST变成了:<code>PUT/DELETE/PATCH。
重点注意事项:CharacterEncodingFilter和HiddenHttpMethodFilter的顺序
细心的同学应该注意到了,在HiddenHttpMethodFilter源码中有这样一行代码:

)
大家是否还记得,字符编码过滤器执行之前不能调用 request.getParameter方法,如果提前调用了,乱码问题就无法解决了。因为request.setCharacterEncoding()方法的执行必须在所有request.getParameter()方法之前执行。因此这两个过滤器就有先后顺序的要求,在web.xml文件中,应该先配置CharacterEncodingFilter,然后再配置HiddenHttpMethodFilter。
5. 总结:
第三步:在web.xml文件配置SpringMVC提供的过滤器:HiddenHttpMethodFilter**
注意:
<code> <!-- 隐藏域-->
<input type="hidden" name="_method" value="put">code>
隐藏域的 name 必须只能是 “_method”, value是 put(大小写忽略)
RESTFul 风格的 “删除数据” 数据(RESTFul 规范 需要发送 DELETE 请求);如何发送 DELETE 请求?,和 发送 PUT 请求的三步是一样的,只需要将 value 的值改为 delete 即可
HiddenHttpMethodFilter 该过滤器一定要在字符编码过滤器后面配置,不然,先设置的话,可能会出现获取到的请求数据是乱码。
6. 最后:
“在这个最后的篇章中,我要表达我对每一位读者的感激之情。你们的关注和回复是我创作的动力源泉,我从你们身上吸取了无尽的灵感与勇气。我会将你们的鼓励留在心底,继续在其他的领域奋斗。感谢你们,我们总会在某个时刻再次相遇。”
声明
本文内容仅代表作者观点,或转载于其他网站,本站不以此文作为商业用途
如有涉及侵权,请联系本站进行删除
转载本站原创文章,请注明来源及作者。
