Webase平台与java交互
珞笔寻依 2024-10-03 14:03:01 阅读 77
在Webase平台上部署好智能合约,并检查能够正常发交易实现增删查改后,我们还需要使其能够与java交互来实现一个可用于应用的系统。在项目中,我们需要新建四个文件夹,一个用于存放java类型文件,一个用来存放abi文件,一个用来存放bin文件,一个用来存放证书文件。本文使用的是maven方法!,文件夹名最好就按图中的来!

一.智能合约编译与虚拟机文件导入
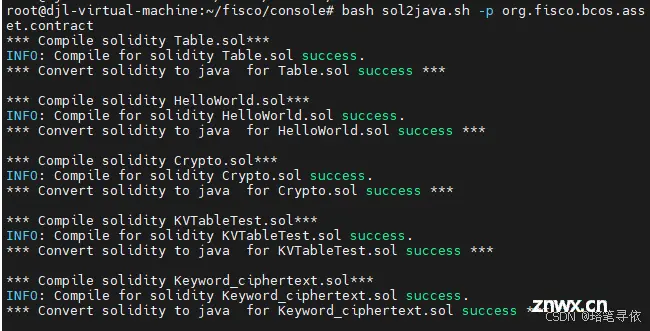
首先将我们的合约进行编译。
<code>bash sol2java.sh -p org.fisco.bcos.asset.contract

然后从虚拟机导入我们需要的文件(用mobaxterm实现主机与虚拟机之间的连接,如果permission denied检查是否在有权限的文件夹下,,可以通过chmod 777 text修改文件权限以下载!)
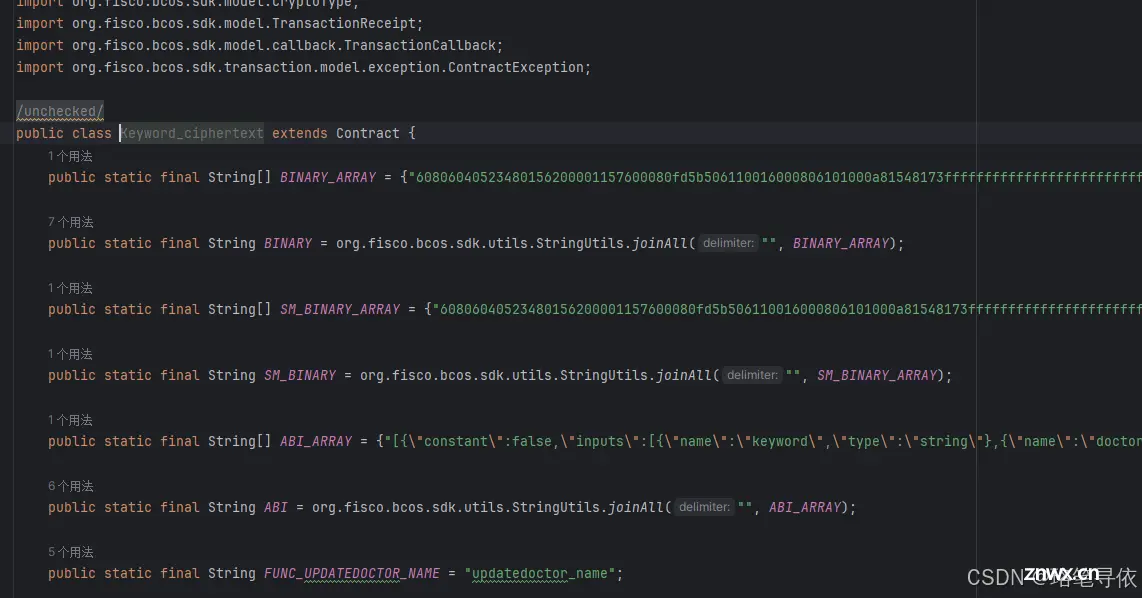
java文件、bin文件、编译好的abi文件一般在 fisco/console/contracts/sdk文件夹下。
证书文件在webase-deploy/nodes/127.0.0.1/sdk文件夹下。
将java文件移到fisco文件夹下

将abi文件移到我们新建的abi文件夹下

将bin文件移到我们新建的bin文件夹下

将证书文件移到我们新建的config 文件夹下
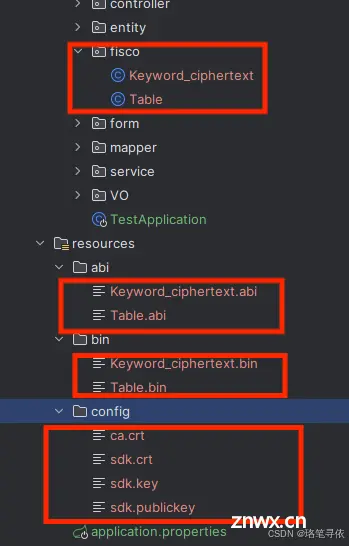
移动完之后的项目文件
检查java文件,将包名改为自己的包名。

发现仍有很多报错,原因是我们还没有注入fisco的依赖,这里演示如何在maven文件注入fisco依赖,注意这篇文章讲的不是gradle文件还是maven文件!
在pom.xml下注入以下依赖。如果报错则等待一会,注入后刷新。
<code><dependency>
<groupId>org.fisco-bcos.java-sdk</groupId>
<artifactId>fisco-bcos-java-sdk</artifactId>
<version>2.9.1</version>
</dependency>
报错解决
二.创建配置文件
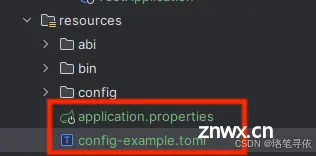
首先,在idea中新建config-example.toml文件,注意位置需与applictions.properties同级!

在config-example.toml文件中写入以下内容:
<code>[cryptoMaterial]
certPath = "conf" # The certification path
# The following configurations take the certPath by default if commented
# caCert = "conf/ca.crt" # CA cert file path
# If connect to the GM node, default CA cert path is ${certPath}/gm/gmca.crt
# sslCert = "conf/sdk.crt" # SSL cert file path
# If connect to the GM node, the default SDK cert path is ${certPath}/gm/gmsdk.crt
# sslKey = "conf/sdk.key" # SSL key file path
# If connect to the GM node, the default SDK privateKey path is ${certPath}/gm/gmsdk.key
# enSslCert = "conf/gm/gmensdk.crt" # GM encryption cert file path
# default load the GM SSL encryption cert from ${certPath}/gm/gmensdk.crt
# enSslKey = "conf/gm/gmensdk.key" # GM ssl cert file path
# default load the GM SSL encryption privateKey from ${certPath}/gm/gmensdk.key
[network]
peers=["127.0.0.1:20200", "127.0.0.1:20201"] # The peer list to connect
# AMOP configuration
# You can use following two methods to configure as a private topic message sender or subscriber.
# Usually, the public key and private key is generated by subscriber.
# Message sender receive public key from topic subscriber then make configuration.
# But, please do not config as both the message sender and the subscriber of one private topic, or you may send the message to yourself.
# Configure a private topic as a topic message sender.
# [[amop]]
# topicName = "PrivateTopic"
# publicKeys = [ "conf/amop/consumer_public_key_1.pem" ] # Public keys of the nodes that you want to send AMOP message of this topic to.
# Configure a private topic as a topic subscriber.
# [[amop]]
# topicName = "PrivateTopic"
# privateKey = "conf/amop/consumer_private_key.p12" # Your private key that used to subscriber verification.
# password = "123456"
[account]
keyStoreDir = "account" # The directory to load/store the account file, default is "account"
# accountFilePath = "" # The account file path (default load from the path specified by the keyStoreDir)
accountFileFormat = "pem" # The storage format of account file (Default is "pem", "p12" as an option)
# accountAddress = "" # The transactions sending account address
# Default is a randomly generated account
# The randomly generated account is stored in the path specified by the keyStoreDir
# password = "" # The password used to load the account file
[threadPool]
# channelProcessorThreadSize = "16" # The size of the thread pool to process channel callback
# Default is the number of cpu cores
# receiptProcessorThreadSize = "16" # The size of the thread pool to process transaction receipt notification
# Default is the number of cpu cores
maxBlockingQueueSize = "102400" # The max blocking queue size of the thread pool
找到

,将其中的ip地址改为虚拟机中的地址,配置文件修改完成。

三.调用测试类检查功能
在idea中创建测试类。获取配置文件路径。
<code>public final String configFile = "src/main/resources/config-example.toml";
初始准备工作:
三.1 初始化SDK
<code>// 初始化BcosSDK对象
BcosSDK sdk = BcosSDK.build(configFile);
// 获取Client对象,此处传入的群组ID为1
Client client = sdk.getClient(Integer.valueOf(1));
// 构造AssembleTransactionProcessor对象,需要传入client对象,CryptoKeyPair对象和abi、
binary文件存放的路径。abi和binary文件需要在上一步复制到定义的文件夹中。
CryptoKeyPair keyPair = client.getCryptoSuite().createKeyPair();
三.2 初始化配置对象
AssembleTransactionProcessor transactionProcessor = TransactionProcessorFactory.createAssembleTransactionProcessor(client, keyPair, "src/main/resources/abi/", "");
三.3 进行交易测试
这里,交易测试以其中一个为例,其它交易操作步骤与例子相同。
准备函数所需要的参数:
String keyword="2";code>
String date="0721";code>
String patient_name="xiaoming";code>
String sex = "nan";
String age="18";code>
String doctor_name="xiaohong";code>
String diagnosis="ganmao";code>
创建参数列表并写入参数
List<Object> params = new ArrayList<>();
params.add(keyword);
params.add(date);
params.add(patient_name);
params.add(sex);
params.add(age);
params.add(date);
params.add(doctor_name);
params.add(diagnosis);
调用合约:
TransactionResponse transactionResponse = transactionProcessor.sendTransactionAndGetResponseByContractLoader("HelloWorld", helloWorldAddrss, "set", params);
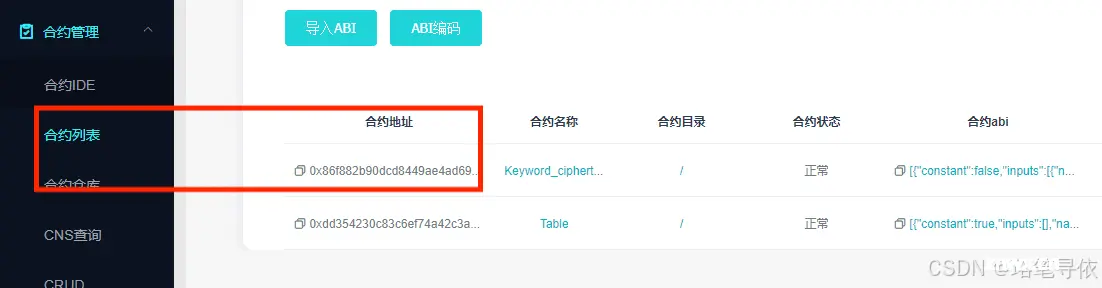
其中,调用合约时的第一个参数为自己编写的智能合约的名字,第二个参数为合约地址,第三个参数为所使用的自己编写的智能合约中的函数,第四个参数为刚刚创建的params参数数组。
合约地址可以在Webase平台中的合约列表找到:

,如果有返回值还需要打印返回值。
声明
本文内容仅代表作者观点,或转载于其他网站,本站不以此文作为商业用途
如有涉及侵权,请联系本站进行删除
转载本站原创文章,请注明来源及作者。